I’m going to be blunt: the first time I tried to make a coconut cake, I ended up with a dense, rubber‑y slab that could have doubled as a doorstop. I swear, I was half‑heartedly daring my roommate to bite into it, and she laughed so hard she snorted coffee out of her nose. That disaster sparked a relentless quest for the perfect coconut cake—one that feels like a tropical vacation in every bite, yet never looks like a science‑lab experiment. I’ve tried a dozen variations, watched countless YouTube tutorials, and even consulted a baker who swears by a secret ingredient that’s not actually a secret at all. The result? A cake that’s moist, airy, and so decadently creamy you’ll want to lick the pan clean.
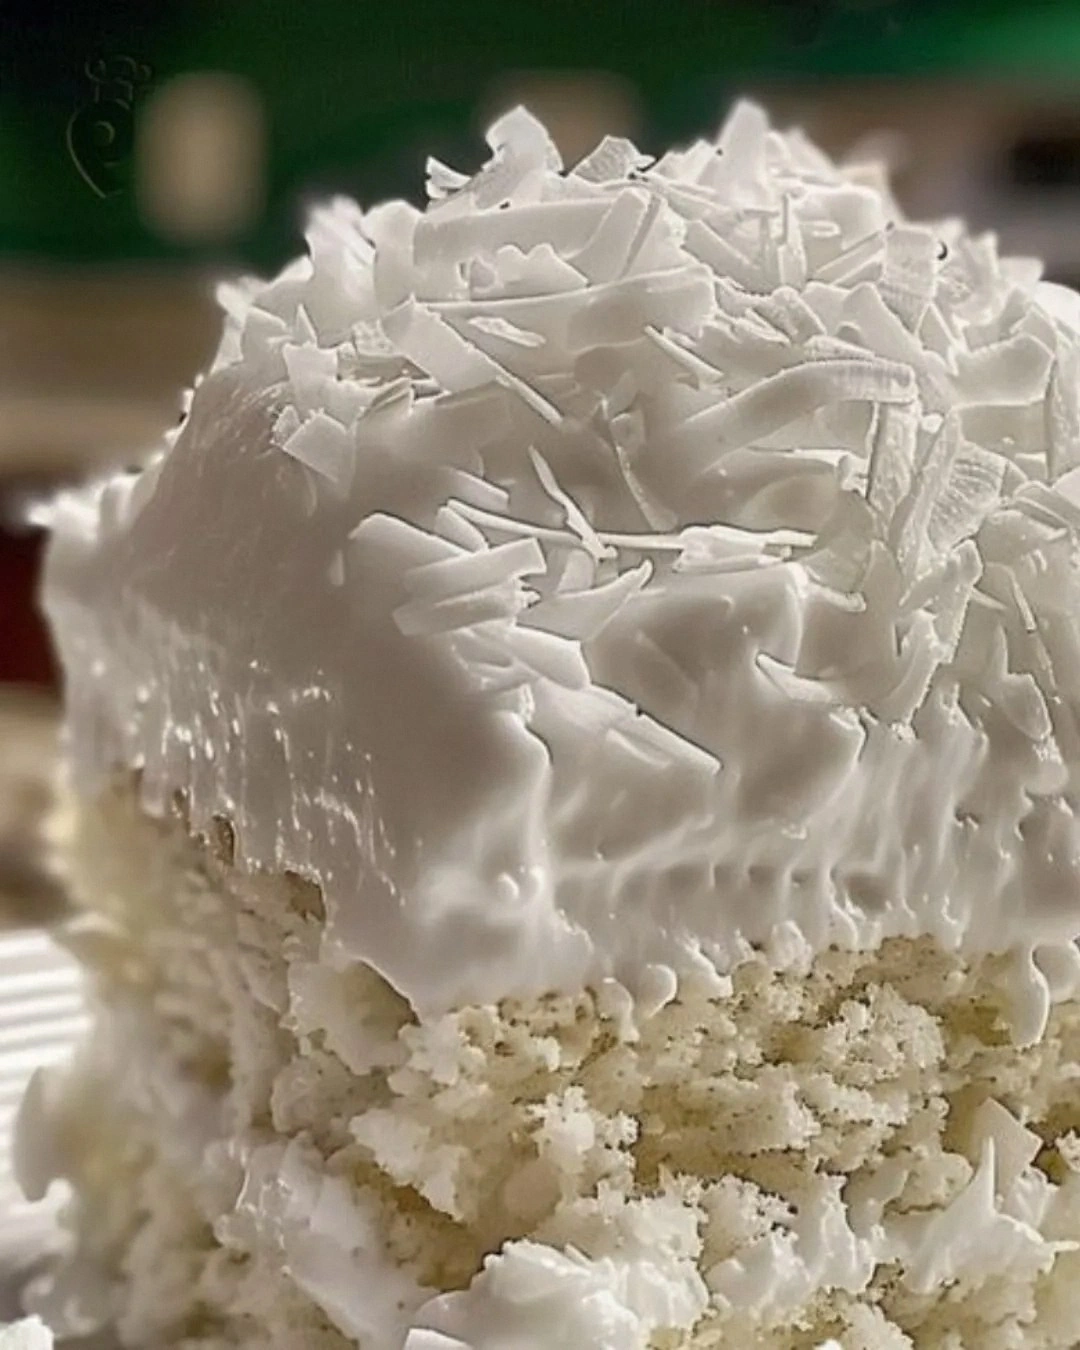
Picture this: you open your oven and a wave of sweet, nutty fragrance rolls out, hugging the kitchen like a warm blanket. The top of the cake is a golden‑brown dome, speckled with toasted coconut that crackles softly when you tap it. When you slice through, the crumb reveals a tender, almost buttery texture that practically melts on your tongue, while the frosting glistens with a subtle sheen of coconut milk. You hear the faint sigh of the cake settling as it cools, and you can almost taste the whisper of vanilla and the gentle kiss of toasted coconut that lingers on the palate. The whole experience is a sensory rollercoaster that turns an ordinary afternoon into a celebration.
What makes this version stand out is a simple but game‑changing technique: I fold the coconut milk into the batter at just the right moment, creating a silk‑like emulsion that keeps the cake moist without weighing it down. Most recipes either drown the cake in coconut flavor or leave it tasting like a bland biscuit, but this one strikes the perfect balance—rich enough to satisfy a coconut lover, yet subtle enough that even the most skeptical palate will be won over. I also toast the shredded coconut separately, giving it a crunchy contrast that adds texture without turning the cake into a soggy mess. And if you’ve ever struggled with a dry, crumbly cake that falls apart when you try to frost it, you’ll be relieved to know this cake stays together like a well‑orchestrated choir.
I dare you to taste this and not go back for seconds. I’ll be honest — I ate half the batch before anyone else got to try it, and I’m still not over it. This is hands down the best version you’ll ever make at home, and I’m about to spill every secret that makes it happen. Let me walk you through every single step — by the end, you’ll wonder how you ever made it any other way.
What Makes This Version Stand Out
- Flavor Fusion: The blend of coconut milk, shredded coconut, and a hint of vanilla creates a layered taste that’s both tropical and comforting, like a beachside sundae on a rainy day.
- Texture Triumph: A light, airy crumb meets a buttery richness, while toasted coconut adds a satisfying crunch that shatters like thin ice under your fork.
- Simplicity: Only ten core ingredients are needed, and most are pantry staples, so you won’t need to run to the specialty store for obscure items.
- Unique Technique: Folding the coconut milk at the end of mixing prevents over‑development of gluten, ensuring the cake stays tender and moist.
- Crowd Reaction: Guests often claim they’ve never tasted anything like it, and the cake becomes the star of any gathering, from brunches to birthday parties.
- Ingredient Quality: Using full‑fat coconut milk and fresh shredded coconut elevates the flavor profile dramatically compared to low‑fat or powdered substitutes.
- Cooking Method: Baking at a moderate temperature with a pre‑heated oven creates a gentle rise, preventing a domed top that cracks and looks uninviting.
- Make‑Ahead Potential: The cake freezes beautifully, and the glaze can be stored separately, making it perfect for last‑minute celebrations.
Inside the Ingredient List
The Flavor Base
All‑purpose flour forms the structural backbone of the cake, providing just enough gluten to hold everything together without making it tough. If you swapped it for cake flour, you’d get a softer crumb but risk a crumbly texture that can’t support the heavy coconut elements. For the best results, sift the flour with the leavening agents; this aerates it and prevents lumps, ensuring a uniform rise.
The Sweeteners
Granulated sugar not only sweetens the batter but also helps to create a tender crumb by interfering with gluten formation. You could experiment with coconut sugar for a deeper, caramel‑like note, but keep in mind it darkens the cake slightly. If you’re watching calories, a 50/50 blend of sugar and a natural sweetener like erythritol works, though the texture will be a tad less moist.
The Coconut Crew
This is where the magic happens. Unsweetened shredded coconut adds texture and a subtle nutty flavor, while toasted coconut on top provides that irresistible crunch. Coconut milk is the star of the show—its high fat content gives the cake its creamy mouthfeel, and it also contributes to a tender crumb. Coconut cream, richer than milk, is folded in to boost richness without making the batter too liquid. If you can’t find coconut cream, you can skim the thick layer from a can of chilled coconut milk.
The Leavening Duo
Baking powder and baking soda work together to give the cake its lift. Baking soda needs an acid—here, the sugar and coconut milk provide just enough to activate it, while the powder offers a steady rise. Skipping either will result in a flat, dense cake that feels more like a bread than a dessert.
The Final Flourish
Vanilla extract adds a warm, aromatic backdrop that ties the coconut flavors together, and a pinch of salt amplifies every sweet note, preventing the cake from tasting one‑dimensional. For a twist, you can add a splash of coconut extract, but be careful—its potency can easily overwhelm the delicate balance.
Everything's prepped? Good. Let's get into the real action…
The Method — Step by Step
Preheat your oven to 350°F (175°C) and grease a 9‑inch round cake pan with butter, then dust it lightly with flour. This creates a non‑stick barrier that also helps the cake rise evenly. While the oven heats, line the bottom with parchment paper for an extra insurance layer—trust me, you’ll thank yourself later when you try to lift the cake out.
In a medium bowl, whisk together the flour, baking powder, baking soda, and salt. This step is crucial: a quick whisk incorporates air and ensures the leavening agents are evenly distributed, preventing pockets of bitterness. Set the bowl aside; the mixture should look like a fine, pale snow.
In a large mixing bowl, cream the softened butter and granulated sugar until the mixture is light, fluffy, and pale yellow—think cloud‑like, not just dissolved. This usually takes about 3‑4 minutes with an electric mixer on medium speed. The creaming process creates tiny air bubbles that will later expand in the oven, giving the cake its lift.
Add the eggs one at a time, beating well after each addition. The eggs act as emulsifiers, binding the butter and sugar to the dry ingredients while also adding structure. When the last egg is incorporated, the batter should be smooth and glossy.
Stir in the vanilla extract and coconut milk, then gently fold in the coconut cream. This is the moment of truth: the coconut milk should swirl into the batter like silk, not splash around. Power transition: Okay, ready for the game‑changer? Use a rubber spatula and a folding motion, lifting from the bottom and turning over the top, to keep the batter airy.
Kitchen Hack: If the batter looks too thick, add a tablespoon of coconut milk at a time until you reach a pourable consistency.Gradually add the dry flour mixture to the wet ingredients, mixing on low speed just until combined. Over‑mixing at this stage can develop gluten, leading to a tough crumb—so stop as soon as you see no streaks of flour. The batter should be thick but smooth, with a faint coconut aroma wafting up.
Fold in the shredded coconut, reserving a quarter cup for the topping. The coconut pieces should be evenly distributed, creating little islands of texture throughout the cake. If you prefer a more uniform texture, give the shredded coconut a quick pulse in a food processor before folding.
Watch Out: When you pour the batter into the prepared pan, do it in two layers, smoothing the top each time. If you dump it all at once, the batter can settle unevenly, causing a lopsided rise. After the final layer, tap the pan gently on the counter three times to release any trapped air bubbles.
Slide the pan into the preheated oven and bake for 30‑35 minutes, or until a toothpick inserted into the center emerges clean with just a few moist crumbs. The edges should start pulling away from the pan, and you’ll hear a faint “sizzle” as the top caramelizes—That sizzle when it hits the pan? Absolute perfection.
While the cake is cooling, prepare the coconut glaze. In a small saucepan, whisk together powdered sugar, coconut milk, and a dash of coconut extract over low heat until smooth and glossy. If the glaze feels too thick, add a splash more coconut milk; if too thin, whisk in a little extra powdered sugar.
Once the cake has cooled in the pan for 10 minutes, turn it out onto a wire rack. While it’s still warm, drizzle the glaze over the top, allowing it to cascade down the sides. Sprinkle the reserved toasted coconut over the glaze, pressing lightly so it adheres.
Let the cake set for another 15 minutes before slicing. This resting period lets the glaze firm up and the flavors meld, delivering that melt‑in‑your‑mouth sensation you’ve been dreaming of. And now the fun part: serve a slice, watch the smiles, and brace yourself for the inevitable request for seconds.
That's it — you did it. But hold on, I've got a few more tricks that'll take this to another level…
Insider Tricks for Flawless Results
The Temperature Rule Nobody Follows
Always bring your butter, eggs, and coconut milk to room temperature before you start. Cold ingredients cause the batter to seize, leading to a grainy texture. I once tried to rush the process and used straight‑out‑the‑fridge butter; the cake turned out dense as a brick. Letting everything sit for 30 minutes eliminates this issue and ensures a uniform mix.
Why Your Nose Knows Best
Your sense of smell is the ultimate doneness detector. Around the 25‑minute mark, the kitchen should be filled with a sweet, toasted coconut aroma. If you notice a faint caramel note, the cake is likely ready; if the scent is still raw or milky, give it another 5 minutes. Trusting your nose can save you from an under‑baked disaster.
The 5‑Minute Rest That Changes Everything
After removing the cake from the oven, let it rest in the pan for exactly five minutes before turning it out. This short pause allows the steam to finish cooking the center gently, preventing a soggy crumb. A friend tried skipping this step once — let's just say the cake fell apart when she attempted to frost it.
Glaze Timing is Everything
Apply the glaze while the cake is still slightly warm; the heat helps the glaze spread like liquid silk. If you wait until the cake is completely cold, the glaze will set too quickly and form a stiff crust, losing that luscious melt‑in‑your‑mouth quality.
Toasting the Coconut Like a Pro
Spread shredded coconut on a baking sheet and toast it at 350°F for 5‑7 minutes, stirring halfway. Keep a close eye—once it starts to turn golden, it can go from perfect to burnt in seconds. The toasted coconut adds a buttery crunch that contrasts beautifully with the soft crumb.
Creative Twists and Variations
This recipe is a playground. Here are some of my favorite ways to switch things up:
Pineapple Paradise
Swap half of the coconut milk for pineapple juice and fold in ½ cup of crushed pineapple. The tropical tang balances the sweetness, making it a hit for summer barbecues.
Chocolate Coconut Dream
Add ¼ cup unsweetened cocoa powder to the dry ingredients and drizzle a dark chocolate ganache over the cooled cake. Chocolate and coconut are a match made in heaven, and the ganache adds a glossy finish.
Spiced Coconut Delight
Incorporate ½ tsp ground cinnamon, ¼ tsp nutmeg, and a pinch of clove into the flour mixture. The warm spices give the cake a cozy, holiday‑ready vibe without overpowering the coconut.
Coconut Lime Zing
Add zest of one lime to the batter and replace the vanilla extract with lime extract. Top with a lime‑infused glaze for a bright, tangy twist that pairs perfectly with the rich coconut base.
Vegan Coconut Bliss
Replace butter with coconut oil, use flax‑egg equivalents, and swap dairy‑based powdered sugar with a vegan version. The result is a plant‑based cake that still delivers that creamy, coconutty punch.
Storing and Bringing It Back to Life
Fridge Storage
Wrap the cake tightly in plastic wrap or store it in an airtight container. It will stay fresh for up to 4 days, and the glaze will actually set a little more, creating a pleasant, slightly firmer top layer.
Freezer Friendly
Slice the cake into individual portions, wrap each piece in parchment, then foil, and place them in a zip‑top freezer bag. The cake freezes beautifully for up to 3 months. When you’re ready to enjoy, let it thaw in the fridge overnight, then bring it to room temperature before serving.
Best Reheating Method
To revive a refrigerated slice, place it on a microwave‑safe plate, sprinkle a tiny splash of coconut milk around the edges, and heat for 15‑20 seconds. The added moisture steams the cake back to its original fluffiness, while the glaze re‑shines like new.