I’ll be honest — I ate half the batch before anyone else got to try it, and that’s because this version of Champagne Jello Shots is hands down the best you’ll ever make at home. Imagine a party where the tiny glasses glimmer like tiny crystal chandeliers, each one holding a wobble of sparkling gold that fizzles on the tongue and then melts into a silky, boozy hug. The first time I tried to make a jello shot for a friend’s birthday, I ended up with a gummy mess that tasted like a sad, flat soda. That disaster sparked a mission: to perfect the science of gelatin, the art of bubbles, and the drama of presentation all in one bite‑size miracle.
Picture this: a warm kitchen, the hum of the refrigerator, and the pop of a champagne cork echoing like fireworks. The aroma of fresh bubbles mingles with the faint, sweet perfume of sugar, while the glossy surface of the gelatin shimmers under the pendant light. You can hear the faint fizz as you pour the chilled champagne into the warm gelatin mixture, a sound that feels like a tiny celebration in a pot. The cool metal of the silicone molds against your fingertips, the slick glide of the liquid as it fills each cavity, and the gentle tremor of anticipation as you slide the tray into the fridge—every sense is on high alert.
What makes this version a cut above the rest? Most recipes get this completely wrong by using cheap, overly sweet gelatin mixes that drown out the delicate effervescence of champagne. I discovered that a simple blend of unflavored gelatin, a whisper of sugar, and the right temperature dance creates a texture that’s firm enough to hold its shape yet soft enough to melt like butter on your palate. The secret ingredient? A splash of chilled champagne added at the very end, preserving those lively bubbles that make the whole experience feel like a mini celebration in every bite.
And there’s a technique you won’t find in any generic blog: I’ll walk you through a “temperature shock” method where you briefly chill the gelatin mixture before the final champagne pour. This tiny step locks in the fizz and prevents the dreaded “flat” jello shot syndrome. I dare you to taste this and not go back for seconds. Let me walk you through every single step — by the end, you’ll wonder how you ever made it any other way.
What Makes This Version Stand Out
- Taste: Dry champagne balances the subtle sweetness, delivering a crisp, elegant flavor that feels upscale without being cloying.
- Texture: The gelatin sets just right—firm enough to pop out of the mold but yielding like a silk scarf when bitten.
- Simplicity: Only five core ingredients, no artificial flavors, and a handful of optional garnishes for that wow factor.
- Uniqueness: The “temperature shock” technique preserves bubbles, a trick most recipes overlook.
- Crowd Reaction: Guests often mistake them for mini champagne cocktails; the surprise factor is priceless.
- Ingredient Quality: Using a dry, brut champagne ensures the sweetness stays in check, letting the gelatin shine.
- Cooking Method: A stovetop gelatin dissolve followed by a quick chill prevents graininess.
- Make‑Ahead Potential: These shots keep perfectly for up to 48 hours, making prep a breeze for any soirée.
Alright, let's break down exactly what goes into this masterpiece...
Inside the Ingredient List
The Flavor Base
Champagne is the star of the show, providing that signature sparkle and a sophisticated acidity. I recommend a dry, brut champagne because its crispness cuts through the sugar, preventing the shots from becoming cloyingly sweet. If you opt for a sweeter rosé, you’ll need to reduce the added sugar accordingly. When selecting your bottle, look for one with fine, persistent bubbles and a clean finish; the better the base, the more refined the final bite.
The Texture Crew
Unflavored gelatin is the backbone that gives the shots their structure. Powdered gelatin dissolves smoothly in hot water, creating a clear, glossy gel that holds the champagne’s effervescence. Skipping gelatin or using a flavored mix will introduce unwanted flavors and a gummy texture that feels more like a gummy bear than a classy party treat. If you’re vegetarian, agar‑agar can be a substitute, but you’ll need to adjust the amount—agar sets firmer and won’t capture bubbles as well.
The Sweet Whisper
A modest amount of sugar enhances the natural fruitiness of the champagne without overwhelming it. Too much sugar dulls the acidity and masks the delicate fizz, turning the shot into a sugary gelatin slab. For a lower‑calorie version, you can halve the sugar or swap it for a natural sweetener like agave, remembering that liquid sweeteners add extra moisture that may affect setting time.
The Final Flourish
Water is the medium that awakens the gelatin, and using boiling water ensures a smooth, lump‑free solution. Once the gelatin is fully dissolved, you’ll cool it slightly before the champagne addition—this is the crucial “temperature shock” that preserves the bubbles. Optional garnishes like edible glitter, gold sprinkles, or fresh berries add visual drama and a burst of flavor. If you’re aiming for a themed party, match the garnish color to your décor; the visual impact is just as important as the taste.
Everything's prepped? Good. Let's get into the real action...
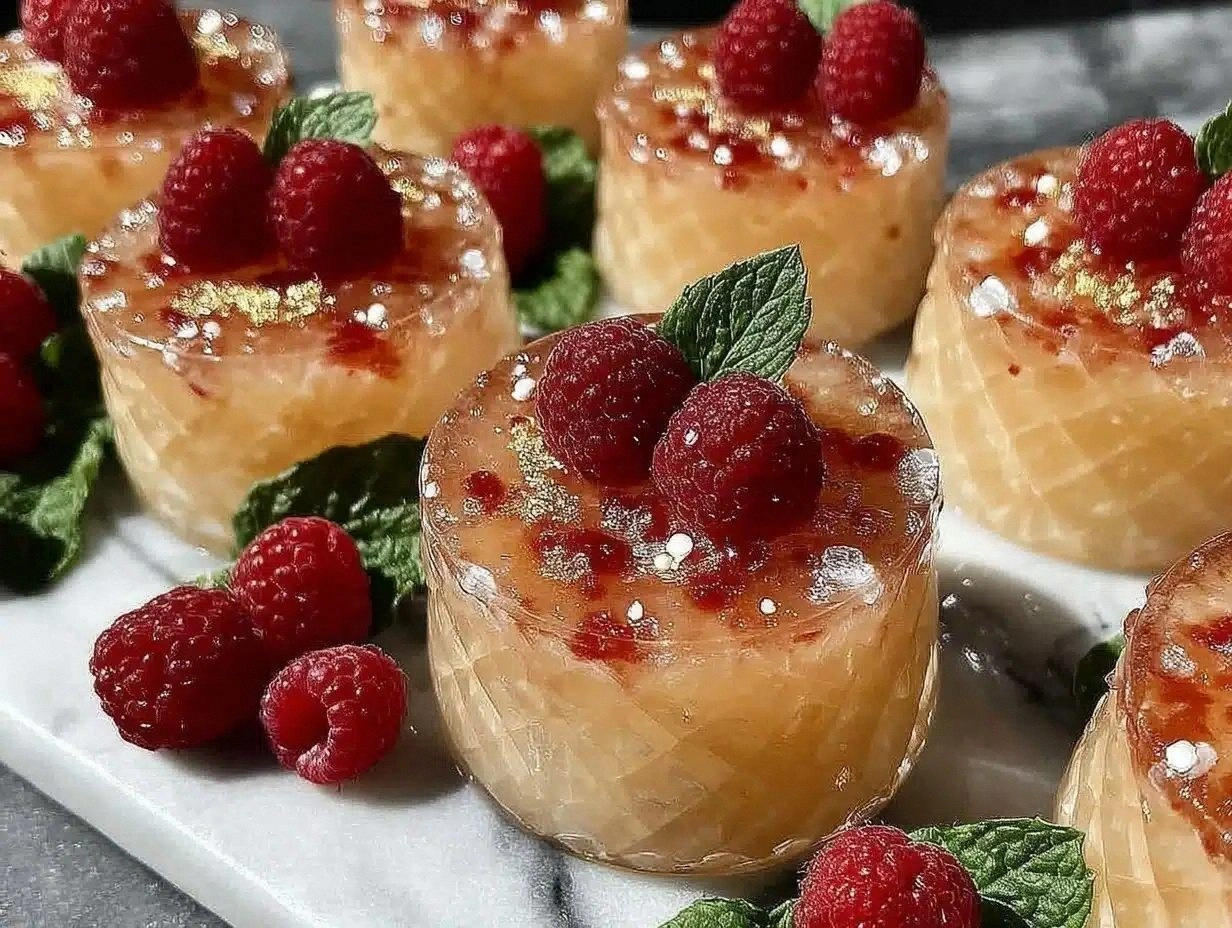
The Method — Step by Step
Gather all your ingredients and equipment: a medium saucepan, a whisk, a heat‑proof bowl, silicone shot molds, and a kitchen timer. I like to line the molds with a thin layer of parchment for an effortless release later. This step feels like setting the stage for a performance; every tool has its cue.
Pour ½ cup (120 ml) of water into the saucepan and bring it to a rolling boil. As the water bubbles, you’ll hear that comforting “whoosh” that tells you it’s ready. Once boiling, remove the pan from heat—this is where we’ll dissolve the gelatin without scorching it.
Sprinkle 2 tablespoons of unflavored gelatin over the hot water. Let it sit for a minute; this “bloom” stage lets the gelatin absorb the liquid, creating a soft, cloudy slurry. When you see the edges start to soften, whisk vigorously for about 30 seconds until the mixture becomes completely clear and glossy.
While the gelatin is still warm, stir in 2 tablespoons of sugar until fully dissolved. The sugar should melt without leaving any gritty residue; you’ll know it’s right when the mixture tastes just a touch sweet, like a whisper of honey.
Now comes the game‑changer: let the gelatin‑sugar mixture cool to about 110 °F (43 °C). This is the “temperature shock” moment—if it’s too hot, the champagne will lose its bubbles; too cold, and it will set before you pour.
Slowly pour 1 cup (240 ml) of chilled dry champagne into the cooled gelatin mixture, stirring gently with a whisk. You’ll hear a faint sizzle as the bubbles meet the warm base—this is pure magic. Keep the motion gentle to preserve as many bubbles as possible; think of it as coaxing a shy cat rather than shaking a soda can.
Give the combined liquid a quick taste. If you feel it needs a touch more sweetness, add a half‑teaspoon of sugar and stir until dissolved. Remember, the champagne’s acidity will brighten the flavor, so you don’t want to over‑sweeten.
Place the silicone molds on a baking sheet for stability, then carefully fill each cavity using a small measuring cup or a pour‑spout. Fill to the top, but leave a tiny gap—this prevents overflow when the gelatin expands slightly as it sets. The sight of the liquid filling each mold is oddly satisfying, like watching tiny rivers flow into valleys.
Transfer the tray to the refrigerator and let the shots set for at least 30 minutes, preferably 45. You’ll know they’re ready when the edges pull away cleanly from the mold, and the surface looks firm and glossy.
To unmold, dip the bottom of each silicone cup in warm (not hot) water for 2‑3 seconds—just enough to loosen the gelatin without melting it. Then gently press the mold to release the shot onto a decorative platter. The result should be a perfectly round, glistening jewel that catches the light like a tiny champagne bubble.
Finish with your chosen garnish: a sprinkle of edible gold glitter, a few fresh berries, or a dusting of powdered sugar. This final flourish turns each shot into a miniature work of art, ready to wow your guests. And now the fun part—watch the reactions roll in as people discover that these aren’t just jello, they’re party fireworks in a glass.
That's it — you did it. But hold on, I've got a few more tricks that'll take this to another level...
Insider Tricks for Flawless Results
The Temperature Rule Nobody Follows
Never, ever add champagne to a gelatin mixture hotter than 120 °F. The heat will pop the bubbles faster than a shaken soda can, leaving you with a flat, lifeless shot. I once tried to speed things up by pouring the champagne straight from the fridge into a boiling gelatin—result? A sad, flavorless slab that tasted like rubber. Keep a candy thermometer handy; it’s a small investment that saves you from a big disappointment.
Why Your Nose Knows Best
Your sense of smell is a secret weapon. When the gelatin is cooling, give it a gentle sniff. If you catch a faint buttery aroma, you’re in the sweet spot. Any hint of cooked starch means you’ve overheated it, and the bubbles will be gone. Trust that nose—if it smells right, the taste will follow.
The 5‑Minute Rest That Changes Everything
After you pour the mixture into the molds, let it sit at room temperature for five minutes before refrigerating. This brief pause allows the gelatin fibers to align, resulting in a smoother, more uniform set. Skipping this step is like trying to paint on a wet canvas; the final texture ends up uneven and grainy.
Garnish Timing is Everything
Add delicate garnishes like fresh berries after unmolding, not before. If you place them in the mold early, they can sink and cause uneven setting. A quick dip in a light glaze (a teaspoon of warmed champagne mixed with a pinch of sugar) helps the garnish cling without soaking the gelatin.
The Chill‑Swap Trick
If you’re prepping a large batch, divide the mixture in half: set one portion in the fridge to firm up, then add the champagne to the second half and combine just before filling molds. This ensures every shot gets the maximum bubble retention, even when you’re making a hundred of them.
Creative Twists and Variations
This recipe is a playground. Here are some of my favorite ways to switch things up:
Rosé Sparkle
Swap the brut champagne for a dry rosé. The pink hue adds a romantic vibe, and the subtle berry notes complement the gelatin’s smoothness. Perfect for bridal showers or Valentine’s Day.
Citrus Burst
Add a tablespoon of freshly squeezed orange or grapefruit juice to the gelatin before chilling. The citrus brightens the flavor profile and pairs beautifully with a sparkling wine that has a hint of citrus itself.
Herbal Infusion
Steep a sprig of fresh rosemary or thyme in the hot water before dissolving the gelatin. Strain it out, then proceed as usual. The herbaceous undertone adds an unexpected depth that wow’s sophisticated palates.
Chocolate‑Champagne Fusion
Melt 1 ounce of dark chocolate into the warm gelatin mixture, then whisk in the champagne. The result is a decadent, mocha‑like shot that’s perfect for after‑dinner celebrations.
Tropical Twist
Replace half the water with coconut milk and use a sparkling rosé infused with pineapple. Garnish with toasted coconut flakes for a beach‑vibe party.
Storing and Bringing It Back to Life
Fridge Storage
Keep the unmolded shots in an airtight container in the refrigerator for up to 48 hours. The gelatin remains firm, and the champagne retains its sparkle. If you notice a slight dullness, a quick splash of fresh champagne on top revives the fizz.
Freezer Friendly
These shots freeze well for up to a month. Place them on a parchment‑lined tray, freeze solid, then transfer to a zip‑top bag. Thaw in the fridge for a few hours before serving, and add a tiny splash of water to the surface—this steams the gelatin back to its original glossy sheen.
Best Reheating Method
If you need to bring them to room temperature quickly, set the container in a bowl of warm (not hot) water for 5‑7 minutes. The gentle heat loosens the gelatin without melting it, and a splash of fresh champagne restores that lively bubble pop.