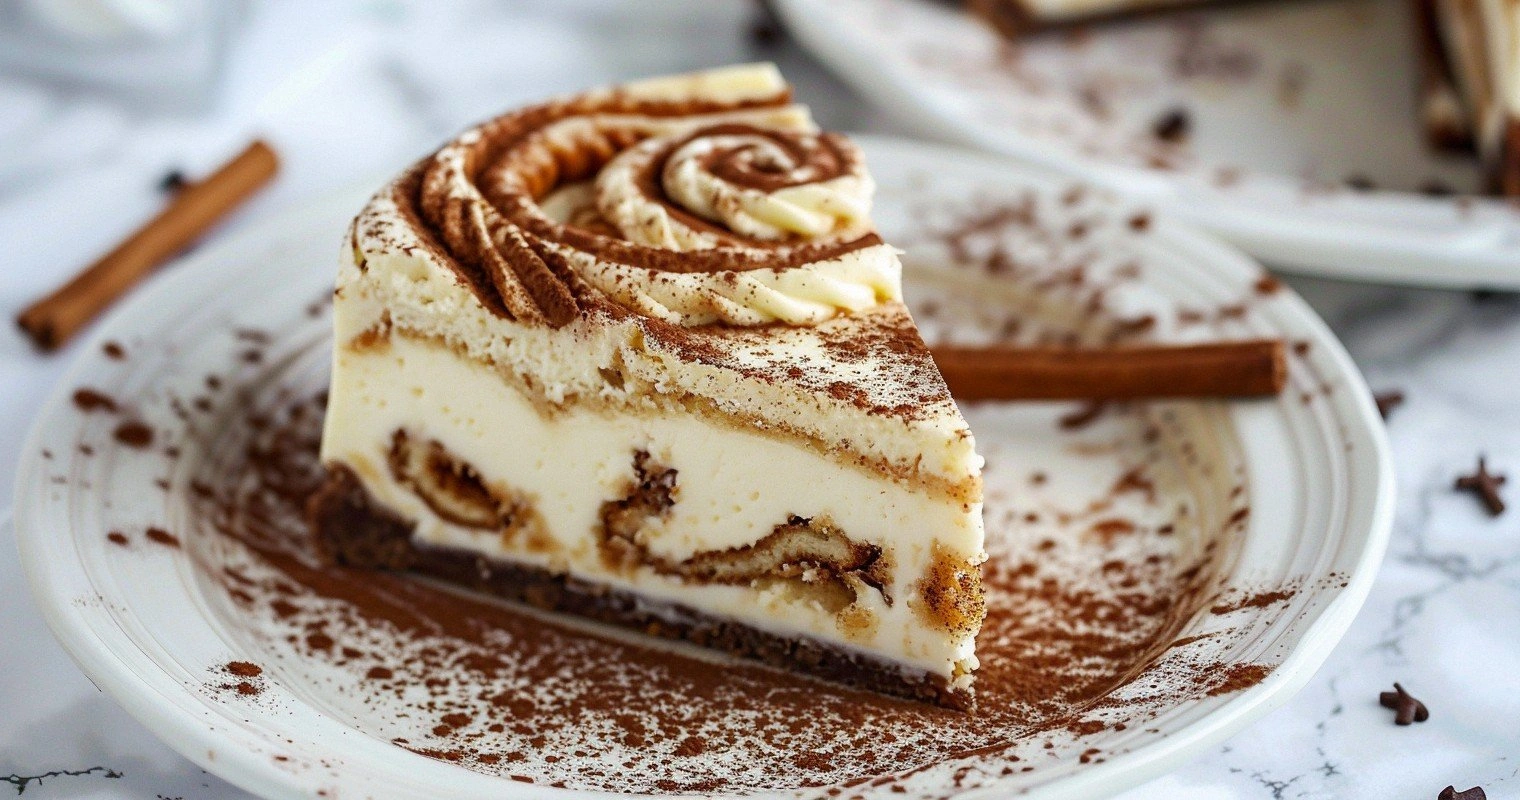
Picture this: It's 11:47 PM on a Tuesday night, and I'm standing in my kitchen wearing mismatched socks, flour in my hair, and a look of pure determination on my face. My roommate had just bet me twenty bucks that I couldn't combine her two favorite desserts—cinnamon rolls and cheesecake—into something that didn't taste like confused mush. Challenge accepted. What followed was three failed attempts, one minor sugar fire, and finally, the moment when I pulled this Ultimate Cinnamon Roll Cheesecake from the oven and the entire apartment building smelled like Cinnabon had a romantic encounter with The Cheesecake Factory. The neighbor from 3B actually knocked on my door at midnight asking if I was opening a bakery.
Here's the thing about most cinnamon roll cheesecake recipes floating around the internet—they get it completely wrong. They either make a cinnamon-flavored cheesecake with some sad, soggy roll pieces thrown in, or they attempt to swirl cinnamon into plain cheesecake and call it a day. Neither captures that magical, swirly, frosting-topped experience that makes cinnamon rolls the ultimate comfort food. My version? We're building layers of flavor that would make a pastry chef weep with joy. We're talking about a crust made from actual cinnamon roll dough, a cheesecake layer that tastes like the cream cheese frosting got upgraded to first class, and a cinnamon swirl that creates these gorgeous marbled rivers of spice through every slice.
I'll be honest with you—I ate half the first batch before anyone else even knew it existed. My original plan was to bring it to work the next day, but then I justified keeping it all to myself with thoughts like "I need to perfect the recipe" and "quality control is important." By 2 AM, I was eating it straight from the pan with a fork, standing in front of my open fridge like some kind of dessert vampire. The next morning, I made another one just so I could photograph it, and that one disappeared too. If you've ever struggled with getting your cheesecake to set properly or your cinnamon swirl to stay swirly instead of sinking to the bottom, you're not alone—and I've got the fix.
Picture yourself pulling this out of the oven, the whole kitchen smelling like someone bottled autumn and mixed it with cloud nine. The top is golden and slightly cracked in that perfectly imperfect way, with cinnamon sugar creating these beautiful caramelized pockets. When you slice into it, you get these gorgeous layers—crispy cinnamon crust, creamy vanilla bean cheesecake, and those signature swirls that make every piece look like edible art. This next part? Pure magic. Let me walk you through every single step—by the end, you'll wonder how you ever made it any other way.
What Makes This Version Stand Out
Flavors That Actually Make Sense: Unlike those recipes that just throw cinnamon into cheesecake and hope for the best, we're building real cinnamon roll flavor from the ground up. The crust uses actual cinnamon roll dough that creates this buttery, flaky base with crispy edges that shatter like thin ice when you cut into it. The cheesecake layer isn't just cream cheese with cinnamon—it's infused with brown butter, vanilla bean paste, and a secret ingredient that makes it taste like the inside of a Cinnabon.
Texture That Defies Physics: Most cinnamon roll cheesecakes end up with a soggy bottom that would make a British baker cry. Not here. We par-bake the cinnamon roll crust until it's golden and crisp, creating a barrier that stays crunchy even after the cheesecake sets. The result? Every bite has that satisfying contrast of creamy against crispy, soft against crunchy, like a textural symphony in your mouth.
Swirl Technique That Actually Works: I dare you to taste this and not go back for seconds when you see how we handle the cinnamon swirl. Instead of just dolloping and hoping, we're using a specific temperature and consistency that keeps the swirl suspended throughout the cheesecake, not sunk at the bottom like a cinnamon-flavored basement. The trick involves slightly warming the swirl mixture so it flows like liquid gold but sets as it bakes.
Make-Ahead Champion: This beauty actually improves with age—if you can resist it that long. The flavors meld and deepen overnight, transforming from good to "hide it from your family" levels of delicious. Most recipes tell you to eat cheesecake fresh, but this one hits its stride at 24-48 hours, making it perfect for dinner parties or when you want to impress without the stress.
Ingredient Quality That Matters: We're using real vanilla bean paste, not extract, because those tiny black specks aren't just for looks—they're flavor bombs that burst with every bite. The cream cheese gets brought to room temperature until it's softer than a lullaby, and the butter gets browned until it smells like hazelnuts had a baby with caramel. Skimp on quality here, and you'll taste the difference like a flat note in your favorite song.
Crowd Psychology: Bring this to any gathering and watch grown adults lose their minds. I've seen people who claim they "don't really like sweets" go back for thirds. It's like dessert hypnosis—the combination of familiar cinnamon roll flavors in cheesecake form short-circuits everyone's willpower. Future pacing moment: imagine yourself becoming the legendary friend who "makes that insane cinnamon roll cheesecake."
Simplicity in Disguise: Despite sounding like something from a fancy bakery, this recipe uses grocery store ingredients and basic techniques. No specialty pans, no hard-to-find spices, no molecular gastronomy equipment. Just good technique, proper timing, and a few tricks that turn ordinary into extraordinary. Stay with me here—this is worth it.
Inside the Ingredient List
The Flavor Foundation
Let's start with the real MVP: that tube of cinnamon roll dough isn't just convenience—it's scientifically engineered to create the perfect crust. The dough contains exactly the right ratio of fat to flour to sugar that, when par-baked, transforms into something that tastes like a cinnamon roll and a pie crust had a beautiful baby. The yeast in the dough creates these tiny air pockets that keep it light and crisp, not dense and tooth-breaking like a graham cracker crust can be. If you try to substitute with crescent roll dough or pizza dough, you'll end up with something that tastes like confusion and disappointment had a potluck.
Cream cheese is the star of our cheesecake show, but not all cream cheese is created equal. Skip the low-fat version—this is not the time for dietary virtue. Full-fat cream cheese contains exactly 33% milk fat, which creates that luxurious, melt-on-your-tongue texture that makes cheesecake worth the calories. Bring it to room temperature until it spreads like warm butter, because cold cream cheese will leave you with lumps that no amount of mixing will fix. I've made this mistake before, and my cheesecake looked like it had cottage cheese freckles.
The Texture Crew
Eggs do more than just bind everything together—they're the silent architects of cheesecake structure. We use whole eggs for richness and stability, but the real secret is adding one extra yolk. That yolk contains lecithin, a natural emulsifier that creates a custard so smooth it makes silk feel like sandpaper. Don't crack your eggs directly into the batter—crack them into a separate bowl first. Nothing ruins cheesecake like shell fragments that you discover only when you're serving guests who already think you're trying to poison them.
Heavy cream isn't just for richness—it's the insurance policy against dry, cracked cheesecake. The fat in cream coats the proteins in the eggs, preventing them from seizing up and creating that unfortunate texture that feels like you're eating sweet scrambled eggs. We add it at the very end, folding it in gently like we're tucking in a baby. Over-mixing here incorporates too much air, which leads to cracks on top that look like the Grand Canyon in dessert form.
The Unexpected Star
Here's where I lose some people, but trust the process: we're adding a tablespoon of good quality instant pudding mix to our cheesecake batter. Not for flavor—for science. The modified cornstarch in pudding mix is heat-activated, creating a custard that sets perfectly every time without that slight jiggle that makes people nervous about whether it's done. Use vanilla pudding mix, not banana or chocolate, unless you want cinnamon roll cheesecake that tastes like a mistake. I've experimented with flour and cornstarch, but pudding mix creates that restaurant-quality texture that makes people ask "how did you get it so smooth?"
Brown butter is our secret weapon for depth of flavor. When butter browns, the milk solids caramelize, creating hundreds of new flavor compounds that taste like toasted nuts and caramel had a party. We only need three tablespoons, but those three tablespoons transform the entire cheesecake from "pretty good" to "I need to sit down." The trick is cutting the butter into small pieces so it browns evenly, and having a heat-proof spatula ready because once it starts browning, it goes from perfect to burnt faster than you can say "smoke alarm."
The Final Flourish
Vanilla bean paste is worth every penny of its admittedly ridiculous price tag. Those tiny black specks aren't just Instagram-worthy—they're flavor bombs that burst with warm, floral notes that extract just can't deliver. If you absolutely must substitute, use real vanilla extract, not imitation vanilla, which tastes like sadness and chemicals had a baby. The paste adds visual drama too, creating little dark flecks that make people think you spent way more time on this than you actually did.
Our cinnamon swirl needs two types of cinnamon for maximum impact. Regular cinnamon provides the familiar warmth, but Ceylon cinnamon adds floral, almost citrusy notes that make the swirl taste sophisticated instead of one-note. Mix them with brown sugar instead of white—the molasses in brown sugar adds butterscotch notes that complement the cream cheese beautifully. Add a pinch of salt to the swirl mixture—it sounds counterintuitive, but salt makes sweet things taste sweeter, like how black frames make art pop.
The Method — Step by Step
- Start by preheating your oven to 350°F—not 325, not 375, but exactly 350. This isn't the time for temperature rebellion. While it's heating, remove your cream cheese from the fridge and cut it into chunks. This helps it warm up faster and more evenly than leaving it in the block, which stays cold in the middle like a cheesecake iceberg. Line your 9-inch springform pan with parchment paper, making sure to cut a circle for the bottom and a strip for the sides. The parchment prevents sticking and makes removal easier than convincing a toddler to eat candy.
- Open your tube of cinnamon roll dough and prepare for a small wrestling match. The key is unrolling it gently but confidently, like you're defusing a delicious bomb. Press the dough into the bottom of your prepared pan, making sure to seal any seams where the spiral was cut. You want an even layer about 1/4 inch thick—too thin and it'll burn, too thick and it'll be doughy in the center. Prick it all over with a fork to prevent air bubbles that'll make your crust look like it has acne.
- Par-bake the crust for 12 minutes, but watch it closely after 10. The edges should be golden and the center should look set but not brown. This step is crucial—it creates a moisture barrier that prevents the cheesecake from making the crust soggy. If you skip this step, you'll end up with a crust that tastes like wet cardboard had an identity crisis. Let it cool while you make the filling, but leave the oven on because we're not done with it yet.
- Now for the brown butter: cut 3 tablespoons of butter into small pieces and place them in a light-colored pan over medium heat. Light-colored is important because you need to see the color change, and trying to judge brown butter in a dark pan is like trying to find a black cat in a coal mine. Swirl constantly—don't walk away, don't check your phone, don't even blink too long. First, it'll foam, then it'll start smelling like toasted nuts and caramel. When it turns amber and you see tiny brown specks, immediately pour it into a heat-proof bowl. Those specks are flavor gold.
- In your stand mixer (or with a hand mixer and some determination), beat the cream cheese until it's smoother than a jazz saxophone solo. Add the sugar gradually, letting each addition fully incorporate before adding more. This prevents lumps that no amount of mixing will fix later. Add the brown butter and vanilla bean paste, mixing until combined. The batter should look like clouds of creamy perfection with tiny black vanilla specks scattered throughout like a starry night.
- Add the eggs one at a time, mixing on low speed just until each is incorporated. Over-mixing here incorporates too much air, leading to cracks on top that look like the surface of Mars. Add the pudding mix and mix until just combined. Finally, fold in the heavy cream with a spatula, being gentle like you're handling a baby bird. The batter should be thick but pourable, like liquid velvet.
- Make the cinnamon swirl by mixing brown sugar, both types of cinnamon, and a pinch of salt. Add melted butter until it forms a thick paste that ribbons when you lift the spoon. If it's too thin, it'll sink; too thick, and it'll sit on top like a cinnamon island. You're looking for the consistency of slightly warm peanut butter.
- Pour half the cheesecake batter over your cooled crust. Dollop half the cinnamon mixture in spoonfuls across the surface, then use a skewer or toothpick to create swirls. Don't over-swirl—you want distinct ribbons, not a muddy mess. Add the remaining batter, then repeat with the remaining cinnamon mixture. The top should look like a beautiful cinnamon galaxy.
- Bake in a water bath by placing your springform pan in a larger pan and adding hot water until it comes halfway up the sides. The water creates steam that prevents cracks and ensures even baking. If you're worried about leaks, wrap the outside of your pan with foil, but make sure it's heavy-duty or your cheesecake will taste like river water. Bake for 55-65 minutes, until the center is just slightly jiggly—like Jell-O, not like liquid.
- Turn off the oven and crack the door, letting the cheesecake cool inside for an hour. This gradual cooling prevents the dramatic temperature change that causes cracks. Remove from the water bath and cool completely on a wire rack, then refrigerate for at least 4 hours or overnight. I know waiting is torture, but this is when the flavors meld and the texture sets to perfection. Slice with a warm knife (dip in hot water, then dry) for clean cuts that make you look like a professional.

Insider Tricks for Flawless Results
The Temperature Rule Nobody Follows
Room temperature ingredients aren't just a suggestion—they're the difference between cheesecake nirvana and a lumpy disaster. Cold cream cheese won't blend properly, leaving you with tiny balls of cheese that feel like you're eating curdled milk. Cold eggs don't incorporate evenly, creating a batter that's part smooth, part scrambled. Take everything out of the fridge at least two hours before you start, or speed things up by placing eggs in warm (not hot) water for 10 minutes and microwaving cream cheese in 10-second bursts. Your future self will thank you when your cheesecake is smoother than a politician's promise.
Why Your Nose Knows Best
Don't rely on a timer alone—your nose is the most accurate doneness indicator. When the cheesecake is perfectly baked, your kitchen will smell like cinnamon rolls and vanilla had a beautiful baby. If it starts smelling eggy or sulfurous, you've overbaked it and crossed into scrambled egg territory. The edges should be puffed and lightly golden, while the center still has a gentle wobble. Think of it like selecting the perfect avocado—slightly soft to the touch but not mushy. A friend tried skipping this step once and ended up with something that tasted like sweet omelet flan—not the vibe we're going for.
The 5-Minute Rest That Changes Everything
After mixing your batter, let it rest for five minutes before pouring it into the crust. This allows any air bubbles to rise to the surface and pop, preventing cracks and creating a denser, creamier texture. It's like letting a good wine breathe, except instead of wine, you've got cheesecake batter, and instead of breathing, it's de-gassing. Swirl the bowl gently after resting—you'll see tiny bubbles rising like a lazy lava lamp. This simple step transforms your cheesecake from good bakery quality to "did you train in France?" level.
The Overnight Miracle
I know it's torture, but this cheesecake needs at least 24 hours in the fridge before serving. During this time, magic happens: the flavors meld and deepen, the texture sets to perfect creaminess, and that raw alcohol taste from the vanilla completely disappears. It's like the difference between a young wine and one that's been properly aged. If you taste it right after cooling, you'll think it's good. Taste it after 24 hours, and you'll understand why people write poetry about dessert. Future you will be glad patient you waited.
Creative Twists and Variations
This recipe is a playground. Here are some of my favorite ways to switch things up:
Maple Bourbon Bonanza
Replace the brown sugar in the swirl with pure maple syrup and add two tablespoons of good bourbon to the cheesecake batter. The maple adds depth that makes people ask "what IS that flavor?" while the bourbon provides warmth without making it taste like a cocktail. Top with maple-glazed pecans for crunch that contrasts beautifully with the creamy cheesecake. This version has converted more bourbon-haters than I can count.
Salted Caramel Dream
Drizzle homemade salted caramel over the top before serving, letting it cascade down the sides like a delicious waterfall. The salt enhances all the sweet flavors while the caramel adds buttery complexity. Make extra caramel for serving—people will want to drown their slices in it. I've seen grown adults lick their plates clean with this version, and honestly, I respect it.
Apple Pie Mashup
Add a layer of thinly sliced, cinnamon-sautéed apples between the crust and cheesecake batter. The apples provide fruity brightness that cuts through the richness, while their slight tartness balances the sweetness. Toss the apples with lemon juice and a touch of cornstarch to prevent them from weeping and making the crust soggy. This version tastes like autumn decided to become a dessert.
Chocolate Chai Champion
Add two tablespoons of cocoa powder to the cheesecake batter and replace the cinnamon in the swirl with chai spice blend. The chocolate adds depth while the chai spices—cardamom, ginger, cloves—create complexity that makes each bite taste slightly different. Top with chocolate shavings and a dusting of gold luster dust for a dessert that looks as dramatic as it tastes.
Nutella Swirl Sensation
Warm half a cup of Nutella until it's pourable, then swirl it through the cheesecake along with the cinnamon mixture. The hazelnut-chocolate spread adds richness that complements the cream cheese beautifully. Warm the Nutella in 10-second bursts in the microwave—too hot and it'll sink to the bottom, too cool and it'll sit in globs on top.
Lemon Blueberry Brightness
Add the zest of two lemons to the cheesecake batter and fold fresh blueberries into the cinnamon swirl. The lemon provides brightness that makes the cinnamon taste fresher, while blueberries add pop and color. This version is perfect for summer brunches when you want something rich but not heavy. The acidity from the lemon also helps cut the sweetness, making it dangerously easy to eat more than you should.
Storing and Bringing It Back to Life
Fridge Storage
Wrap the cheesecake tightly in plastic wrap, then in foil, and store it in the coldest part of your fridge for up to 5 days. Don't store it in the door—temperature fluctuations from opening and closing will dry it out faster than a comedy club on amateur night. If you've already cut into it, press plastic wrap directly against the cut surface to prevent it from forming that weird skin that makes people think it's gone bad. For best quality, place it in a cake carrier or airtight container—cheesecake absorbs odors like a sponge, and nobody wants garlic cheesecake.
Freezer Friendly
This cheesecake freezes beautifully for up to 3 months. Cut it into individual slices first—trying to slice frozen cheesecake is like trying to cut through a delicious brick. Wrap each slice in plastic wrap, then in foil, then place in a freezer bag with the air pressed out. Thaw overnight in the fridge, not on the counter, unless you enjoy cheesecake with the texture of frozen sadness. Add a tiny splash of cream before serving to refresh the texture and make it taste freshly made.
Best Reheating Method
Cheesecake is best served cold, but if you must warm it slightly, let individual slices sit at room temperature for 15 minutes. Never microwave it—you'll end up with warm edges and a cold center, like dessert with commitment issues. If you absolutely must warm it, place a slice in a 200°F oven for 5 minutes, but honestly, cold cheesecake is perfect cheesecake. The flavors are more pronounced when cold, and the texture is at its creamy best.