I burned the first three batches. Not a little brown around the edges—I'm talking charcoal-black, smoke-alarm-screaming, roommate-running-with-a-dish-towel disasters. You'd think after fifteen years of baking I'd have the humility to read the package directions, but nope, I was determined to wing it because "cheesecake bars are basically just smaller cheesecakes, right?" Wrong. So gloriously wrong. The fourth attempt came at 2:14 a.m. on a Wednesday when the city outside my window was dead quiet and the only sound was my mixer whipping cream cheese into a cloud so thick it looked like edible satin. That night I learned that Philadelphia Cheesecake Bars aren't just shrunken cheesecakes—they're an entirely different species, a dessert that wants to be velvety yet sliceable, tangy yet mellow, sturdy enough to pick up with your fingers but still delicate enough to dissolve on your tongue like a secret. By sunrise I had a pan of perfection cooling on the counter, and I swear the first bite tasted like forgiveness for every kitchen sin I'd ever committed.
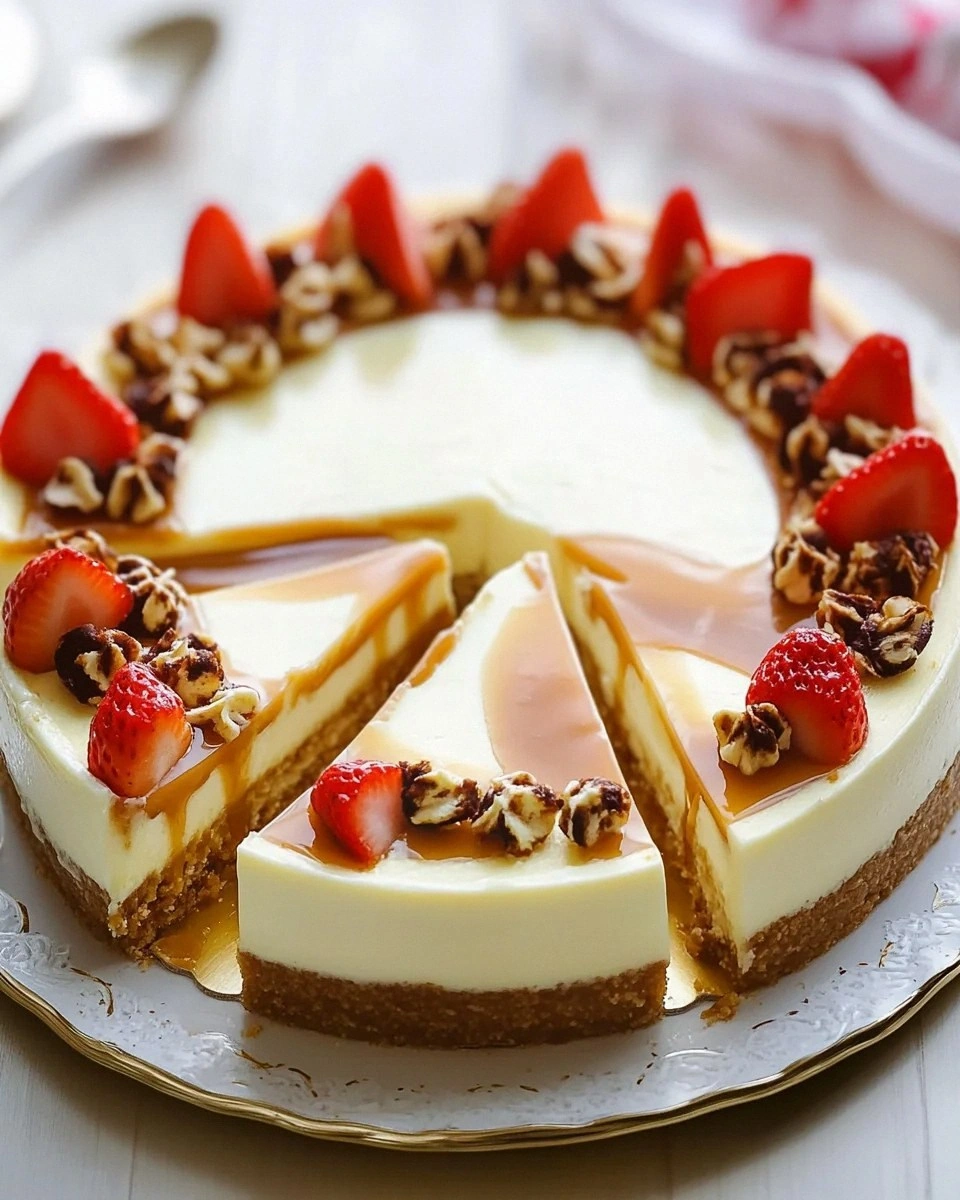
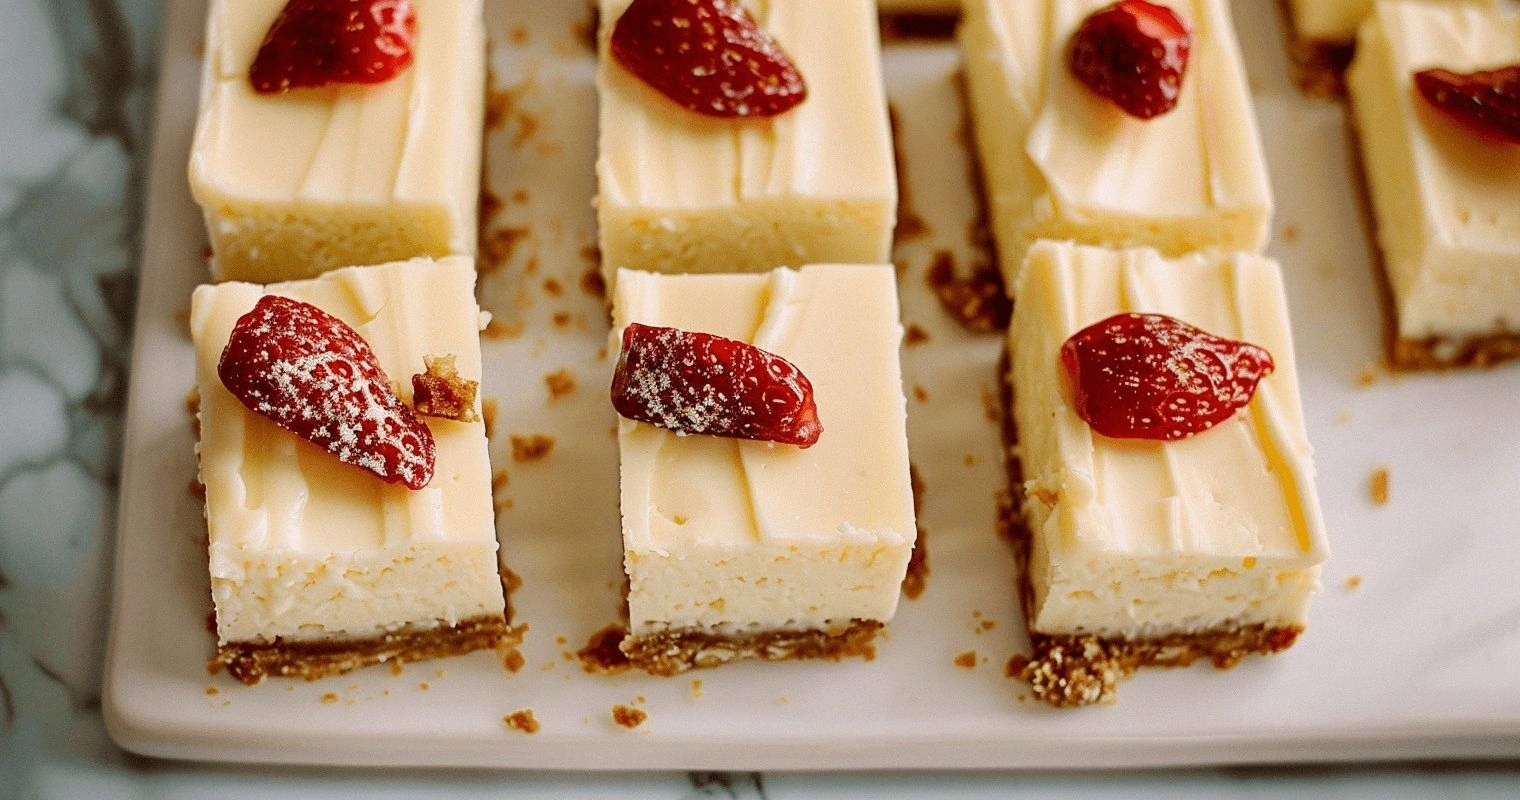
Picture this: a buttery shortbread base that shatters like thin ice under the weight of your first bite, giving way to a filling so silky it makes velvet feel like sandpaper. The top bronzes into the faintest blush of gold—not the cracked lunar landscape you see on lesser bars—and when you slice them (warm knife, wipe between cuts, patience of a saint) the edges hold so cleanly you could measure angles with them. The aroma is vanilla and faint lemon riding on a cloud of warm dairy, the smell equivalent of cashmere. I dare you to walk past that pan without lifting a corner of the parchment "just to check if they're set" and then accidentally eating a two-inch square standing up in your socks.
Most recipes get this completely wrong. They treat the cream cheese like a batter rather than a custard, over-aerate it until it soufflés and collapses, or they bake the bars until the centers resemble rubber. Here's what actually works: treat the filling like you're making the world's most luxurious ice cream base—low, slow, and gentle—then bake it in a watery steam bath so it stays as plush as a down pillow. Stay with me here—this is worth it. The payoff is squares of cheesecake that you can stack in lunchboxes, serve at baby showers, or hide in your freezer for midnight emergencies (they thaw in six minutes, I timed it).
Okay, ready for the game-changer? We're using two full pounds of Philadelphia brick cream cheese—yes, bricks, not the tubs—because the stabilizers are different and the fat content is calibrated for exactly this texture. Add a whisper of sweetened condensed milk for chew, sour cream for tang, and just enough egg to set things without turning it into omelet city. The crust isn't graham cracker because graham goes soggy after day one; instead we're doing brown-butter shortbread that stays crisp even if you refrigerate for a week (not that they'll last that long). Let me walk you through every single step—by the end, you'll wonder how you ever made it any other way.
What Makes This Version Stand Out
- Custard, Not Cake: Most recipes whip air into the batter like they're making a birthday sponge. We keep the mixer on low, incorporating minimal air so the bars bake dense and fudgy, almost like cheesecake caramels.
- Shortbread Armor: Graham crusts absorb moisture and turn to wet sand overnight. Our brown-butter shortbread is fortified with a touch of cornstarch, creating a water-resistant barrier that stays snappy for days.
- Steam Bath Without the Fuss: Forget wrestling with a giant roasting pan. We set a rimmed baking sheet on the rack below the bars and fill it with boiling water. The oven stays humid, the tops don't crack, and you keep your sanity.
- Neapolitan Chill: After baking you cool the bars for exactly eight minutes at room temp, then plunge the pan into an ice-water bath in the sink. Shocking them fast prevents carry-over cooking and that dreaded sunken center.
- Vanilla Bean Flecks: Imitation vanilla tastes like sadness. We steep real beans in warm cream so every bite carries those aromatic black specks—tiny flavor bombs that read luxury even if you're serving these at a tailgate.
- Make-Ahead Magic: These bars taste better on day two once the flavors meld. Wrap the pan tightly, refrigerate up to five days, or freeze individual squares with parchment between layers for up to two months. Instant dessert diplomacy.
Alright, let's break down exactly what goes into this masterpiece...
Inside the Ingredient List
The Flavor Base
Philadelphia full-fat brick cream cheese is non-negotiable. I've tried every boutique brand from Vermont goat dairies to European imports, and nothing sets up with the same satiny firmness. The protein matrix in Philly is engineered for stability; off-brands can weep or turn grainy. Make sure it's room temp—cold cheese won't fully emulsify and you'll end up with tiny white lumps that look like cottage cheese curds floating in your batter. If you forgot to plan ahead, unwrap the bricks, slice them like thick toast, and set the slabs on a plate under an upside-down metal bowl. The bowl traps warmth and the increased surface area softens in fifteen minutes flat.
The Texture Crew
Sweetened condensed milk is the clandestine weapon here. A modest half-cup adds milk solids and sugar in perfect proportion, boosting chewiness without making the bars cloying. Sour cream loosens the mixture just enough to pour while lending that classic tang that makes cheesecake addictive—skip it and the flavor falls flat like diet soda. Eggs must be large, not XL or medium; too much egg and the bars soufflé, too little and they slump. I crack them into a separate bowl first because nothing ruins silky batter like a broken yolk full of membrane shards. Vanilla bean paste is worth the splurge; those tiny black flecks signal your guests that they're about to taste something artisan even if you baked in pajamas.
The Unexpected Star
Cornstarch in the crust is the sleeper hit. It shortens gluten strands so the shortbread stays tender even when ice-cold, and it acts as a moisture barrier between filling and base. A mere two tablespoons do the job—more and the crust tastes chalky. Brown the butter until the milk solids turn chestnut and the aroma smells like toasted hazelnuts; this single step adds layers of caramel complexity that plain melted butter can't touch. Swirl the pan constantly in the last minute because those solids go from perfect to acrid faster than you can say "smoke alarm."
The Final Flourish
Lemon zest is optional but transformative. Use a microplane to remove just the yellow outer skin, no bitter white pith, and fold it in at the very end so the volatile oils stay bright. A whisper of kosher salt in both crust and filling amplifies sweetness the way a frame elevates a painting—skip it and the flavors taste muted like they've been wrapped in wool. For slicing, heat a chef's knife under hot tap water, wipe dry, cut straight down, then repeat. The warm blade glides without tearing, producing bakery-worthy edges that'll make you look like a pastry-school valedictorian.
The Method — Step by Step
- Start with the crust because it needs a head start to cool. Brown the butter in a light-colored saucepan so you can see the color change; once the foam subsides and the milk solids turn amber, pull it off the heat immediately—it keeps cooking in the hot pan. Whisk flour, cornstarch, powdered sugar, and salt in a bowl, then pour in the liquid gold plus a teaspoon of ice water. The dough will look like wet sand that holds together when squeezed. Press it evenly into a parchment-lined 9x13 pan using the flat bottom of a measuring cup; you want it compact like sidewalk cement so it won't crumble later. Slide the pan into a 350°F oven for eighteen minutes, just until the edges tan like beach sand.
- While the base cools, lower the oven to 300°F and start the steam setup. Bring a kettle of water to a boil, then place a rimmed sheet on the lowest rack. This is the moment of truth: if you skip the steam, the tops will crack like drought earth. Reduce mixer speed to stir and beat the cream cheese in the bowl for a full two minutes; you're looking for a texture reminiscent of thick yogurt—smooth, glossy, zero lumps. Scrape the bowl obsessively every thirty seconds because unmixed brick bits will ruin the final mouthfeel.
- Stream in the sweetened condensed milk and sour cream in a slow ribbon, letting each addition disappear before adding more. Think of it like making mayonnaise—slow and steady keeps the emulsion tight. Once incorporated, add eggs one at a time, mixing just until the yolk vanishes. Over-beating whips in air that will expand in the oven and collapse later, leaving a sunken center that looks like a trampoline after the circus left town.
- Now the fun part: fold in vanilla bean paste and lemon zest with a spatula, not the mixer. The batter should pour like thick pancake mix, forming ribbons that hold their shape for two seconds before melting back. If it's stiff, add a tablespoon of milk; if it's soupy, you've gone too far and need to start over—there's no saving over-thinned cheesecake batter. Pour it onto the cooled crust, tap the pan on the counter to release trapped bubbles, and slide it onto the middle rack above the steam tray.
- Carefully pour the kettle water into the hot sheet below—stand back, it will hiss like an angry cat. Close the door fast to trap the steam. Bake for twenty-eight minutes, then jiggle the pan gently; the outer two inches should look set while the center wobbles like Jell-O. Don't walk away from the stove here; one extra minute can tip the balance from creamy to rubbery. Turn off the oven, crack the door with a wooden spoon, and let the bars rest inside for ten minutes to ease the temperature shock.
- Remove the pan, cool on a rack for eight minutes exactly, then set it into an ice bath in the sink. The rapid chill prevents carry-over cooking and locks in that velvety texture. After thirty minutes, transfer to the fridge uncovered for four hours or overnight. I dare you to taste this and not go back for seconds while it's still technically "setting up."
- To unmold, lift the parchment sling onto a cutting board. Heat a long knife under hot water, wipe dry, and score the top where you plan to cut—this prevents the filling from dragging. Slice straight down, not sawing, then rinse and reheat the blade between cuts. You'll get fifteen pristine squares or twenty-four party-size fingers, depending on how generous you're feeling.
- Serve them cold, room temp, or even slightly warm with a drizzle of raspberry coulis. They travel like champions; stack them in a tin with parchment between layers and they'll survive a cross-country road trip. I've mailed these to my brother in Iraq and he reported they arrived "tasting like home and victory."
Insider Tricks for Flawless Results
The Temperature Rule Nobody Follows
Room temperature isn't marketing fluff—it's thermodynamics. Cold cream cheese won't blend smoothly, leaving microscopic lumps that expand during baking into visible craters. Pull ingredients out two hours ahead, or microwave cream cheese bricks on 50% power in ten-second bursts, flipping between each. You're aiming for pliable but not melty, like playdough left in a sunny car.
Why Your Nose Knows Best
Ignore the timer and trust your senses. When the bars are done, the kitchen smells like warm vanilla ice cream with a faint caramel edge. If you still smell raw dairy, give it three more minutes. If you smell toasted coconut, you've edged into overbaked territory and should yank them immediately. A friend tried skipping this sniff test once—let's just say it didn't end well for dessert or her dinner party reputation.
The 5-Minute Rest That Changes Everything
After the ice bath, let the pan sit uncovered in the fridge for five minutes before wrapping. Trapping steam too early creates condensation that drips back onto the surface, marring the glossy finish. Those five minutes evaporate surface moisture so when you cover with foil, it stays pristine. This is the difference between bakery-case pretty and homemade ho-hum.
Crust Insurance Policy
Brush the baked crust with a thin layer of beaten egg white while it's still hot. The protein seals the surface, creating a moisture barrier that keeps the base crisp for days. Return it to the oven for two minutes to set the glaze, then cool before adding filling. It's like Scotchgard for desserts.
Creative Twists and Variations
This recipe is a playground. Here are some of my favorite ways to switch things up:
Salted Caramel Swirl
Dollop three tablespoons of thick caramel sauce on top after pouring in the batter. Drag a toothpick through to create marbled galaxies. Sprinkle with flaky sea salt before baking; the sweet-salty combo tastes like boardwalk taffy evolved into haute cuisine.
Berry Mosaic
Freeze raspberries or blueberries first so they don't bleed. Dot them across the surface, pressing lightly so they're half-submerged like colorful icebergs. The cold fruit lowers local temperature, creating pockets of extra-creamy filling around each berry.
Mocha Buzz
Dissolve two teaspoons of instant espresso powder in the vanilla paste. The coffee amplifies chocolate notes without turning it into a coffee dessert—it's more like a whispered secret than a shout.
Pumpkin Patch (October Exclusive)
Replace sour cream with an equal amount of canned pumpkin and add a teaspoon of pumpkin pie spice. Reduce vanilla to half a teaspoon so the warm spices shine. These taste like sweater weather and football weekends.
Coconut Cloud
Swap the shortbread for a macaroon crust: press sweetened shredded coconut mixed with egg whites and sugar into the pan. Toast the top edges until they bronze like Hawaiian beaches. The tropical perfume will transport you to an island vacation even if you're in a studio apartment in February.
Midnight Oreo
Fold crushed chocolate sandwich cookies into the batter for cookies-and-cream vibes. Reserve some larger pieces to scatter on top so they stay visible after baking. Kids will declare you a superhero; adults will sneak pieces when they think no one's looking.
Storing and Bringing It Back to Life
Fridge Storage
Once fully chilled, lift the slab out using the parchment sling and cut into portions. Layer in an airtight container with parchment between rows; they'll keep five days refrigerated without drying or absorbing fridge odors. If the edges firm up too much, let a square sit at room temp for ten minutes before serving—cream cheese relaxes and the texture returns to silk.
Freezer Friendly
Flash-freeze individual squares on a tray until rock solid, then transfer to a zip-top bag with all air pressed out. They'll keep two months without flavor loss. Thaw overnight in the fridge or at room temp for forty-five minutes. For an emergency dessert, microwave on 30% power for fifteen seconds; it warms just enough to feel fresh-baked without turning rubbery.
Best Reheating Method
While these are designed to be served cold, sometimes you want that fresh-from-the-oven experience. Warm a square in a 275°F oven for six minutes; the crust regains its snap and the filling turns molten at the edges while staying cool in the center. Add a scoop of vanilla ice cream and you've got a dessert that straddles the line between cheesecake and lava cake.