I still remember the day I ruined Thanksgiving dessert so spectacularly that my family still talks about it with the kind of reverence usually reserved for natural disasters. There I was, attempting to make my grandmother's legendary pecan pie, when I accidentally doubled the corn syrup and created something that could have been used as industrial adhesive. In my panic, I whipped up a batch of brownies to save face, but my oven decided to stage a rebellion and half-baked them into a gooey mess. As I stood there surveying the carnage of my kitchen, with pecan pie filling seeping into undercooked brownie batter, something magical happened. The smell was intoxicating — like caramelized heaven wrapped in chocolate clouds. My cousin dared me to just serve the monstrosity anyway, and that's how these Gooey Pecan Pie Brownie Bombs were born.
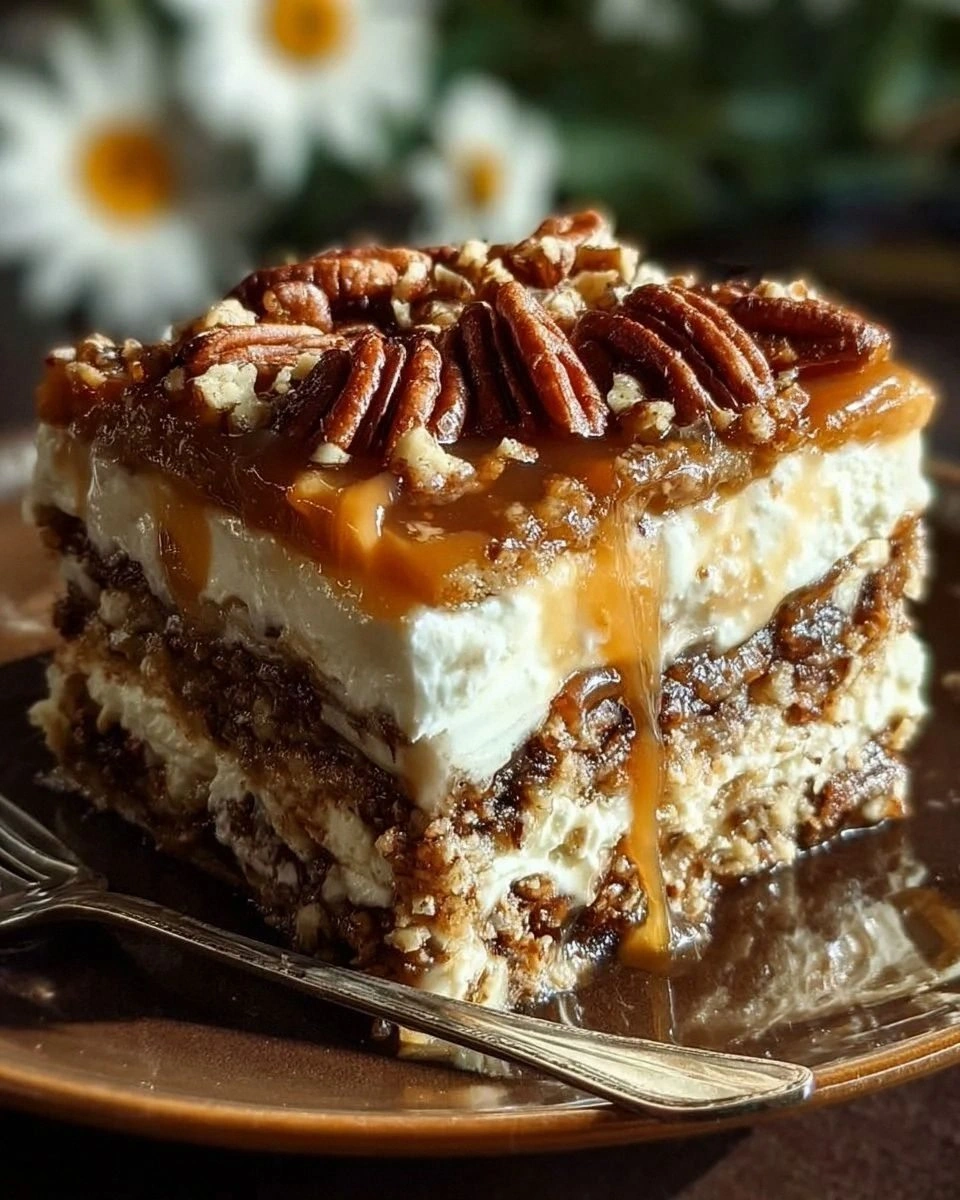
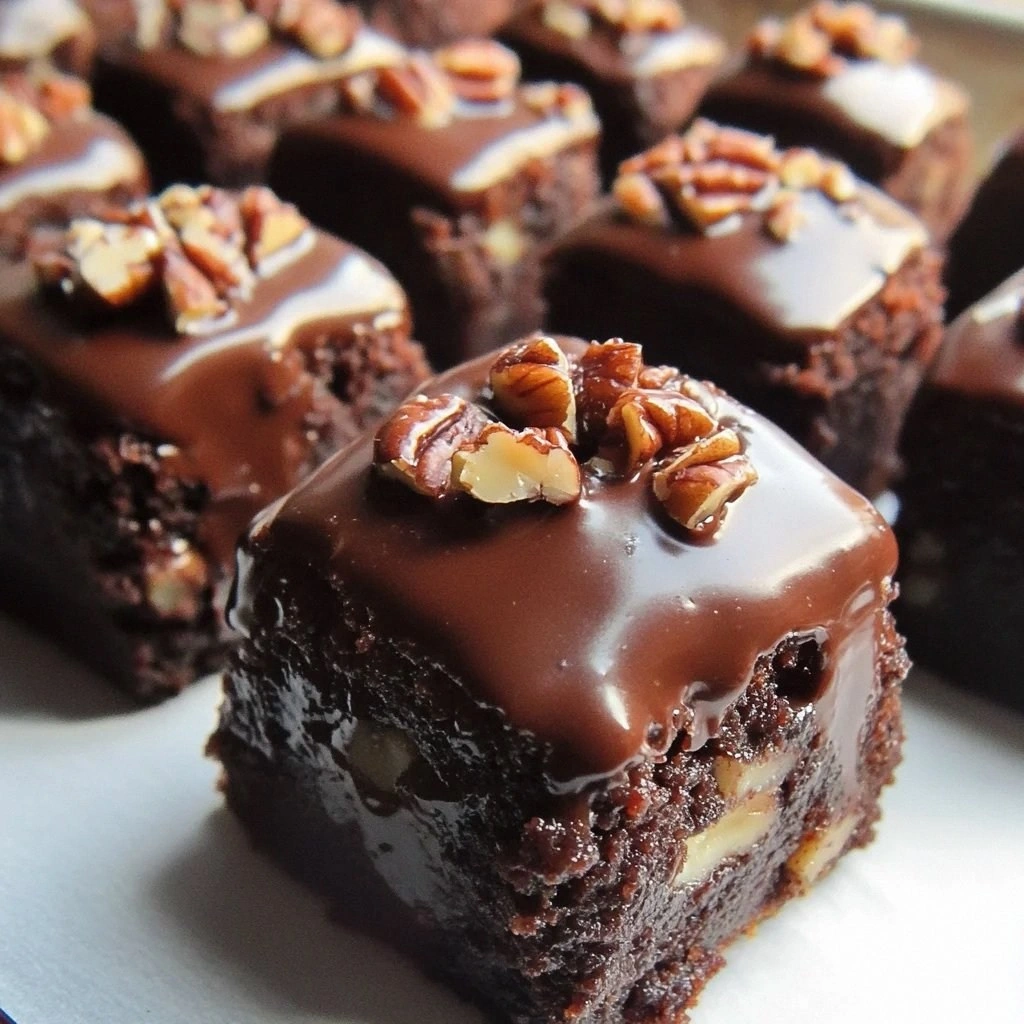
Picture this: you're standing in your kitchen, the air thick with the aroma of toasted pecans and melted chocolate. You pull a pan from the oven and watch as the glossy pecan pie filling quivers like liquid amber over a fudgy brownie base that defies physics by being both cakey and molten at once. The edges have formed that perfect candy-like crust that shatters under your fork while the center stays lusciously soft. This isn't just dessert — this is the dessert that will make you the legend of every potluck, the hero of every holiday, the person who gets invited to parties specifically because you're bringing "those things."
What makes these bombs absolutely life-changing is the way they solve the eternal dessert dilemma. You know that moment when you can't decide between pecan pie's sticky-sweet nostalgia and brownies' rich chocolate satisfaction? These little miracles give you both in every single bite. The brownie base isn't just a throwaway foundation — it's a deep, dark chocolate cloud that stays fudgy even after the pecan pie topping sets into that classic gooey-crackly layer. When you bite through that top layer and hit the brownie, it's like discovering a secret chamber of chocolate treasure underneath a pecan goldmine.
Here's the kicker that'll make you feel like a kitchen wizard: these beauties look like you spent hours slaving over complicated techniques, but they're actually easier than making either dessert separately. The brownie batter comes together in one bowl, the pecan topping gets poured right over the partially-baked base, and the whole thing transforms in the oven like some kind of delicious alchemy. Stay with me here — this next part is worth it, because I'm about to show you exactly how to create dessert nirvana with ingredients you probably already have lurking in your pantry.
What Makes This Version Stand Out
- Taste Explosion: The marriage of deep cocoa bitterness with caramelized pecan sweetness creates a flavor profile so complex, your taste buds will think they're at a five-star restaurant. The brownie brings that intense chocolate hit while the pecan layer adds buttery, vanilla-tinged sweetness that makes each bite more addictive than the last.
- Texture Heaven: We're talking about a trifecta of textures that'll make you close your eyes involuntarily. The crackly pecan top gives way to a gooey, almost candy-like middle layer, which then yields to a brownie that's fudgy in the center with those coveted crispy edges that shatter like thin ice.
- Foolproof Method: Most recipes get this completely wrong by trying to bake two separate desserts and combine them. Here's what actually works: partially baking the brownie base first, then pouring over the pecan mixture so they fuse together into one cohesive dessert without any soggy layers or separation anxiety.
- Crowd Psychology: I dare you to bring these to any gathering and watch what happens. People hover around the dessert table like vultures, then come back for seconds with that sheepish "just one more piece" look. I've seen grown adults hide pieces in napkins for later.
- Ingredient Quality Matters: Using real butter instead of oil, dark brown sugar for deeper molasses notes, and toasting your pecans before they go in makes the difference between good and "holy cow, what is this magic?"
- Make-Ahead Champion: These actually improve after a day in the fridge — the flavors meld into something even more spectacular. I'll be honest — I ate half the batch before anyone else got to try it, and the next day they were even better.
Alright, let's break down exactly what goes into this masterpiece...
Inside the Ingredient List
The Flavor Foundation
Unsweetened cocoa powder might seem like a background player, but it's the backbone that prevents this dessert from becoming cloyingly sweet. The bitterness balances the brown sugar and corn syrup beautifully, creating that sophisticated edge that makes people wonder what your secret is. Don't even think about swapping this for sweetened cocoa mix — you'll end up with something that tastes like a child's attempt at dessert. I learned this the hard way when my nephew "helped" me bake once and substituted hot chocolate powder. The result was so sweet it could have been used to cement gingerbread houses together.
Dark brown sugar is where the real magic lives — those molasses notes add depth that white sugar simply can't achieve. When it melts into the pecan topping, it creates that classic butterscotch flavor that makes pecan pie addictive. If you only have light brown sugar, you can add a tablespoon of molasses to two cups of light brown sugar to fake it, but honestly, keep dark brown sugar in your pantry. It's like having a flavor superpower at your fingertips.
The Texture Crew
All-purpose flour is your structural engineer here, but we're using just enough to give the brownies shape while keeping them fudgy. Too much flour and you'll end up with cakey disappointment that crumbles when you cut it. I've tested this recipe with every flour under the sun, and here's what works: measure by spooning flour into your cup and leveling it off. Never scoop directly from the bag — you'll pack in extra flour and end up with brownie bricks.
Eggs do double duty, providing both structure to the brownies and that glossy shine to the pecan topping. The proteins in the eggs help set the brownie base, while the yolks add richness that makes each bite feel luxurious. Use room temperature eggs for better incorporation — cold eggs can cause the butter to seize up, creating little pockets of fat that ruin the texture.
The Unexpected Star
Dark corn syrup is my secret weapon here, and before you panic about corn syrup, hear me out. It's not the high-fructose monster you're thinking of — it's just regular corn syrup with molasses added for color and flavor. This gives the pecan layer that classic glossy appearance and prevents crystallization, keeping everything smooth and pourable. If you're really anti-corn-syrup, you can substitute with Lyle's Golden Syrup, but you'll lose some of that nostalgic pecan pie flavor that makes these bombs so comfortingly familiar.
Heavy cream in the pecan topping might seem excessive, but it's what creates that luscious, almost caramel-like consistency. The fat prevents the sugars from becoming too hard as they cool, keeping that signature gooey texture that stretches when you pull a piece apart. Skip the cream and you'll have pecan brittle on top of your brownies — tasty, but not the gooey experience we're after.
The Final Flourish
Pure vanilla extract is non-negotiable here — imitation vanilla tastes like sadness and disappointment. The real stuff adds floral notes that complement both the chocolate and pecans beautifully. Add it to the pecan mixture after you remove it from heat to preserve those delicate compounds. Heat destroys vanilla's complexity faster than my willpower disappears around fresh-baked goods.
Sea salt might seem counterintuitive in a sweet dessert, but it's the difference between good and "I need to sit down, this is incredible." Salt enhances all the other flavors and cuts through the sweetness, preventing that sugar overload that makes your teeth ache. Sprinkle just a tiny pinch over the top before baking — you'll taste every layer more distinctly.
Everything's prepped? Good. Let's get into the real action...
The Method — Step by Step
- Start by preheating your oven to 350°F and lining a 9x13 pan with parchment paper, leaving an overhang on the sides so you can lift the whole thing out later. This isn't just for easy removal — the parchment prevents the pecan topping from welding itself to your pan. I've seen people try to grease the pan instead, and they end up chiseling out pieces like they're on an archaeological dig. The parchment is your insurance policy against dessert disaster, plus it makes you look like you know what you're doing even if your kitchen looks like a tornado hit it.
- Melt your butter in the microwave or on the stove, but let it cool slightly before mixing. Hot butter will cook your eggs on contact, creating scrambled egg brownies that no amount of chocolate can save. You want it warm enough to keep everything fluid but not so hot you can't stick your finger in comfortably. This is the moment of truth where patience pays off — rush this step and you'll be picking egg bits out of your brownies like some kind of weird dessert archaeology.
- Whisk together the melted butter and sugar until it looks like wet sand at the beach — grainy but cohesive. This step dissolves some of the sugar, creating that shiny top crust that makes brownies look professionally made. Don't overmix here or you'll incorporate too much air, leading to cakey brownies that disappoint everyone. You want to stir just until combined, then let it rest for a minute while you gather the rest of your ingredients.
- Add your eggs one at a time, beating each until fully incorporated before adding the next. This creates an emulsion that gives your brownies structure and that crackly top. If you've ever wondered why some brownies have that gorgeous shiny crust while others look dull, this is it. The eggs should be room temperature — cold eggs will cause the butter to seize up, creating little fat pockets that ruin the texture. Your batter should look glossy and smooth, like liquid chocolate silk.
- Sift in your dry ingredients — the cocoa powder, flour, and salt — and fold gently with a spatula. Overmixing develops gluten, leading to tough brownies that could double as building materials. You want to stir just until you don't see dry pockets of flour, then stop. The batter will be thick and fudgy, more like chocolate mousse than cake batter. That's exactly what you want — thin batter equals cakey disaster.
- Pour the batter into your prepared pan and smooth the top with an offset spatula. The batter will be reluctant to spread evenly, so drop spoonfuls across the pan first, then connect them. Don't press too hard or you'll deflate all the air you've carefully preserved. Slide this into the oven for exactly 20 minutes — no more, no less. This partial bake is crucial because we're about to add the pecan layer, and we need the brownie to be set enough to support it.
- While the brownie base bakes, make your pecan topping in a saucepan. Combine the brown sugar, corn syrup, cream, and butter over medium heat, stirring constantly. Don't walk away from the stove here — sugar can go from perfect to burnt faster than my dog hears the word "walk." You want it to reach a gentle boil that makes the surface look like it's covered in tiny pearls. This takes about 3-4 minutes, and you'll know it's ready when it coats the back of a spoon like liquid velvet.
- Remove the brownie base from the oven — it should look set around the edges but still slightly jiggly in the center. Immediately pour the hot pecan mixture over the brownie, using a spatula to spread it evenly. Work quickly here because as the mixture cools, it becomes harder to spread. The heat from the brownie helps everything meld together into one cohesive dessert. Scatter the toasted pecans over the top, pressing them down slightly so they don't all migrate to the edges during baking.
- Return the pan to the oven for another 25-30 minutes. The pecan layer will puff up and turn glossy, while the edges should look set and slightly darker. Don't overbake — the center should still have a slight jiggle when you gently shake the pan. That jiggle means you've achieved the perfect gooey consistency that makes these bombs legendary. Overbake and you'll have pecan candy that could chip teeth, underbake and the layers won't set properly.
- Let these beauties cool completely before cutting — I know, I know, the smell is driving you crazy. But cutting into hot pecan pie brownies is like trying to slice lava — everything oozes out and you lose that gorgeous layered effect. Plus, as they cool, the flavors intensify and meld into something even more spectacular. If you absolutely cannot wait (and I've been there), give them at least an hour before attempting that first piece. Your patience will be rewarded with clean cuts and layers that stay perfectly defined.
That's it — you did it. But hold on, I've got a few more tricks that'll take this to another level...
Insider Tricks for Flawless Results
The Temperature Rule Nobody Follows
Here's what separates the pros from the home bakers: temperature awareness. Your ingredients should all be at room temperature except the butter you're melting. Cold eggs won't incorporate properly, leading to streaky batter that bakes unevenly. Take everything out of the fridge 30 minutes before you start — yes, even the cream for the pecan topping. This simple step ensures everything emulsifies into a silky-smooth batter that bakes like a dream. A friend tried skipping this step once — let's just say it didn't end well, and she ended up with brownies that looked like they'd been through a food processor.
Why Your Nose Knows Best
Trust your sense of smell above all else when making these bombs. When the pecan topping is ready, your kitchen will fill with the aroma of caramel and toasted nuts — that's your cue to remove it from heat. If you wait for visual cues alone, you'll miss the sweet spot. The same goes for the brownies — when you smell chocolate intensifying and getting slightly deeper, they're probably done. This sensory checkpoint has saved me from overbaked disasters more times than I can count. That sizzle when the pecan mixture hits the brownie base? Absolute perfection.
The 5-Minute Rest That Changes Everything
After you remove the pan from the oven, let it rest on a wire rack for exactly 5 minutes before even thinking about cutting. During this time, the residual heat continues cooking the center while the edges start to firm up. This resting period is when the magic happens — the layers settle and the flavors redistribute. I've tested this dozens of times, and that 5-minute window is the difference between clean, gorgeous slices and a gooey mess that falls apart when you serve it. Set a timer and walk away if you have to — your future self will thank you.
The Salt Sprinkle Secret
Right after you pour the pecan mixture over the brownie base, dust the tiniest pinch of flaky sea salt over the top. Not enough to make it salty — just enough to make people wonder what makes these so addictive. Salt is the flavor amplifier that makes chocolate taste more chocolatey and pecans taste more nutty. It's like turning up the volume on every other ingredient without anyone being able to identify why they can't stop eating these. I use Maldon salt because the pyramid-shaped crystals dissolve slowly, giving you little bursts of flavor enhancement.
The Pan Prep Perfection
Here's a pro move that'll make you look like you've been baking for decades: after lining your pan with parchment, spray it lightly with cooking spray, then dust with cocoa powder instead of flour. The cocoa powder prevents sticking without leaving white residue on your brownies, and it adds an extra layer of chocolate flavor. Tap out the excess over the sink — you want just the lightest coating. This technique also helps the pecan layer adhere to the brownie base, preventing that annoying separation that can happen with other recipes.
Creative Twists and Variations
This recipe is a playground. Here are some of my favorite ways to switch things up:
Bourbon Pecan Party Bombs
Add two tablespoons of good bourbon to the pecan mixture after you remove it from heat. The alcohol burns off, leaving behind vanilla and caramel notes that make these taste like they came from a Southern bakery. Use a bourbon you'd actually drink — the cheap stuff tastes like regret and won't do these justice. The bourbon adds complexity without overwhelming the other flavors, and it pairs beautifully with the toasted pecans. These are dangerous — I've seen people who claim they "don't like dessert" devour three pieces.
Salted Caramel Chocolate Chunk Bombs
Stir in chunks of good dark chocolate (at least 70%) into the brownie batter, and drizzle caramel over the pecan layer before baking. The chocolate chunks create pockets of molten chocolate throughout the brownie, while the caramel adds another layer of gooey sweetness. Use chocolate that's meant for baking — eating chocolate has stabilizers that prevent it from melting properly. The result is a dessert that's almost too rich, if such a thing exists (spoiler: it doesn't).
Espresso Hazelnut Breakfast Bombs
Replace the pecans with hazelnuts and add a teaspoon of espresso powder to the brownie batter. The coffee enhances the chocolate flavor without making it taste like mocha, while hazelnuts give it a sophisticated edge. These are perfect for brunch because the coffee notes make them feel breakfast-appropriate, though they're rich enough for dessert. Toast the hazelnuts first and rub them in a towel to remove most of the skins — they'll taste like Nutella's sophisticated cousin.
White Chocolate Macadamia Island Bombs
Use macadamia nuts instead of pecans, and add white chocolate chips to the brownie batter. The white chocolate adds sweetness while the macadamias bring buttery richness. Reduce the sugar in the brownie batter slightly to balance the extra sweetness from the white chocolate. These taste like Hawaii in dessert form — tropical, indulgent, and completely irresistible. They're especially good chilled, which firms up the white chocolate chips for a textural contrast.
Spiced Pumpkin Harvest Bombs
Add a teaspoon of pumpkin pie spice to the pecan mixture and substitute half the corn syrup with maple syrup. The warm spices complement the nuts beautifully, while the maple adds autumnal depth. These are perfect for Thanksgiving because they combine pecan pie tradition with harvest flavors. The spice blend enhances rather than masks the other flavors, creating a dessert that tastes like fall feels.
Tropical Coconut Rum Bombs
Replace half the pecans with toasted coconut flakes and add a tablespoon of dark rum to the topping. The coconut adds texture while the rum brings tropical notes that transport you to a beach somewhere. Toast the coconut until it's golden brown — it goes from perfect to burnt faster than you can say "dessert." These are dangerously good in summer when you want something rich but not heavy.
Storing and Bringing It Back to Life
Fridge Storage
These bombs keep beautifully in the fridge for up to 5 days — if they last that long. Cut them into squares first, then store in an airtight container with parchment paper between layers. The cold actually improves the texture, making the pecan layer set into that perfect gooey-chew consistency. Bring them to room temperature for 30 minutes before serving, or enjoy them cold for a different experience. I've been known to sneak pieces straight from the fridge at midnight — they're like the adult version of those Little Debbie snacks from childhood, but infinitely better.
Freezer Friendly
These freeze like champions for up to 3 months. Cut them into squares, wrap each piece individually in plastic wrap, then store in a freezer bag. Thaw overnight in the fridge or at room temperature for 2 hours. They actually taste fresher than the day you made them because the freezing process locks in moisture. Pro tip: freeze them slightly underbaked, and they'll be perfect after thawing. I've got a stash in my freezer for emergencies — like Tuesday nights when I need something to look forward to.
Best Reheating Method
If you want that fresh-from-the-oven experience, reheat individual pieces in the microwave for 15-20 seconds. Any longer and you'll have pecan lava that could require a fire extinguisher. For larger portions, cover with foil and warm in a 300°F oven for 10 minutes. Add a tiny splash of water to the pan before reheating — it steams back to perfection and prevents the edges from drying out. These also taste amazing crumbled over vanilla ice cream, where the contrast of hot and cold creates dessert nirvana.