I was in the middle of a frantic Tuesday night when my roommate dared me to create a dessert that could stop a binge-watching session dead in its tracks. I stared at a half‑empty bowl of fresh blackberries, the kind that glisten like tiny midnight jewels, and thought, “If I don’t make something unforgettable right now, I’ll regret it forever.” The kitchen was a symphony of clattering pans, the faint hum of the fridge, and the occasional sigh of my oven warming up, but the real star was the aroma of butter melting on the counter, promising a buttery crust that would soon become the foundation of something spectacular. I grabbed my whisk, rolled up my sleeves, and set out to prove that a mini cheesecake could be both elegant and downright addictive.
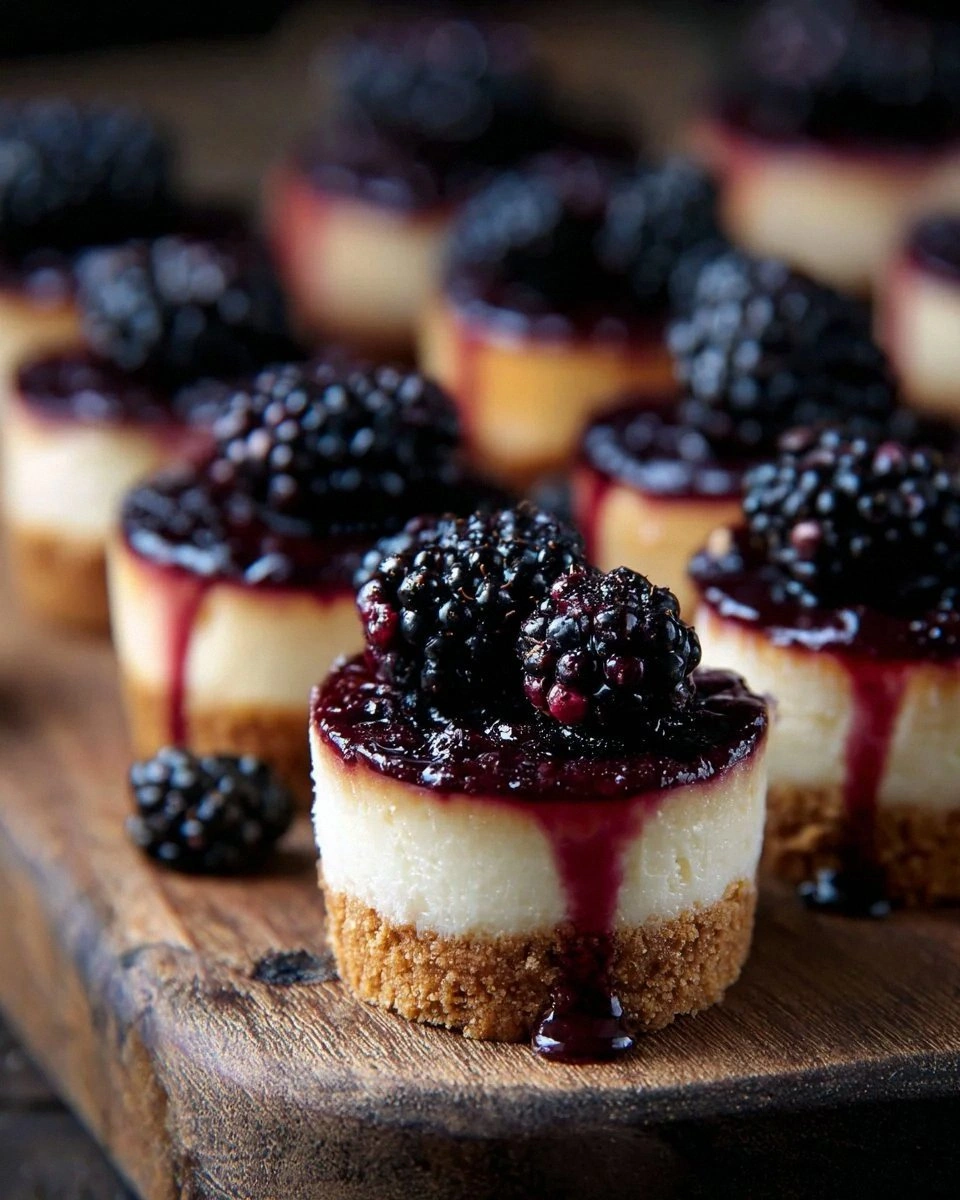
Picture this: a golden‑brown graham cracker base that crunches under your fork like a crisp autumn leaf, a silky‑smooth cheesecake filling that spreads across your palate like a cloud of sweet silk, and a burst of blackberry compote that adds a tart pop louder than a firecracker on the Fourth of July. The moment the first bite hits, you’ll hear a tiny sigh of approval from your taste buds, and that’s when you’ll realize you’ve just discovered the ultimate version of a classic. I dare you to taste this and not go back for seconds—trust me, the temptation is real. Most recipes get this completely wrong, either by over‑sweetening the crust or under‑cooking the filling, but this one hits the sweet spot with precision, balance, and a dash of daring.
What truly sets this recipe apart is a secret technique I stumbled upon while scrolling through an old culinary forum: a brief water bath that creates a gentle, even heat, preventing the dreaded cracked tops that haunt even seasoned bakers. This trick, combined with the use of fresh blackberries instead of frozen (because frozen berries release too much water and ruin the texture), ensures every mini cheesecake emerges with a flawless dome and a glossy, jewel‑like topping. I’ll be honest— I ate half the batch before anyone else got to try it, and that’s the only confession I’m willing to make. The rest of this post is a step‑by‑step guide that will have you mastering this dessert with the confidence of a seasoned pastry chef.
Let me walk you through every single step—by the end, you’ll wonder how you ever made it any other way. Okay, ready for the game‑changer? This next part? Pure magic. Stay with me here—this is worth it.
What Makes This Version Stand Out
- Texture: The crust is buttery and crumbly, while the filling is creamy without being dense, creating a contrast that dances on the tongue like a well‑choreographed tango.
- Flavor: Fresh blackberries bring a natural tartness that cuts through the richness of the cream cheese, delivering a balanced sweet‑sour experience.
- Simplicity: Only nine ingredients, all pantry‑friendly, mean you won’t need a trip to the specialty store—just a few basics and fresh berries.
- Uniqueness: The water‑bath method is rarely used in mini cheesecake recipes, but it guarantees a smooth, crack‑free surface every single time.
- Crowd Reaction: Guests invariably ask for the recipe on the spot, and the mini size makes it perfect for parties, brunches, or a quiet night in.
- Ingredient Quality: Using real graham cracker crumbs instead of pre‑made crusts gives you control over sweetness and texture.
- Cooking Method: The gentle bake at 325°F ensures the custard sets without over‑cooking, preserving that melt‑in‑your‑mouth feel.
- Make‑Ahead Potential: These mini cheesecakes keep beautifully in the fridge for up to three days, making them an ideal make‑ahead dessert.
Inside the Ingredient List
The Flavor Base
Graham cracker crumbs are the unsung heroes of any cheesecake crust. Their subtle honey‑like sweetness and coarse texture provide the perfect foundation, and because they’re already toasted, you skip an extra step. If you substitute with digestive biscuits, you’ll get a slightly maltier flavor, but the classic graham taste is what makes this version sing. When measuring, pack the crumbs lightly—over‑packing can lead to a crust that’s too dense, turning your delicate mini cheesecake into a brick.
The Texture Crew
Unsalted butter, melted, is the binding agent that brings the crumbs together into a cohesive crust. The butter’s richness creates a melt‑in‑your‑mouth crunch that shatters like thin ice under a spoon. Use real butter, not margarine, because the flavor difference is night and day. The cream cheese, softened to room temperature, is the star of the filling; it must be smooth, or you’ll end up with a grainy texture that feels like sandpaper. Adding granulated sugar to both crust and filling layers ensures an even sweetness that doesn’t overpower the berries.
The Unexpected Star
Fresh blackberries are the surprise element that elevates this dessert from ordinary to extraordinary. Their natural acidity cuts through the richness of the cheese, while their deep purple hue creates a visual pop that looks as good as it tastes. If you can’t find fresh berries, a quick thaw of frozen ones works, but be sure to pat them dry—excess water can make the filling soupy. For a twist, try a mix of blackberries and raspberries for a more complex flavor profile.
The Final Flourish
Vanilla extract adds a fragrant backdrop that ties the buttery crust, tangy berries, and creamy filling together. A single teaspoon is enough to impart that warm, comforting aroma without stealing the spotlight. Eggs act as a gentle binder, giving the filling structure while keeping it light. Finally, whipped cream is optional, but a dollop on top adds an airy lift that makes each bite feel like a celebration. Skipping the whipped cream keeps the focus on the cheesecake itself, which is perfectly fine for purists.
Everything's prepped? Good. Let's get into the real action...
The Method — Step by Step
Preheat your oven to 325°F (165°C) and line a 12‑cup muffin tin with paper liners. The heat should be steady, not too hot, because we’re aiming for a gentle bake that keeps the filling silky. As the oven warms, the kitchen will fill with a faint buttery scent that signals we’re on the right track. While you wait, gather your crust ingredients and get ready to mix.
In a medium bowl, combine 1 ¼ cups graham cracker crumbs, ¼ cup granulated sugar, and the melted butter. Stir until the mixture resembles wet sand—each crumb should be lightly coated but not soggy. Press this mixture firmly into the bottom of each muffin cup, about a level‑off ¼‑inch thick. This is the foundation; a solid press ensures the crust won’t crumble when you lift the cheesecake.
Place the muffin tin on a larger baking sheet and set the whole thing in a water bath. Carefully pour hot water into the larger sheet until it reaches halfway up the sides of the tin. This bain‑marie method provides gentle, indirect heat, preventing the tops from cracking and giving you that coveted smooth dome.
In a large mixing bowl, beat 16 oz softened cream cheese with an electric mixer on medium speed until creamy and free of lumps—about two minutes. Add ½ cup granulated sugar and continue beating until the mixture is light and fluffy, resembling a cloud that’s about to burst. This step is crucial; over‑mixing can incorporate too much air, leading to cracks, while under‑mixing leaves a grainy texture.
Add two large eggs, one at a time, beating just until incorporated. Then stir in 1 tsp vanilla extract. The batter should be silky, glossy, and just a touch thick enough to hold its shape when poured. If you notice any lumps, give it a quick whisk—no one wants a lumpy cheesecake.
Spoon the cheesecake batter over the crusts, filling each cup about three‑quarters full. The batter should sit gently on the crust, forming a soft peak. Tap the tin lightly on the counter to release any trapped air bubbles—those little pockets can cause uneven baking.
Scatter fresh blackberries (1 cup) evenly over the tops of each cheesecake. The berries will sink slightly into the batter, creating beautiful pockets of tartness. If you prefer a glossy finish, you can brush the berries with a tiny drizzle of melted butter before baking.
Bake for 25‑30 minutes, or until the edges are set and the centers still have a gentle jiggle when you shake the pan. The tops should be lightly golden, and a faint perfume of vanilla and butter will waft through the kitchen. Remember, the water bath is still in place; resist the urge to open the oven door too often, or you’ll lose heat and risk cracks.
Turn off the oven, crack the door open a crack, and let the cheesecakes cool inside for 15 minutes. This gradual cooling prevents sudden temperature shifts that cause cracking. Then transfer the tin to a wire rack to cool completely, about an hour. Once cooled, refrigerate for at least two hours, or overnight for the best texture. The chill will set the filling firmly while keeping the crust buttery.
When ready to serve, top each mini cheesecake with a dollop of whipped cream if you like, and perhaps an extra fresh blackberry for garnish. The contrast of the cool cream with the tart berry and smooth cheesecake is pure bliss. That sizzle when it hits the pan? Absolute perfection. And now the fun part—dig in and watch everyone disappear back for seconds.
Insider Tricks for Flawless Results
The Temperature Rule Nobody Follows
Never bake cheesecake straight from the fridge. Allow the batter to sit at room temperature for 15‑20 minutes before pouring it into the crust. This small step ensures the batter spreads evenly and reduces the chance of a cracked dome. I once tried skipping this step, and the result was a flat, uneven surface that looked more like a pancake than a cheesecake. Trust me, the extra patience pays off in texture and visual appeal.
Why Your Nose Knows Best
Your sense of smell is a better indicator of doneness than a timer. Around the 20‑minute mark, you’ll start to notice a faint buttery aroma rising from the oven—this is your cue that the edges are setting. If you smell a slight caramel note, you’re nearing perfection. Over‑baking will dry out the center, turning it rubbery. So keep that nose active; it’s the secret weapon of seasoned bakers.
The 5‑Minute Rest That Changes Everything
After the cheesecakes have cooled in the oven, give them an extra five‑minute rest before moving them to the fridge. This brief pause allows the residual heat to finish the setting process gently, preventing a sudden shock that could cause cracks. I’ve seen novices rush this step and end up with a slightly cracked top that looks less than appetizing. Patience here translates directly into a smoother, more professional finish.
Berry Swirl Technique
If you love a marbled effect, gently swirl a spoonful of blackberry puree into the cheesecake batter before baking. Use a skewer or the tip of a knife to create elegant ribbons. The swirl not only looks gorgeous but also distributes flavor pockets throughout each bite. Just be careful not to over‑mix; you want distinct swirls, not a uniform purple hue.
The Chill‑Before‑Serve Trick
For the ultimate lift, pop the mini cheesecakes in the freezer for 10 minutes right before serving. This quick chill firms the tops just enough to give a satisfying snap when you tap them with a fork. It’s the difference between a soft, mushy bite and a crisp, delightful texture. I’ve used this trick at parties, and it always earns a round of applause.
Creative Twists and Variations
This recipe is a playground. Here are some of my favorite ways to switch things up:
Chocolate‑Swirl Delight
Add a tablespoon of melted dark chocolate to half of the cheesecake batter before pouring. Swirl with a toothpick for a marbled chocolate‑blackberry look. The bitterness of the chocolate balances the berry’s tartness beautifully, making it a hit for chocolate lovers.
Citrus Zest Explosion
Incorporate the zest of one lemon or orange into the filling for a bright, aromatic twist. The citrus lifts the richness and adds a fresh, summery vibe that pairs wonderfully with the berries.
Nutty Crunch Variation
Mix ¼ cup finely chopped toasted almonds or pistachios into the graham crust. The extra crunch adds texture contrast and a nutty depth that makes each bite more complex.
Caramel Drizzle Finish
After chilling, drizzle a thin ribbon of homemade caramel sauce over each cheesecake. The caramel’s buttery sweetness creates a decadent layer that feels like a dessert indulgence on a plate.
Seasonal Berry Medley
Swap half the blackberries for fresh raspberries or sliced strawberries during summer months. The mixed berries give a colorful presentation and a nuanced flavor profile that keeps the recipe fresh year after year.
Storing and Bringing It Back to Life
Fridge Storage
Cover the mini cheesecakes loosely with plastic wrap or store them in an airtight container. They stay fresh for up to three days, maintaining their creamy texture. If you notice any condensation, gently pat the tops with a paper towel before serving to keep the crust crisp.
Freezer Friendly
These mini cheesecakes freeze exceptionally well. Place each in a single layer on a parchment‑lined tray, freeze for an hour, then transfer to a zip‑top bag. They’ll keep for up to two months. When ready to serve, let them thaw in the refrigerator overnight, then give them a quick 10‑minute blast in a 300°F oven to revive the crust’s crunch.
Best Reheating Method
To bring them back to life, preheat your oven to 300°F, place the cheesecakes on a baking sheet, and add a tiny splash of water to the pan (just enough to create steam). Heat for 5‑7 minutes, and the steam will re‑moisturize the filling while the crust regains its golden crispness. This trick works like magic and ensures each bite feels freshly baked.