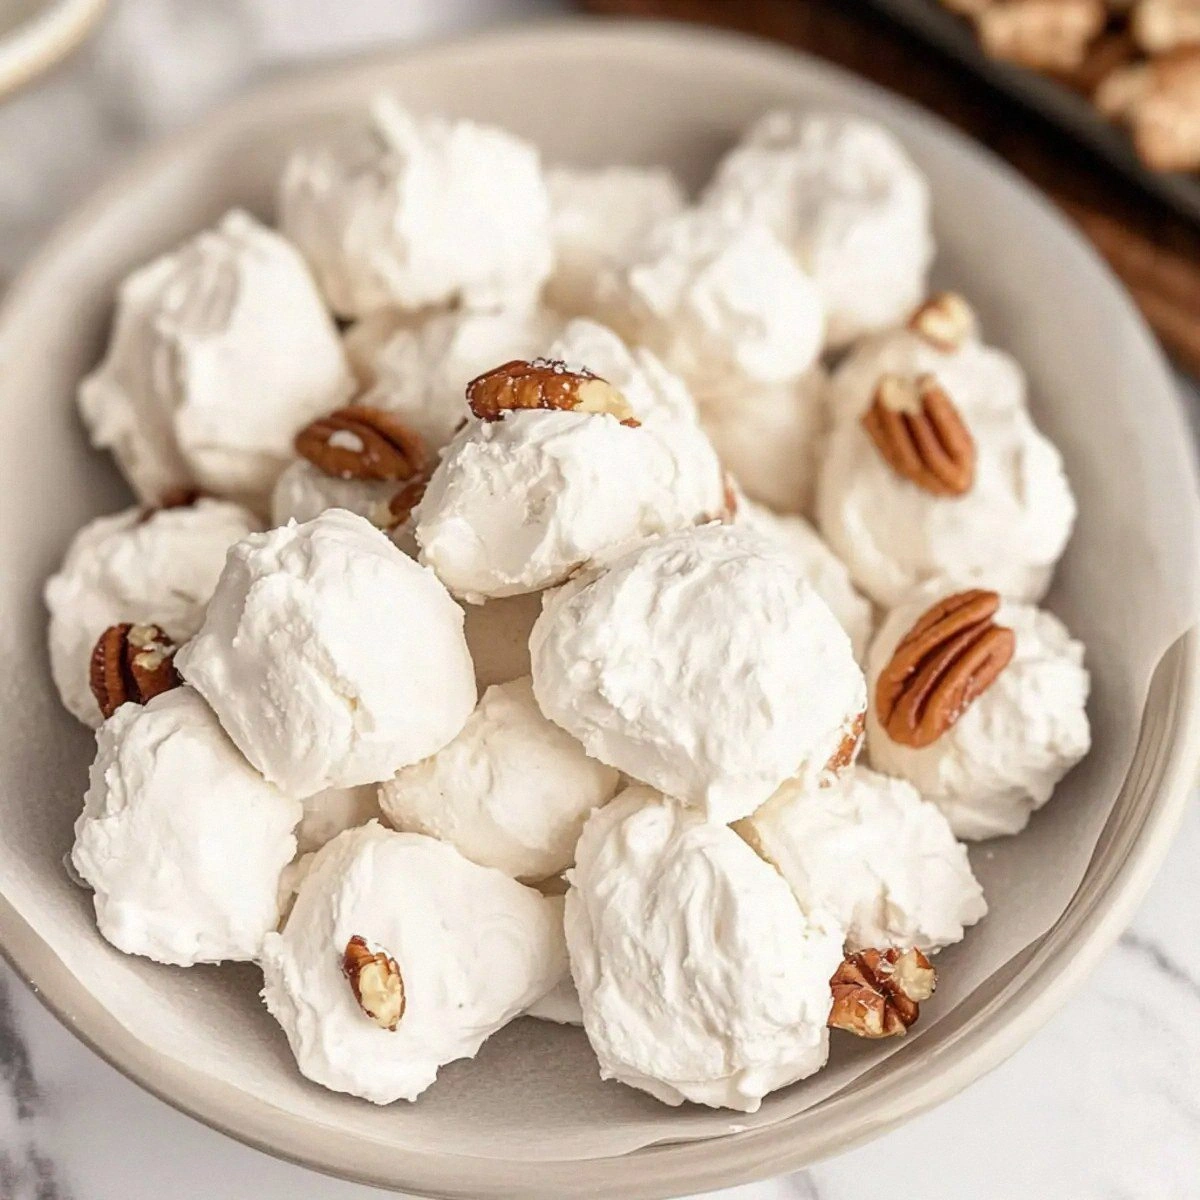
I was standing in my kitchen, half‑asleep, when my roommate dared me to make the most “divine” candy she’d ever tasted. She’d just finished a marathon of Southern cooking shows and claimed the classic divinity she’d seen was a myth—soft, airy, and impossibly sweet, like a cloud that had been kissed by sugar. I laughed, grabbed a whisk, and set the stage for a kitchen showdown that would end with a bowl of fluffy, melt‑in‑your‑mouth candy and a very satisfied ego. The moment the sugar, corn syrup, and water met the pan, a low hiss rose like a chorus of tiny fireworks, and I knew we were on the right track.
The air filled with a buttery, caramel‑sweet perfume that seemed to hug every corner of the house, making the old wooden floorboards creak in approval. My hands felt the heat of the stove, the pan’s surface slick with syrup, and the rubber spatula’s cool grip, while the sound of the sugar crystals dissolving was a gentle, reassuring fizz. When the egg whites hit the hot mixture, they swirled and rose like a sunrise over a Southern plain, and the pecans toasted in the background, releasing a nutty perfume that made my mouth water before the first bite. The texture was a paradox: airy enough to melt on the tongue, yet sturdy enough to hold its shape when you pick it up—like biting into a sweet, edible cloud.
What makes this version stand out isn’t just the flawless texture; it’s the confidence that comes from finally cracking the code that most recipes get wrong. Most divinity recipes either over‑cook the sugar, leaving you with a brittle, glassy mess, or under‑cook it, resulting in a gummy, never‑rising confection. I’ve tweaked the temperature, the timing, and the folding technique until the mixture behaves like a dream—soft, glossy, and ready to be folded into a perfect meringue without collapsing. The secret ingredient? A pinch of salt that amplifies the sweetness and a splash of vanilla that adds depth without overpowering the delicate flavor.
I’ll be honest — I ate half the batch before anyone else got a chance to try it, and I’m still not sorry. I dare you to taste this and not go back for seconds, because once you’ve experienced the melt‑in‑your‑mouth magic, ordinary candy will feel like a cheap imitation. Picture yourself pulling this out of the pan, the whole kitchen smelling like a Southern bakery on a lazy Sunday, and the first bite releasing a burst of caramelized sugar that melts like silk. Okay, ready for the game‑changer? Let me walk you through every single step — by the end, you’ll wonder how you ever made it any other way.
What Makes This Version Stand Out
- Texture: The candy achieves a cloud‑like lightness while still holding together, thanks to precise temperature control and a gentle folding technique that traps air without deflating the meringue.
- Flavor Balance: A subtle hint of vanilla and a quarter‑teaspoon of salt amplify the caramel notes, making the sweetness feel sophisticated rather than cloying.
- Simplicity: Only seven pantry staples are needed, and each step is broken down so even a novice can nail the perfect divinity on the first try.
- Ingredient Quality: Using light corn syrup prevents crystallization, while fresh, chopped pecans add a buttery crunch that contrasts the airy base.
- Crowd Reaction: This candy has a habit of disappearing within minutes at gatherings—people swear it’s “addictive” and “the best thing they’ve ever tasted.”
- Make‑Ahead Potential: Properly stored, it stays fresh for up to two weeks, and a quick reheating revives the original melt‑in‑your‑mouth texture.
- Versatility: The base can be tweaked with different nuts, extracts, or even a splash of bourbon for a grown‑up twist without compromising the core structure.
- Time Efficiency: The entire process takes under an hour, with most of the time spent waiting for the syrup to reach the perfect stage—no endless stirring required.
Inside the Ingredient List
The Flavor Base
Granulated sugar is the backbone of any candy, providing the sweet foundation and the structure once it caramelizes. In this recipe, the two cups of sugar dissolve completely, creating a syrup that can hold air when the egg whites are folded in. Skipping sugar or using a low‑quality brand will result in a bland, crumbly candy that never achieves that glossy sheen. If you’re looking for a lower‑glycemic option, you can substitute half of the sugar with a natural sweetener like erythritol, but expect a slightly different texture.
The Sweet Syrup Crew
Light corn syrup is the unsung hero that stops sugar crystals from forming, keeping the mixture smooth and glossy. One cup is enough to give the candy its characteristic shine and prevent the dreaded grainy texture that ruins the experience. Water acts as the medium that helps the sugar dissolve evenly; too much water will lengthen the cooking time, while too little can cause scorching. If corn syrup is unavailable, you can replace it with an equal amount of glucose syrup or even honey, though the flavor will shift toward a floral note.
The Unexpected Star
A quarter‑teaspoon of salt may seem trivial, but it’s a flavor amplifier that cuts through the sweetness, making each bite feel balanced. Without the salt, the candy can taste one‑dimensional, like a sugar rush without depth. This tiny amount also helps the egg whites stabilize during the folding process, ensuring the meringue holds its airy structure. If you’re on a low‑sodium diet, you can reduce it to a pinch, but don’t eliminate it entirely.
The Final Flourish
Egg whites are the magical element that turns a hot syrup into a fluffy confection. Two large egg whites, beaten to stiff peaks, create a glossy foam that, when folded into the syrup, expands and sets into a cloud‑like candy. If you’re allergic to eggs, aquafaba (the liquid from a can of chickpeas) can be used as a vegan alternative—three tablespoons of aquafaba mimic one egg white, but you’ll need a bit more patience to reach stiff peaks. The chopped pecans add a buttery crunch that contrasts the soft interior, and the vanilla extract provides a fragrant backdrop that ties the whole flavor profile together.
Everything's prepped? Good. Let’s get into the real action…
The Method — Step by Step
In a heavy‑bottomed saucepan, combine the granulated sugar, water, and light corn syrup. Place the pan over medium‑high heat and stir gently until the sugar dissolves; you’ll hear a faint sizzle that tells you the mixture is alive. Once dissolved, stop stirring and let the syrup come to a boil. Attach a candy thermometer to the side of the pan, making sure it doesn’t touch the bottom, and watch the temperature climb. When it reaches 240°F (the soft‑ball stage), you’ll notice the syrup turning a deep amber and the edges of the pan start to pull away—this is the moment of pure magic.
Kitchen Hack: If you don’t have a thermometer, dip a cold spoon into the syrup; when a thin thread forms and holds its shape, you’re at the right stage.While the syrup is heating, separate the egg whites from the yolks, placing the whites in a clean, dry mixing bowl. Using a hand mixer on medium speed, whisk the whites until they become frothy, then add a pinch of cream of tartar (optional) to stabilize them. Increase the speed to high and continue whisking until soft peaks form—this should take about two minutes. At this point, the mixture should look glossy but still be loose enough to fold into the hot syrup without breaking.
When the syrup hits 240°F, immediately remove the pan from heat and let it sit for ten seconds to settle. Then, with the mixer still running on low, slowly pour the hot syrup into the egg whites in a thin, steady stream. The key is to pour gradually; rushing this step can cause the meringue to collapse. As the syrup integrates, you’ll hear a faint “whoosh” and see the mixture turn a glossy, caramel‑gold hue. Keep mixing on low for another minute, then crank the speed up to high for another two minutes until the mixture becomes thick, glossy, and holds stiff peaks.
Watch Out: If the syrup is hotter than 250°F, the mixture can become grainy; always stay within the 240°F‑245°F window.Now comes the fun part: gently fold in the chopped pecans and vanilla extract using a rubber spatula. Scrape the bottom of the bowl to ensure every nut is coated. The aroma of toasted pecans will rise, and the vanilla will add a warm, fragrant undertone. Fold just enough to incorporate—over‑mixing will deflate the airy structure you’ve worked so hard to create.
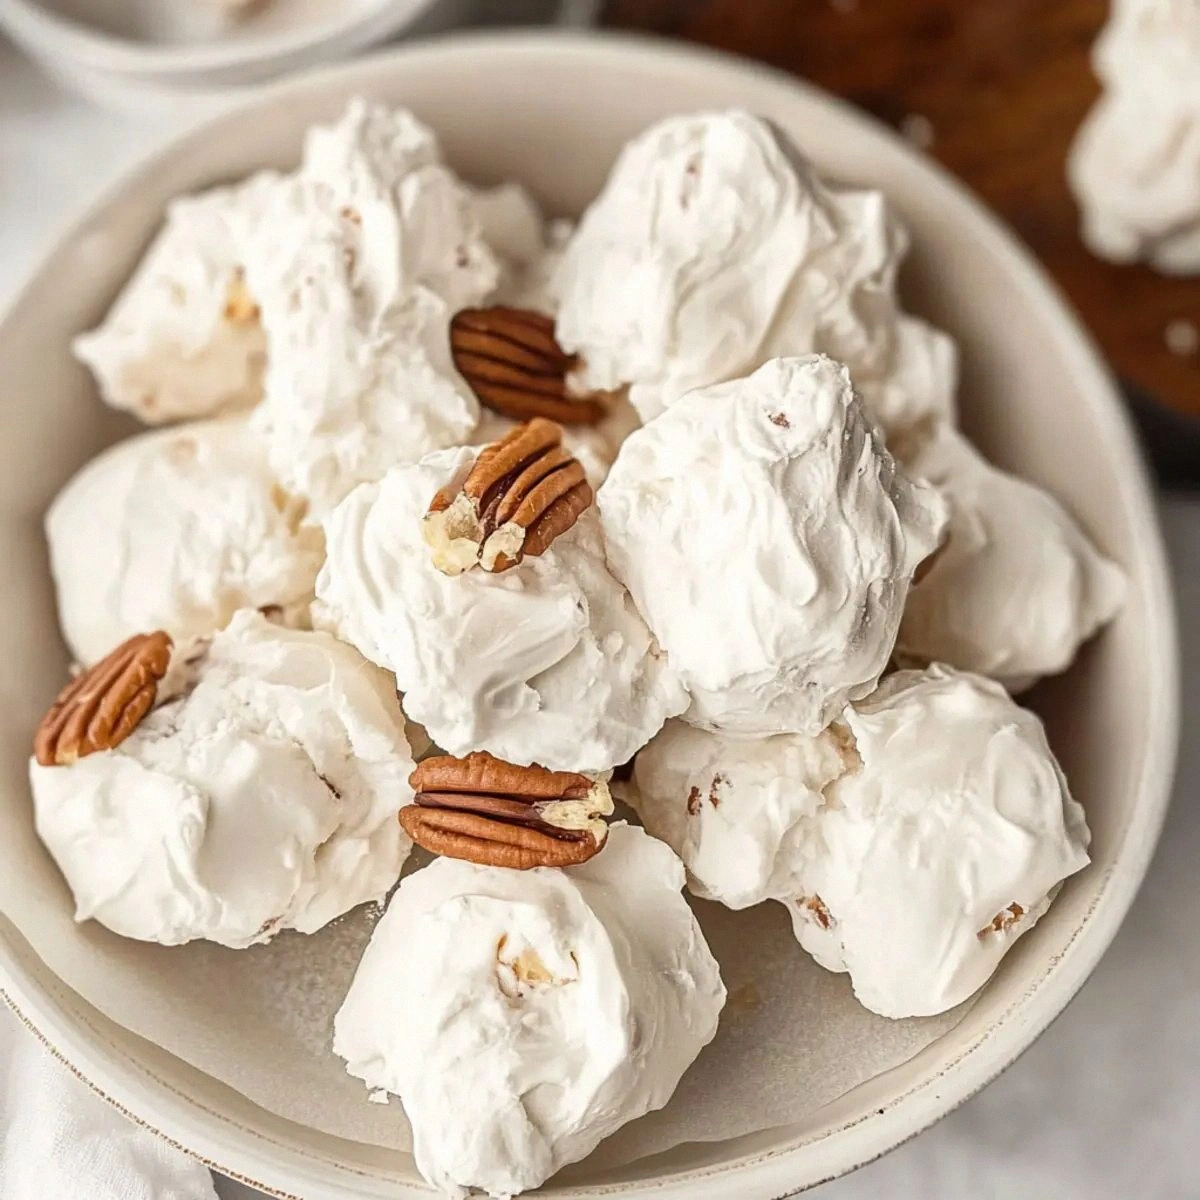
Line a large baking sheet with parchment paper or a silicone mat. Using a spoon or a small ice‑cream scoop, drop dollops of the candy onto the prepared sheet, spacing them about an inch apart. The candy will spread slightly as it cools, forming a soft, irregular shape reminiscent of tiny clouds. If you prefer uniform pieces, use a piping bag fitted with a wide tip to pipe consistent circles.
Allow the divinity to cool at room temperature for 30‑45 minutes. You’ll notice the edges firm up while the center remains slightly pliable—this is the perfect texture. Resist the urge to refrigerate; the cold will cause the candy to harden too quickly, losing its melt‑in‑your‑mouth quality.
Once fully set, gently lift the candies with a thin spatula. They should lift cleanly without sticking, and a slight crack should form when you press the edge—think of it as the candy’s way of saying “I’m ready.” Transfer them to an airtight container, layering parchment between layers to prevent sticking.
That’s it — you did it. But hold on, I’ve got a few more tricks that’ll take this to another level. First, if you want an extra glossy finish, drizzle a thin ribbon of melted white chocolate over the top while the candy is still slightly warm. Second, a pinch of sea salt on each piece just before it sets adds a sophisticated contrast that will make your guests gasp. And finally, store the candy in a cool, dark place; heat and humidity are the arch‑enemies of this delicate confection.
Insider Tricks for Flawless Results
The Temperature Rule Nobody Follows
Never guess the syrup stage—use a candy thermometer and aim for exactly 240°F. This temperature creates the soft‑ball stage that yields a glossy, stable base capable of trapping air. I once tried to eyeball the stage and ended up with a crunchy, glassy candy that shattered like thin ice. Trust the thermometer, and you’ll get that perfect melt‑in‑your‑mouth texture every single time.
Why Your Nose Knows Best
Your sense of smell is an underrated gauge for candy readiness. When the syrup reaches the soft‑ball stage, it releases a caramel‑rich aroma that fills the kitchen. If you smell a burnt note, you’ve gone too far. A light, buttery scent means you’re right on the money, and the final product will have that delicate balance of sweet and nutty.
The 5‑Minute Rest That Changes Everything
After folding the pecans and vanilla, let the mixture sit for five minutes before spooning it onto the sheet. This short rest allows the air bubbles to stabilize, preventing sudden collapse when you transfer the candy. I once skipped this pause and ended up with a flat, dense batch that lacked the signature lift. Those five minutes are a tiny investment for a massive payoff.
Cool‑Down Zone Strategy
Set your cooling rack near a window with a gentle breeze, but not direct sunlight. A subtle airflow helps the candy set evenly, while direct sun can cause the surface to harden too fast, leading to cracks. My first attempt was on a kitchen counter under a bright lamp, and the candy developed a strange, uneven texture. The cool‑down zone trick eliminates that problem.
The Final Glaze Surprise
For an extra wow factor, melt a handful of white chocolate and drizzle it over the candies while they’re still slightly warm. The chocolate hardens into a thin, crackly shell that adds a contrasting texture without overwhelming the delicate flavor. I tried this at a family reunion, and the kids declared it “the best candy ever.” Trust me, this tiny addition turns good into unforgettable.
Creative Twists and Variations
This recipe is a playground. Here are some of my favorite ways to switch things up:
Chocolate‑Swirl Divinity
Add 2 tablespoons of melted dark chocolate to the batter just before folding in the pecans. The chocolate ribbons create a visual contrast and a subtle bitterness that balances the sweetness. Chocolate lovers will swoon, and the swirl looks impressive on a dessert platter.
Coconut‑Kissed Cloud
Replace half of the chopped pecans with toasted shredded coconut. The coconut adds a tropical aroma and a chewy bite that pairs beautifully with the airy base. This version is perfect for summer picnics or beachside gatherings.
Spiced Autumn Delight
Stir in a pinch of ground cinnamon, nutmeg, and a dash of pumpkin spice into the syrup before it reaches 240°F. The warm spices turn the candy into a cozy, fall‑ready treat that pairs wonderfully with hot apple cider.
Bourbon‑Infused Southern Charm
Add a tablespoon of good bourbon to the mixture after the syrup is removed from heat, before folding in the egg whites. The bourbon adds a subtle depth and a faint caramel note that evokes classic Southern hospitality.
Nut‑Free Sunshine
Swap the pecans for toasted sunflower seeds or pumpkin seeds for a nut‑free version. The seeds retain their crunch and bring a slightly earthy flavor that still complements the sweet base. Great for guests with nut allergies.
Storing and Bringing It Back to Life
Fridge Storage
Place the candies in an airtight container with parchment sheets separating each layer. Store in the refrigerator for up to two weeks. The cool environment keeps the candy from becoming sticky, but remember to bring them to room temperature before serving for that melt‑in‑your‑mouth feel.
Freezer Friendly
Divinity freezes beautifully. Lay the pieces on a baking sheet, freeze until solid (about 1 hour), then transfer to a zip‑top bag. They’ll keep for up to three months. When you’re ready to enjoy them, let them thaw at room temperature for 15 minutes, and they’ll regain their original texture.
Best Reheating Method
If the candy has hardened too much, place a single piece on a microwave‑safe plate, add a tiny splash of water (about 1 teaspoon), and heat for 5‑7 seconds. The steam will revive the candy’s softness without melting it completely. This trick works wonders for reviving that airy melt‑in‑your‑mouth sensation.