Picture this: I’m standing in a cramped kitchen, a handful of chicken breasts in one hand and a shaker of spices in the other, when the smoke alarm decides to join the party. I’ve tried a dozen blackened recipes, but every time I’ve ended up with a dry, flavorless mess that even my cat refused to touch. That night, after a particularly disastrous batch that left my countertop looking like a battlefield, I swore to find the holy grail of quick blackening. I was determined to create a dish that would sing, that would leave my guests begging for the recipe, and that would fit into a 20‑minute window.
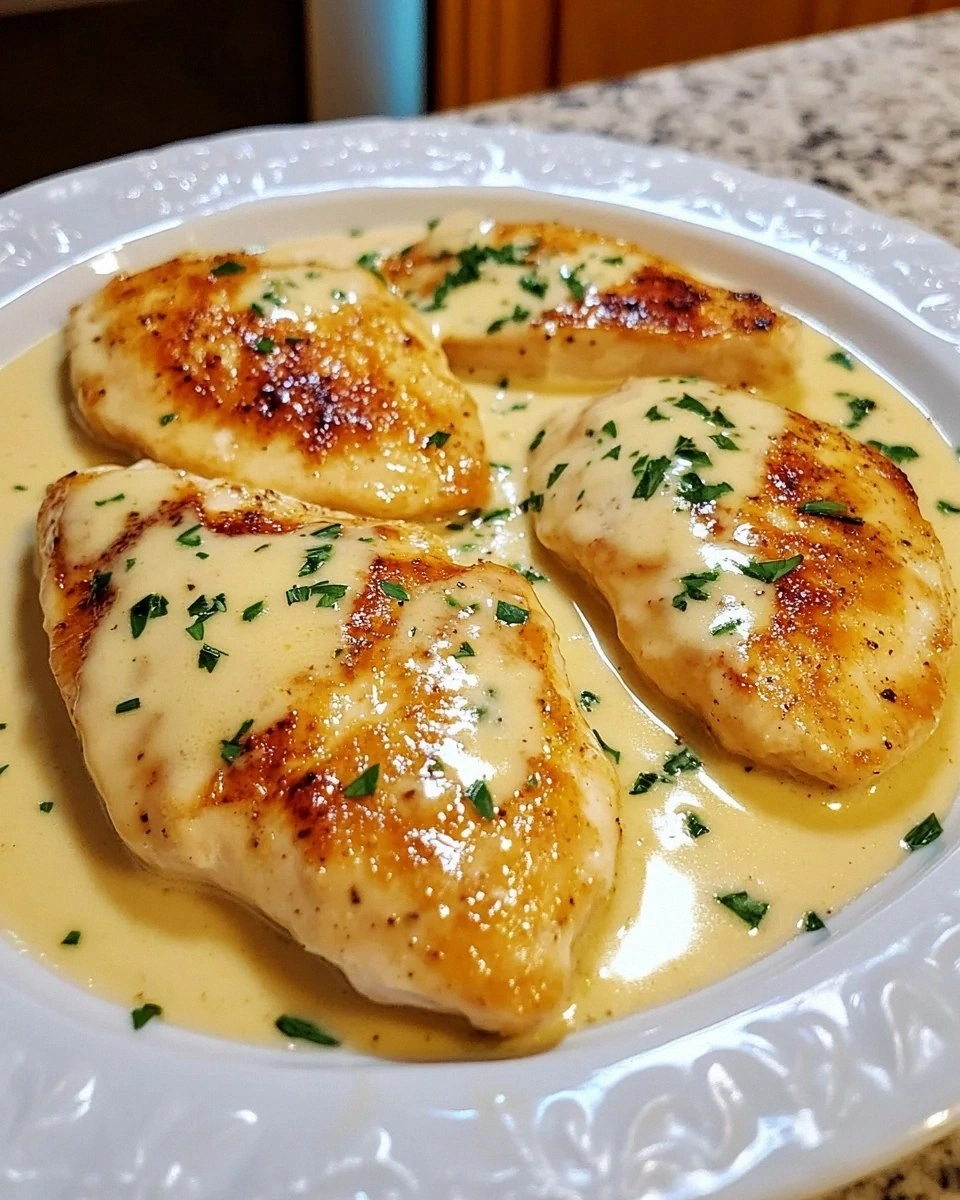
When I finally cracked the code, the result was nothing short of culinary fireworks. The chicken came out with a crust that crackled like a campfire on a brisk evening, while the interior remained moist and tender as a cloud. The aroma that filled the kitchen was a heady mix of paprika, cayenne, and thyme, with a subtle hint of garlic that made my nose do a happy dance. The first bite was a punch of smoky heat balanced by a gentle sweetness from the onions, and the texture—crispy on the outside, juicy on the inside—was a revelation. I dared you to taste this and not go back for seconds, and I’ve seen my friends and family do just that.
I’m not going to lie—my initial attempts were full of trial and error. I learned that the key to a perfect blacken is in the seasoning blend and the searing technique. The moment the chicken hits the pan, the spices form a caramelized crust that locks in juices. And the best part? You don’t need a fancy cast‑iron skillet; a regular stainless‑steel pan works just fine if you heat it properly. This is hands down the best version you'll ever make at home, and it’s so simple you’ll wonder why you ever used anything else.
Picture yourself pulling this out of the pan, the whole kitchen smelling incredible, and knowing that the only thing you’ll need to do is plate it up and serve. I’ll be honest—I ate half the batch before anyone else got to try it. The rest of the story is in the next section, where I’ll walk you through every single step—by the end, you’ll wonder how you ever made it any other way.
What Makes This Version Stand Out
- Flavor: The blend of paprika, cayenne, and thyme creates a complex, smoky profile that cuts through the richness of the chicken. This isn't just seasoning—it's a flavor passport to the Southern United States, condensed into a single dish. The result is a taste that lingers long after the last bite.
- Texture: The high heat sears the surface, forming a crust that’s crunchy yet not burnt. Inside, the chicken remains juicy, thanks to the oil that seals in moisture. The contrast between the crisp exterior and tender interior is a sensory delight.
- Simplicity: No elaborate marinades or lengthy prep times. Just a quick rub and a hot pan. This makes it a go-to for busy weeknights or spontaneous dinner parties.
- Ingredient Quality: Using fresh, high‑quality chicken breasts and real spices elevates the dish. The extra virgin olive oil adds a subtle fruity note that balances the heat.
- Make‑Ahead Potential: The seasoning can be pre‑mixed and stored in a sealed container for up to a week, saving you time on busy days.
- Crowd Reaction: Guests often ask for the recipe after tasting. The dish is a crowd‑pleaser that works with both casual and formal menus.
- Versatility: It pairs beautifully with a range of sides—from creamy mac and cheese to fresh cucumber salad. You can even serve it over rice or quinoa for a wholesome meal.
- Health Conscious: With minimal oil and no added sugars, it’s a lean protein option that still feels indulgent.
Alright, let's break down exactly what goes into this masterpiece. But first, a quick hack that will save you time and frustration.
Before we dive into the ingredient list, let’s take a moment to appreciate how each component contributes to the final masterpiece. Each spice is chosen for its ability to enhance the others, creating a harmonious balance. The paprika provides a smoky sweetness, while the cayenne adds heat without overwhelming. The thyme brings earthiness, and the garlic and onion powders give depth. The olive oil is the binding agent that ensures the spices stick and the chicken stays moist. Together, they form a symphony of flavors that dance on the palate.
Inside the Ingredient List
The Flavor Base
At the heart of this dish is the seasoning blend. Paprika is the star, delivering a sweet, smoky aroma that lingers long after the meal. Cayenne pepper injects a kick of heat that wakes up your taste buds. Dried thyme adds an herbal note that grounds the overall flavor profile. Together, these spices create a complex base that is both comforting and exciting.
The Texture Crew
The olive oil is more than just a cooking medium—it’s the secret to achieving that coveted crust. It creates a barrier that seals in moisture, preventing the chicken from drying out. When heated, the oil helps the spices caramelize, giving the surface that satisfying crunch. A small amount goes a long way, so use just enough to coat the surface lightly.
The Unexpected Star
Garlic and onion powders are the unsung heroes of this recipe. They add a subtle depth that elevates the dish from simple to unforgettable. These powders dissolve into the oil, creating a fragrant base that enhances every bite. If you’re a fan of garlic, you can add a pinch more to intensify the flavor.
The Final Flourish
Black pepper and salt are the finishing touches that bring everything together. Black pepper adds a mild heat that balances the cayenne, while salt enhances the natural flavors of the chicken. They’re the final touch that ensures the dish is perfectly seasoned. Don’t be tempted to skip them; they’re essential for a balanced taste.
Now that you’ve got the ingredients lined up, let’s talk about how to prepare them. Each step is designed to maximize flavor and texture, ensuring that every bite is a triumph.
The Method — Step by Step
- Begin by patting the chicken breasts dry with paper towels. This step is crucial for achieving a crisp crust; moisture will steam the surface instead of searing it. Once dry, let the chicken sit at room temperature for about 10 minutes to ensure even cooking.
- In a small bowl, combine the paprika, cayenne pepper, black pepper, dried thyme, garlic powder, onion powder, and salt. Stir until the spices are evenly distributed. This mixture will form the flavorful crust that defines the dish.
- Coat each chicken breast generously with the spice rub, pressing the mixture onto the surface to ensure it adheres. The coating should be thick enough to stay intact during cooking but not so heavy that it clumps. Let the seasoned chicken rest for 5 minutes to allow the flavors to penetrate.
- Heat a stainless‑steel skillet over high heat until it starts to smoke lightly. Add the olive oil, swirling to coat the bottom of the pan. The oil should shimmer but not burn; this is the sweet spot for searing.
- Place the chicken breasts skin‑side down in the hot pan. You should hear a satisfying sizzle that signals the pan is hot enough. Let them cook undisturbed for 3–4 minutes, allowing the spices to caramelize and form a crust.
- Flip the chicken and cook for another 3–4 minutes on the other side. The internal temperature should reach 165°F (74°C) for safe consumption. The edges will start pulling away from the pan, indicating a good sear.
- Remove the chicken from the skillet and let it rest on a cutting board for 5 minutes. Resting allows the juices to redistribute, ensuring each bite is moist and flavorful. The rest period also lets the crust set, making it easier to slice.
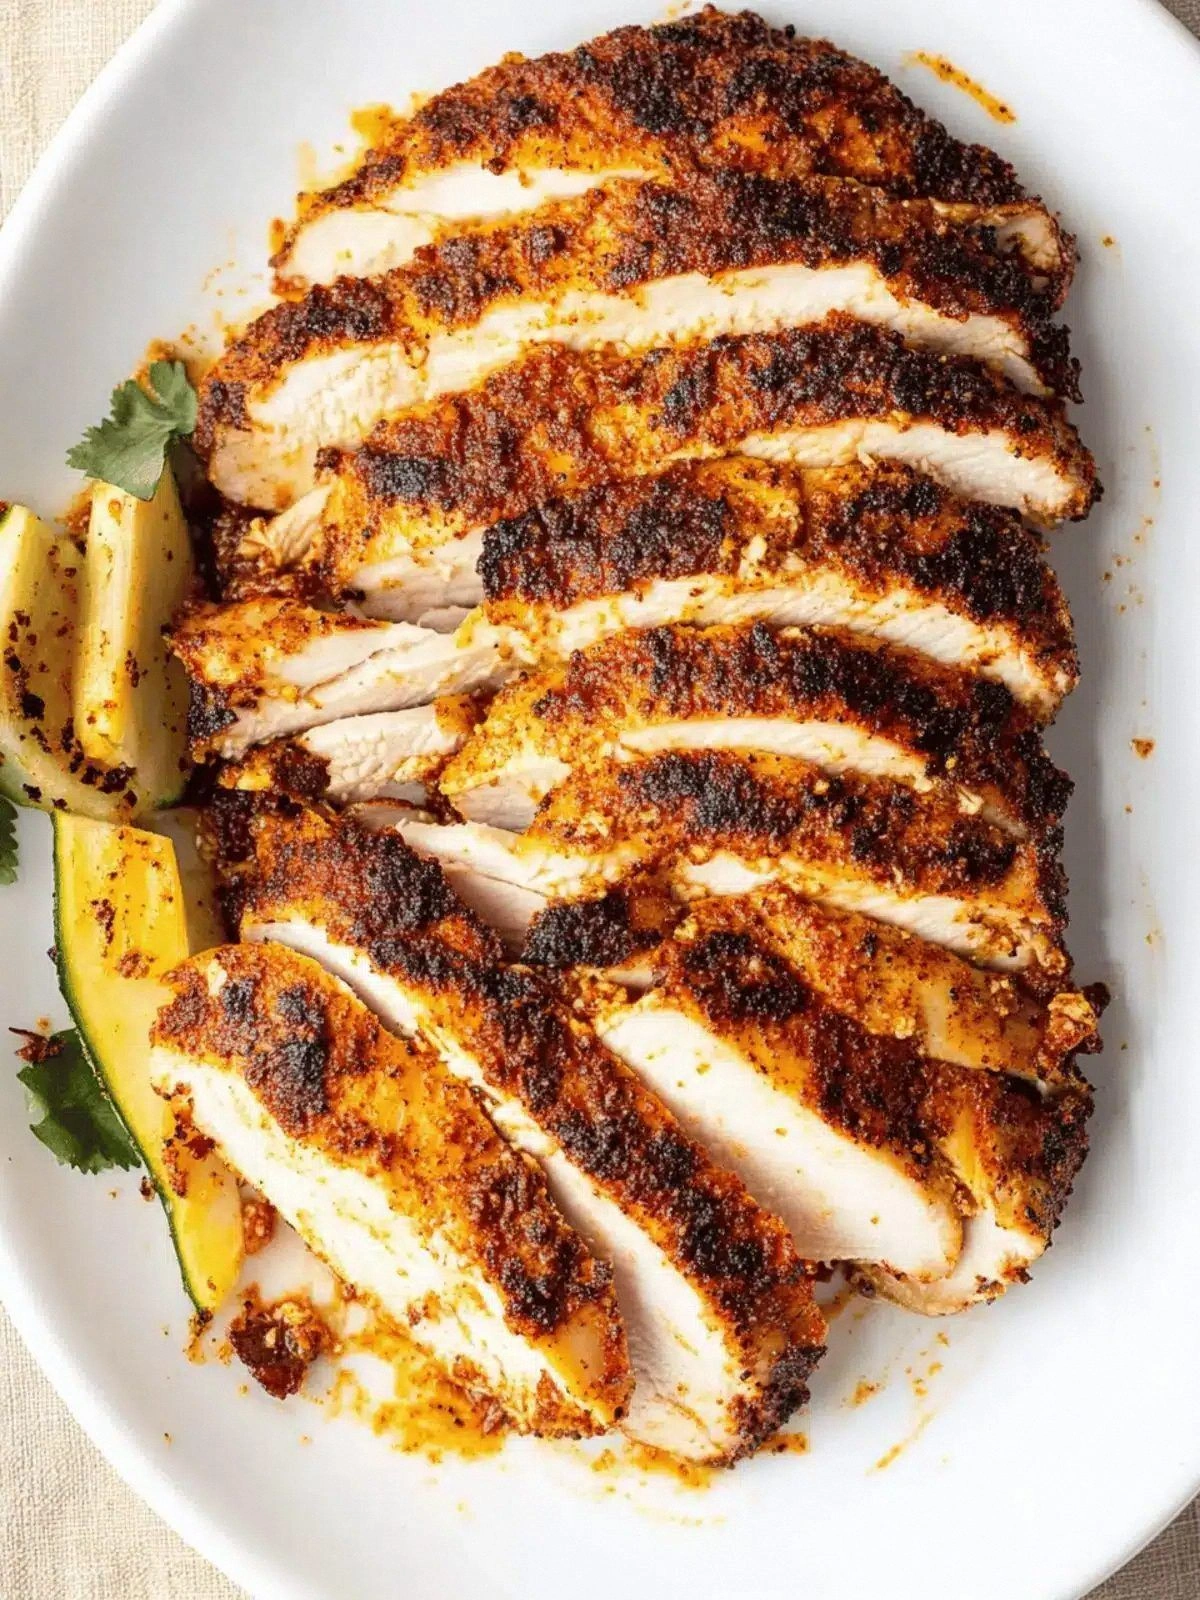
- Slice the rested chicken into strips or bite‑sized pieces, depending on your serving preference. Arrange them on a plate, drizzle any pan juices over the top, and serve immediately. The result is a dish that looks as good as it tastes.
That’s it—you did it. But hold on, I've got a few more tricks that'll take this to another level.
Insider Tricks for Flawless Results
The Temperature Rule Nobody Follows
Many cooks think any high heat will do, but the secret lies in a pan that’s truly hot before the chicken hits it. A temperature of 400°F (204°C) is ideal for a quick blacken. If your stove doesn’t reach that heat, use a cast‑iron skillet that retains heat better.
Why Your Nose Knows Best
Before you even touch the pan, smell the spices. A fragrant aroma is a sign that the spices are fresh and potent. If the smell feels flat, consider buying a new batch or adding a pinch of fresh garlic powder.
The 5‑Minute Rest That Changes Everything
Resting the chicken after searing is not just a courtesy; it’s essential for moisture retention. The juices redistribute, preventing the meat from drying out. A quick rest also lets the crust set, making the chicken easier to slice.
Use a Skillet with a Lid
Covering the skillet for the last minute of cooking locks in heat and helps the interior cook evenly. This is especially useful if you’re cooking thicker pieces. Just remember to remove the lid before the final sear to crisp the exterior.
Keep the Pan Clean
Stuck bits from the spices can burn and impart bitterness. Wipe the pan with a paper towel between batches, or rinse it with hot water if you’re making a large quantity.
Serve with a Fresh Salad
Pairing the blackened chicken with a crisp salad balances the heat and adds a refreshing contrast. A simple lemon vinaigrette or a tangy yogurt sauce works wonders. It also turns the dish into a complete, balanced meal.
With these tricks in your arsenal, you’ll never have to worry about a mediocre blacken again.
Creative Twists and Variations
Southwestern Flair
Swap the thyme for cumin and add a handful of chopped cilantro after cooking. Serve the chicken over a bed of cilantro‑lime rice for a fresh, zesty twist. This version is perfect for a lively family dinner.
Asian‑Inspired Kick
Replace the paprika with a mix of five‑spice powder and a splash of soy sauce during searing. Finish with a drizzle of sesame oil and a sprinkle of sesame seeds. The result is a savory, umami‑rich dish that pairs well with steamed rice.
Mediterranean Twist
Incorporate oregano and a squeeze of lemon juice into the seasoning. After cooking, top the chicken with a dollop of tzatziki or a spoonful of hummus. This variation brings a bright, tangy flavor profile.
Smoky BBQ Fusion
Add a tablespoon of your favorite BBQ sauce to the pan during the last minute of cooking. The sauce caramelizes, creating a sticky, sweet glaze that complements the spice rub. Serve with coleslaw for a classic Southern vibe.
Herb‑Infused Creaminess
After searing, deglaze the pan with a splash of heavy cream and a pinch of fresh rosemary. Let it reduce to a silky sauce that coats the chicken. Pair this with roasted vegetables for a comforting dinner.
Breakfast Bonanza
Slice the chicken into strips and sauté with diced potatoes and bell peppers. Add a dash of paprika for color and serve with a side of scrambled eggs. This makes for a hearty, protein‑rich breakfast that’s far from ordinary.
These variations showcase how versatile a simple blackened chicken can be. Whether you’re craving something spicy, sweet, or savory, there’s a version that will tickle your taste buds.
Storing and Bringing It Back to Life
Fridge Storage
Cool the chicken completely before refrigerating in an airtight container. Store for up to 3 days. When ready to serve, reheat gently in a skillet or microwave to avoid drying out.
Freezer Friendly
Wrap the chicken tightly in plastic wrap and place in a freezer bag. It stays good for up to 2 months. Thaw overnight in the fridge before reheating.
Best Reheating Method
Reheat in a preheated oven at 350°F (177°C) for 10 minutes, or use a skillet over medium heat, adding a splash of water to create steam. This keeps the chicken moist and restores the crisp crust.
Adding a tiny splash of water before reheating steams the chicken back to perfection, preventing it from becoming rubbery.
With these storage tips, you can enjoy this dish anytime, whether it’s a quick weeknight dinner or a leftover treat.
That’s the whole recipe card in one place, complete with a handy serving adjuster. You can now tweak the portion size to feed a crowd or a single person with ease. The checkboxes let you keep track of what you’ve already added to your shopping list. The recipe card’s interactive elements make it a breeze to adapt the dish to any occasion.
With the recipe card ready, you’re fully equipped to bring this dish to life. Whether you’re cooking for a family dinner or a dinner party, the quick blacken will impress everyone. The process is straightforward, the flavors are bold, and the result is a dish that feels both comforting and adventurous. Give it a try, and watch the magic happen.
Remember, the key to a perfect blacken is in the timing, the seasoning, and the rest period. Each step is designed to maximize flavor and texture, ensuring that every bite is a triumph. Enjoy the journey, and let the aroma guide you to a culinary masterpiece that will become a staple in your kitchen.