I was standing in my kitchen, half‑asleep, when a sudden craving for something that could double as a dessert and a post‑workout treat slammed into me like a freight train. I opened the pantry, stared at a lonely pack of Oreo cookies, and thought, “What if I turned these crunchy, chocolate‑kissed wonders into a milkshake that could make a grown‑up cry with joy?” The idea was reckless, the kind of reckless that makes you wonder if you’ve finally lost your mind or discovered a new superpower. I tossed a few cookies into a blender, added ice cream, and the first sip was a revelation: creamy, chocolatey, with that unmistakable snap of Oreo crunch that lingered like a secret lover’s whisper.
The kitchen filled with the sweet perfume of vanilla and chocolate, a scent so intoxicating that even the cat paused mid‑prance to sniff the air. The sound of the blender’s whirr was like a low‑key rave, each spin coaxing the cookies into a silky vortex that promised indulgence. As the mixture thickened, I could feel the anticipation building in my chest, a fluttering that matched the frothy peaks of the homemade whipped cream I was about to crown it with. When the final pour hit the glass, it was a cascade of velvety darkness topped with a cloud of cloud‑soft cream—an Instagram‑ready moment that begged to be shared.
Most Oreo milkshake recipes out there either drown the cookies in endless ice cream or forget the whipped cream entirely, resulting in a drink that feels more like a bland milk‑shake than the decadent treat you deserve. This version, however, respects the cookie’s crunch, balances it with a full‑fat vanilla base, and finishes with a homemade whipped cream that’s as airy as a summer breeze yet rich enough to keep you coming back for more. I dare you to taste this and not go back for seconds; it’s that good. And the secret? A tiny dash of vanilla extract in the whipped cream that adds depth without stealing the spotlight.
Okay, ready for the game‑changer? I’m about to walk you through every single step—by the end, you’ll wonder how you ever made a milkshake any other way. Grab your blender, your favorite glass, and let’s turn those humble Oreos into a masterpiece that will have your friends begging for the recipe.
What Makes This Version Stand Out
- Taste: The marriage of rich vanilla ice cream with the bittersweet cocoa of Oreo cookies creates a flavor symphony that’s both nostalgic and sophisticated.
- Texture: Every sip delivers a velvety smoothness punctuated by tiny cookie crumbs that melt on your tongue, giving you a subtle crunch that’s never overwhelming.
- Simplicity: Only seven core ingredients, all pantry‑friendly, mean you can whip this up in under fifteen minutes without a grocery run.
- Uniqueness: Homemade whipped cream infused with vanilla extract adds a luxurious lift that store‑bought topping simply can’t match.
- Crowd Reaction: Expect gasps, wide‑eyed stares, and the inevitable “Can I have the recipe?” chorus—this shake is a party starter.
- Ingredient Quality: Using full‑fat ice cream and whole milk ensures a buttery mouthfeel that low‑fat alternatives lack.
- Method: A quick blend‑then‑whip technique keeps the process foolproof while delivering professional‑grade results.
- Make‑Ahead Potential: The whipped cream can be prepared a day ahead, letting the flavors meld even deeper.
Inside the Ingredient List
The Flavor Base
Vanilla ice cream is the backbone of this shake, providing a creamy, buttery canvas that lets the Oreo’s chocolate‑cream filling shine. I recommend a brand with at least 12% milk fat; anything less feels watery and loses that luxurious mouthfeel. If you’re dairy‑free, a premium coconut‑based vanilla ice cream can work, but expect a subtle coconut undertone that might compete with the chocolate notes.
The Texture Crew
Milk, whether whole, almond, or oat, adjusts the consistency. Whole milk adds richness, while almond milk offers a lighter profile and a hint of nuttiness. The heavy whipping cream is reserved for the topping, not the shake itself, because its high fat content creates peaks that stay fluffy for minutes after whisking.
The Unexpected Star
Oreo cookies—8 to 10 whole pieces—are the secret weapon. Their cookie‑cream layers dissolve just enough to flavor the liquid while leaving micro‑crunches that surprise the palate. If you love extra creaminess, opt for double‑stuffed Oreos; if you crave a more pronounced crunch, stick with the classic version. Pro tip: lightly crush them before blending; this prevents the blender from over‑working and heating the mixture.
The Final Flourish
A tablespoon of sugar and a teaspoon of vanilla extract are whisked into the heavy cream to sweeten and aromatize the topping. The sugar isn’t strictly necessary if your ice cream is super sweet, but it gives the whipped cream a stable structure and a glossy finish. Chocolate syrup is optional, but a drizzle inside the glass adds a visual swirl and a burst of chocolate that elevates the drink from ordinary to Instagram‑gold.
Everything's prepped? Good. Let's get into the real action...
The Method — Step by Step
-
Gather all your ingredients and place the Oreo cookies on a cutting board. Using a rolling pin, give them a gentle press—just enough to crack them into bite‑size shards. This step ensures the cookies blend evenly without turning the shake into a gritty paste. Tip: If you love extra cookie bits, reserve a handful of larger pieces for the garnish later.
Kitchen Hack: Pop the crushed cookies into a zip‑top bag and use a meat mallet for an even finer crumble without a mess. -
In the blender, combine the vanilla ice cream, whole milk, and the crushed Oreo pieces. Secure the lid tightly—this is the moment of truth. Blend on medium speed for about 30 seconds, then increase to high for another 15 seconds until the mixture is smooth but still has specks of cookie visible. You’ll hear a faint sigh as the blend reaches the perfect thickness, like a velvet curtain being drawn.
-
While the blender works its magic, start the whipped cream. In a chilled mixing bowl, pour the heavy whipping cream, add the sugar and vanilla extract. Using a hand mixer on medium‑high, whip for 2‑3 minutes until soft peaks form. The cream should hold its shape when the whisk is lifted, but still be pliable enough to fold into the shake later.
Watch Out: Over‑whipping turns cream into butter; stop as soon as peaks form. -
Taste the blended shake. If you crave a deeper chocolate note, add a drizzle of chocolate syrup directly into the blender and give it a quick pulse—just enough to swirl, not to fully incorporate. This creates a marbled effect that’s both visual and flavorful, a secret weapon for impressing guests.
-
Now, pour the shake into chilled glasses, leaving about an inch of space at the top for the whipped cream. The glass should be filled to the brim, showcasing the shake’s rich, dark hue. If you’re feeling theatrical, tap the glass gently on the counter to settle any air bubbles; this ensures a smooth surface for the topping.
Kitchen Hack: Use a spoon to create a gentle whirl in the shake before adding the cream; the swirl locks in the chocolate syrup for a marble effect. -
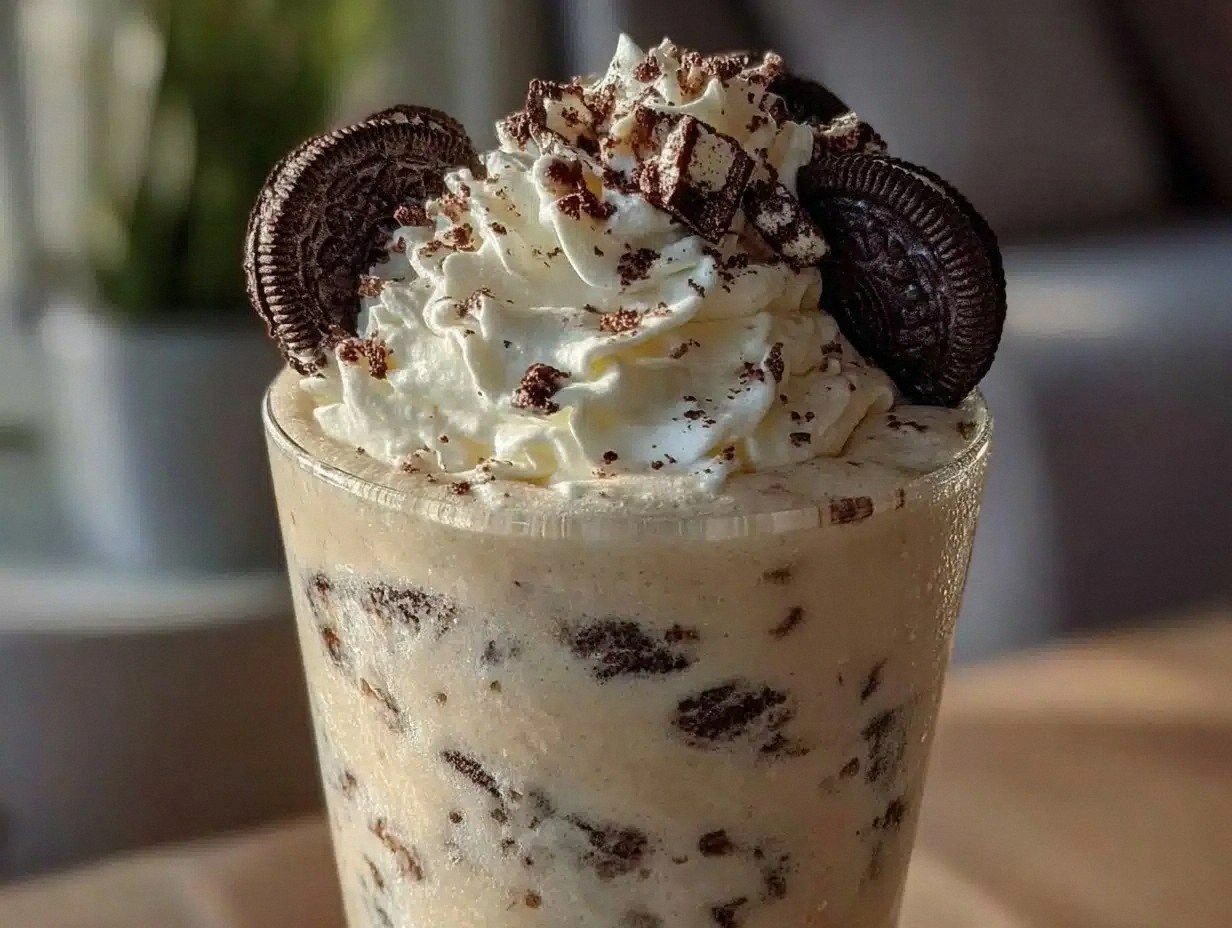
Spoon the freshly whipped cream on top, creating a lofty cloud that looks like a snow‑capped mountain. For an extra touch, sprinkle a few extra crushed Oreo pieces over the cream and drizzle a thin line of chocolate syrup across the surface. This final garnish is not just for looks; the extra crumbs add a satisfying crunch with every sip.
-
Serve immediately with a sturdy straw and a long spoon. The first sip should hit you with a cool, creamy wave, followed by the delightful snap of Oreo crumbs, and finish with the airy sweetness of the whipped topping. If anyone asks for a second round, you’ll be ready with a smile—because you’ve already pre‑made the whipped cream.
-
Clean up while the flavors linger. Rinse the blender promptly to prevent the chocolate from hardening, and store any leftover whipped cream in an airtight container in the fridge for up to 24 hours. This way, you can recreate the magic tomorrow without starting from scratch.
That's it — you did it. But hold on, I've got a few more tricks that'll take this to another level, because a good milkshake never truly ends at the first sip.
Insider Tricks for Flawless Results
The Temperature Rule Nobody Follows
Always keep your ice cream and milk as cold as possible before blending. Warm ingredients cause the shake to become thin and lose that luxurious thickness. If you’re in a rush, pop the milk in the freezer for ten minutes and let the ice cream sit out for only 2‑3 minutes to soften just enough for blending. I once tried to skip this step and ended up with a watery mess that tasted like a sad sundae.
Why Your Nose Knows Best
When the shake is blending, lean in and sniff the aroma. A perfect blend will give off a sweet vanilla‑chocolate perfume; if you detect any raw milk smell, the blend is under‑mixed. Trust your nose—it's the quickest quality control you have, and it prevents you from serving a sub‑par shake.
The 5‑Minute Rest That Changes Everything
After whipping the cream, let it rest for five minutes before spooning it onto the shake. This brief pause lets the air bubbles stabilize, giving you a denser, more stable peak that won’t melt instantly. A friend tried skipping this rest once—let's just say the cream sank like a stone.
Chocolate Syrup Swirl Secrets
Instead of mixing the syrup straight into the shake, drizzle it in a slow, circular motion over the surface just before serving. This creates a marble pattern that not only looks stunning but also releases bursts of chocolate flavor as you sip. If you love extra chocolate, use a dark chocolate sauce instead of the typical bright syrup for a richer profile.
The Double‑Stuffed Oreo Upgrade
Swap half of your classic Oreos for double‑stuffed ones. The extra cream filling intensifies the milkshake’s silkiness, while the cookie component still provides that essential crunch. The result? A shake that feels like it’s been kissed by a velvet glove.
Creative Twists and Variations
This recipe is a playground. Here are some of my favorite ways to switch things up:
Mint Oreo Madness
Add a handful of fresh mint leaves to the blender and a splash of peppermint extract. The mint cuts through the richness, delivering a refreshing aftertaste that’s perfect for summer afternoons.
Salted Caramel Dream
Swirl in a tablespoon of salted caramel sauce after blending. The salty caramel amplifies the chocolate depth and adds a buttery finish that feels like a dessert in a glass.
Coffee‑Infused Kick
Replace half of the milk with chilled espresso or cold brew. The coffee notes pair beautifully with the chocolate, turning the shake into an adult‑only treat that could replace a latte.
Nutty Crunch
Mix in a tablespoon of toasted almond butter or chopped hazelnuts. The nutty undertone adds complexity and a pleasant textural contrast to the soft cream.
Vegan Velvet
Swap dairy ice cream for a coconut‑based vanilla ice cream, use oat milk, and replace heavy cream with chilled coconut cream whipped with a dash of maple syrup. The result is a dairy‑free version that still feels indulgent.
Storing and Bringing It Back to Life
Fridge Storage
If you have leftover shake, store it in an airtight mason jar for up to 24 hours. Give it a good shake before serving to reincorporate any settled ingredients. The texture will be slightly thinner, but a quick blend will bring it back to its original silkiness.
Freezer Friendly
For longer storage, pour the shake into a freezer‑safe container, leaving an inch of headspace. Freeze for up to one month. When you’re ready, let it thaw in the fridge for 4‑6 hours, then blend briefly to restore smoothness.
Best Reheating Method
If you prefer a warm, dessert‑style version, gently warm the shake on the stovetop over low heat, stirring constantly. Add a splash of milk (about 2 tablespoons) midway; the steam will bring back that velvety texture without curdling the dairy.