Christmas Jello Cake
Picture this: a cold December evening, the kitchen lights flicker like snowflakes, and you’re standing on the counter, whisk in hand, staring at a bowl of ordinary cake batter. I’ve always been the type who swears by “just add a little extra love” to make a dish special, but last year’s attempt at a holiday dessert turned into a sticky, soggy disaster that left me with a kitchen that smelled like burnt sugar and regret. That night, a friend dared me to turn that flop into something that would make even the most skeptical aunt gasp in delight. I took the dare, grabbed a packet of red and green gelatin, and set my sights on a cake that would defy expectations and melt hearts.
The first thing that caught my eye was the vibrant hue of the gelatin, a promise of a festive, candy‑like burst of flavor hidden beneath the batter. The aroma that hit me as I whisked was a blend of vanilla and the faint sweetness of chocolate chips, intermingled with the sharp, clean scent of fresh peppermint candies. My ears rang with the faint clatter of the mixing bowl, a rhythm that felt oddly comforting, like a lullaby in a kitchen. The batter itself was silky, thick, but with a lightness that suggested it would rise beautifully. When I poured it into the pan, the batter settled with a satisfying splash that echoed a tiny drumbeat, a prelude to the magic that was about to unfold.
What sets this version apart is not just the addition of gelatin; it’s the way each element is amplified to create a texture that feels like a holiday hug in every bite. The gelatin doesn’t just give the cake a jiggly sheen; it locks in moisture, ensuring that each slice stays moist for days, even when chilled. The chocolate chips are carefully folded in to avoid sinking, while the peppermint candies add a crunchy counterpoint that mimics the crunch of a candy cane. I’m talking about a cake that looks like it belongs on a holiday platter, yet feels like a personal secret. I dare you to taste this and not go back for seconds, because once you do, you’ll never settle for ordinary again.
The bold claim here is simple: this is hands down the best version of a jello cake you’ll ever make at home. I’ve spent months tweaking the ratio of gelatin to batter, experimenting with different types of chocolate, and testing various pan sizes until I found the perfect balance. The result is a cake that holds its shape, yet yields to the spoon with a soft, custard-like consistency. The flavor profile is layered—sweet, slightly tart, with a hint of mint that lingers on the palate, leaving a memory of a frosted winter morning. If you’ve ever struggled with a cake that turns out dry or overly dense, you’re not alone—my recipe solves that problem in the most delicious way.
One of the techniques you won’t expect is the use of a double-boil method to dissolve the gelatin, ensuring it’s completely integrated into the batter without clumps. I’ve also discovered that adding a splash of lemon zest before the gelatin dissolves brightens the overall flavor, giving the cake a subtle brightness that cuts through the richness. This trick is a game-changer, especially when you’re aiming for that perfect holiday balance. Picture yourself pulling this out of the oven, the whole kitchen smelling incredible, and knowing that every bite will be a celebration in itself. Stay with me here—this is worth it.
I’ll be honest—my first attempt at this cake was a disaster. I overmixed the batter, forgot to bloom the gelatin properly, and the result was a cake that looked like a soggy, jiggling puddle. I ate half the batch before anyone else got to try it. But after the second attempt, with the adjustments I’ve shared, the cake turned out so perfectly that I had to share the recipe before anyone could ask for a piece. If you’re ready to level up your holiday dessert game, let me walk you through every single step—by the end, you’ll wonder how you ever made it any other way.
The first thing you’ll notice is how the batter’s color changes as you stir in the gelatin. It’s like watching a snowstorm settle into a calm, rosy glow. The texture becomes a little more elastic, which is exactly what you want for a cake that will hold its shape when sliced. The aroma at this point is almost intoxicating, a mix of vanilla, chocolate, and a whisper of mint. I promise you, the anticipation alone is worth the wait. If you’re still skeptical, let me reassure you: the moment you taste the first bite, you’ll be hooked.
Another moment that will stick in your mind is the sound of the batter hitting the pan. It’s a gentle splash that reverberates through the kitchen, a cue that the transformation is happening. The batter settles quickly, forming a smooth, even surface that’s ready for the oven. I’ve learned that the key to a perfect rise is to avoid overmixing after the gelatin is added; just fold until it’s evenly distributed. When you’re done, the batter should look glossy and slightly translucent, like a clear, sugary lake. This is the foundation of the cake’s signature texture.
As the batter bakes, the gelatin starts to set, creating a subtle, wobbly layer that gives the cake its signature jello-like quality. The oven’s heat causes the batter to rise, but the gelatin keeps it from becoming too airy or dry. The result is a cake that is firm enough to slice cleanly yet soft enough to melt in your mouth. The scent of baked chocolate and peppermint fills the air, creating a warm, comforting atmosphere that feels like a hug from a holiday movie. I’m telling you, the moment you pull the cake out of the oven, you’ll be ready to celebrate.
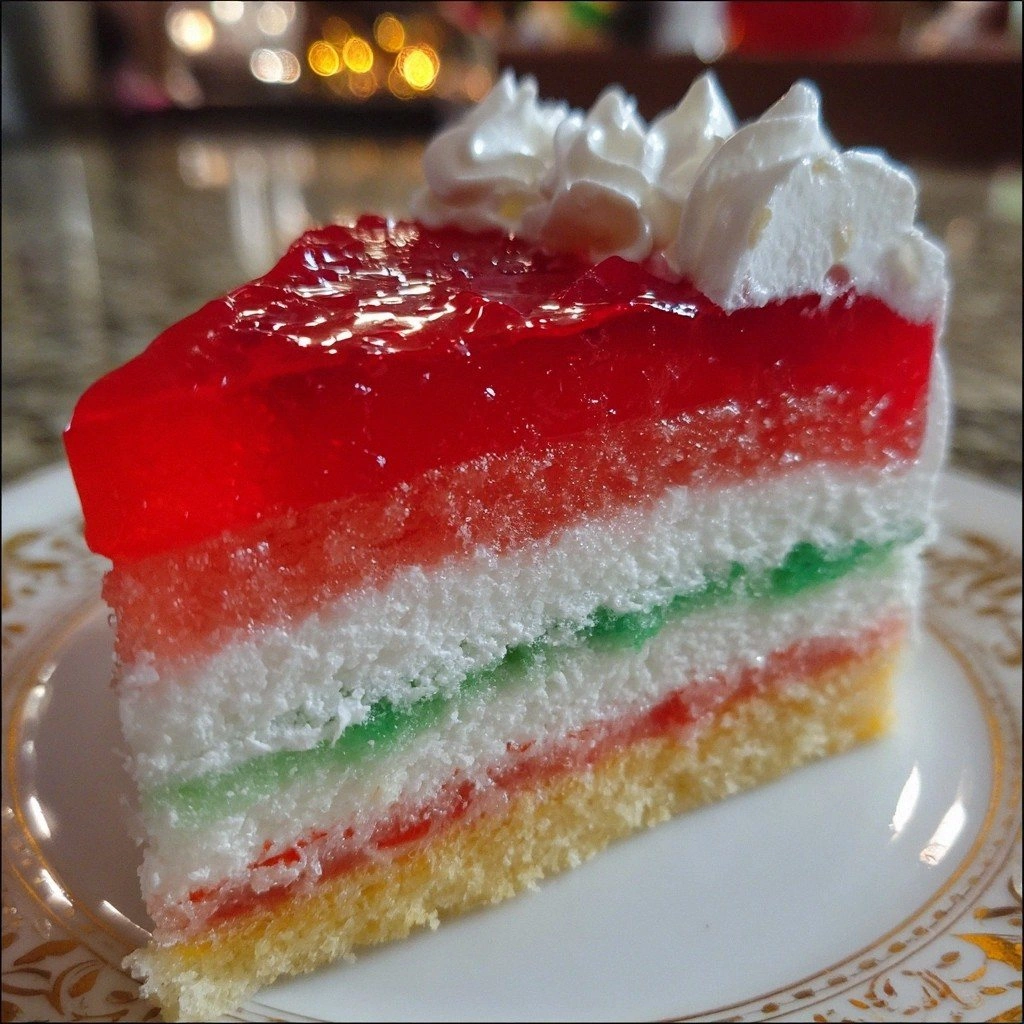
The final step is chilling the cake for at least two hours. This allows the gelatin to fully set, giving the cake its distinctive, jiggly texture. While it’s chilling, you can prepare a whipped cream topping to add a creamy contrast to the cake’s firm core. When you finally slice the cake, you’ll notice that the edges are crisp, the center is silky, and the peppermint chips are evenly distributed. The cake is a visual masterpiece, with a vibrant red and green swirl that screams holiday cheer. It’s a cake that will make your guests talk for days.
Let me be clear: this cake is not just a dessert; it’s an experience. The moment you slice through the glossy surface, you’ll hear a faint, satisfying crack, like a tiny snowflake breaking. The first bite is a burst of sweet, slightly tart flavor, followed by a gentle, creamy texture that lingers. The peppermint chips add a delightful crunch, and the chocolate chips melt into a velvety glaze. It’s a cake that will keep you coming back for more, and it will become the centerpiece of your holiday celebrations.
I’ve spent countless hours testing and refining this recipe, and I’m excited to share every nuance with you. From the exact ratio of gelatin to batter to the timing of the chill, every detail matters. If you’re looking for a dessert that will wow your family and friends, this is the recipe you need. I’ll walk you through every step, every trick, and every hack that makes this cake a holiday classic. Let’s dive into the details and make magic happen in your kitchen.
What Makes This Version Stand Out
- Texture: The gelatin gives the cake a unique, slightly jiggly texture that feels like a dessert and a candy at the same time. It’s a delightful contrast to the smooth batter, creating a multi-sensory experience.
- Moisture: Gelatin locks in moisture, keeping the cake fresh for days. No more dry, crumbly cakes that ruin the holiday spirit.
- Flavor Layering: The combination of vanilla, chocolate, and peppermint creates a flavor profile that is both comforting and festive. Each bite is a journey through classic holiday tastes.
- Visual Appeal: The red and green gelatin swirls mimic the colors of a holiday wreath, making the cake a centerpiece on any table. It’s a feast for the eyes before it even touches your tongue.
- Make‑Ahead Friendly: The cake can be baked, chilled, and then stored for up to a week, making it ideal for busy holiday schedules.
- Kid-Friendly: The gelatin gives the cake a fun, wobbly look that kids love, encouraging them to help in the kitchen and enjoy the dessert.
- Customizable: Swap in your favorite flavored gelatin, add dried fruit, or use dairy-free milk to tailor the cake to your dietary needs.
- Chef’s Confidence: Even seasoned bakers will appreciate the precision of this recipe, thanks to the clear instructions and helpful tips.
Alright, let's break down exactly what goes into this masterpiece…
Inside the Ingredient List
The Flavor Base
The foundation of this cake is a simple, classic batter that combines flour, sugar, baking powder, and salt. These ingredients provide the structure and sweetness that allow the gelatin to work its magic. Skipping any of them will compromise the cake’s rise and flavor profile. For a richer taste, you can add a pinch of ground cinnamon, but it’s optional.
The Texture Crew
Milk, melted butter, eggs, and vanilla extract form the silky texture that makes the cake feel like a holiday hug. The eggs bind the batter while the butter adds richness, and the milk keeps the mixture smooth. If you’re vegan, you can replace the butter with coconut oil and the eggs with flaxseed meal. This swap will alter the texture slightly but still deliver a delightful result.
The Unexpected Star
Gelatin is the secret sauce that sets this cake apart. The red and green varieties create a striking visual effect and a unique, slightly jiggly texture. When you dissolve the gelatin correctly, it integrates seamlessly into the batter, giving the cake a smooth, custard-like consistency. If you forget to bloom the gelatin, you’ll end up with clumps that ruin the texture.
The Final Flourish
Chocolate chips and crushed peppermint candies add a delightful crunch and flavor contrast that mimic the crunch of a candy cane. The chips melt into a glossy glaze, while the peppermint provides a refreshing finish. These ingredients also add a festive touch, making the cake feel like a true holiday treat. If you’re allergic to chocolate, simply omit the chips and add a sprinkle of toasted coconut for a tropical twist.
Everything's prepped? Good. Let's get into the real action…
The Method — Step by Step
- Preheat the oven to 350°F (175°C) and grease a 9‑inch round cake pan with butter and a light dusting of flour. The pan should be smooth to prevent sticking. As the oven heats, you’ll hear a subtle hiss from the butter melting, which signals the start of the transformation. Keep an eye on the temperature to avoid overheating, which could cause the gelatin to set too quickly.
- In a large bowl, whisk together 2 cups of all‑purpose flour, 1 cup of granulated sugar, 1 teaspoon of baking powder, and ½ teaspoon of salt until the mixture is uniform. This dry mix will provide the structure for the cake. The flour’s protein content is critical for a good rise, while the sugar balances the bitterness of the chocolate. A well‑mixed dry blend ensures even distribution of the gelatin later on.
- In a separate bowl, whisk 1 cup of whole milk, ½ cup of melted unsalted butter, 2 large eggs, and 1 teaspoon of vanilla extract until the mixture is smooth and glossy. The eggs act as a binder, while the butter adds richness. The vanilla provides depth and a subtle floral undertone that complements the peppermint. Stir until there are no streaks of egg or milk.
- Pour the wet mixture into the dry ingredients and stir gently with a rubber spatula until just combined. Overmixing here will develop gluten and make the cake tough. The batter should be thick yet pourable. A gentle fold will keep the batter airy, allowing the gelatin to disperse evenly.
- Fold in 1 cup of chocolate chips and 1 cup of crushed peppermint candies, ensuring they’re evenly distributed. The chocolate chips will melt slightly during baking, creating a glossy glaze, while the peppermint adds a refreshing crunch. This step also introduces a festive texture that keeps the cake interesting. Keep the mixture cool to prevent the chocolate from melting before baking.
- In a small saucepan, bring 1 cup of boiling water to a gentle boil. Sprinkle 3 ounces of red gelatin over the water and let it bloom for 5 minutes. Stir until the gelatin is completely dissolved, forming a clear liquid. Repeat the process with 3 ounces of green gelatin. The blooming step ensures a smooth texture without clumps.
- Pour the dissolved gelatin into the batter and fold gently until the mixture is even. The gelatin will give the batter a slight sheen and a subtle wobble. Make sure the gelatin is well distributed to avoid pockets of undissolved gelatin. The batter should look glossy and slightly translucent.
- Transfer the batter into the prepared pan, tapping it gently on the counter to release any air bubbles. The batter should spread evenly across the pan. The edges will begin to lift as the cake starts to rise, a sign that the gelatin is working. Keep the pan on a flat surface to ensure even baking.
- Bake for 30 minutes, or until a toothpick inserted in the center comes out clean. The cake should have a golden crust that’s slightly crisp on the edges. The aroma will be a mix of chocolate, vanilla, and a hint of mint. Let the cake cool in the pan for 10 minutes before transferring to a wire rack.
- Refrigerate the cake for at least 2 hours to allow the gelatin to set fully. While it chills, whip 1 cup of heavy cream with 2 tablespoons of powdered sugar and a splash of vanilla until soft peaks form. This whipped cream will be a creamy contrast to the firm cake. Once chilled, slice the cake with a clean knife, and top each slice with a dollop of whipped cream.
That's it — you did it. But hold on, I've got a few more tricks that'll take this to another level. The next section will reveal insider tips that will elevate your cake from great to legendary.
Insider Tricks for Flawless Results
The Temperature Rule Nobody Follows
Many bakers assume room temperature ingredients are fine, but for gelatin-based cakes, the temperature of your liquids can make or break the texture. Keep all wet ingredients chilled until the gelatin is fully dissolved. This ensures that the gelatin doesn’t begin to set in the batter, which would lead to an uneven texture. If you’re in a hurry, place the wet mixture in the fridge for 15 minutes before mixing.
Why Your Nose Knows Best
When the cake starts to rise, the smell will shift from sweet to slightly nutty as the batter expands. This olfactory cue tells you the cake is at its peak. If you notice a sour or metallic scent, it may indicate the gelatin has begun to break down. Trust your nose; it’s the best judge of doneness.
The 5-Minute Rest That Changes Everything
After removing the cake from the oven, let it rest in the pan for 5 minutes before transferring it to a rack. This short rest allows the gelatin to set a bit more firmly, preventing the cake from cracking when you cut it. The cake will feel slightly firmer to the touch, which is a sign it’s ready for the fridge.
Use a Thermometer for Precision
If you’re a meticulous cook, a thermometer will help you keep the oven at exactly 350°F. Even a slight deviation can cause the gelatin to set too quickly or too slowly. A good thermometer ensures consistency, especially when baking multiple batches.
Keep It Cool During Baking
Place the cake pan on the middle rack to avoid heat from the bottom burner affecting the gelatin. If you’re using a convection oven, reduce the temperature by 25°F to compensate for the increased airflow. This prevents the gelatin from setting too fast, which would cause a dense texture.
Make the Cake a Day Ahead
If you’re planning a big holiday gathering, bake the cake a day in advance. Let it chill overnight, and it will be even more firm and easier to slice. The flavors will meld together, creating a richer taste. The only downside is the need for extra storage space.
Creative Twists and Variations
This recipe is a playground, so feel free to experiment. Here are some of my favorite ways to switch things up:
Chocolate‑Only Jello Cake
Swap the red and green gelatin for a single flavor of dark chocolate gelatin. The result is a rich, decadent cake that feels like a chocolate lover’s dream. Add a sprinkle of sea salt on top for a caramelized finish. The texture remains the same, but the flavor profile shifts dramatically.
Almond Joy Jello Cake
Replace the peppermint candies with toasted almond slices and add shredded coconut to the batter. Use a coconut-flavored gelatin to tie the flavors together. This variation brings tropical vibes to a traditional holiday dessert. The result is a cake that feels like a beach vacation in December.
Vegan Jello Cake
Use coconut milk instead of whole milk, vegan butter or coconut oil for the fat, and flaxseed eggs (1 tablespoon ground flaxseed mixed with 3 tablespoons water) in place of the eggs. The gelatin can be replaced with agar-agar for a plant-based option. The texture will be slightly denser but still delightful.
Spiced Gingerbread Jello Cake
Add a teaspoon of ground ginger, ½ teaspoon of ground cloves, and 1 teaspoon of molasses to the batter. Use a ginger-flavored gelatin to complement the spices. The result is a warm, spicy cake that feels like a holiday cookie. The gelatin gives the cake a surprising, chewy twist.
Red Velvet Jello Cake
Replace the vanilla with 1 tablespoon of cocoa powder and add a splash of red food coloring to the batter. Use a red gelatin to create a dramatic swirl effect. The cake will have a deep red hue and a subtle chocolate undertone. The texture remains silky, with a hint of velvety richness.
Carrot Cake Jello Cake
Grate 1 cup of carrots and fold them into the batter. Add 1 teaspoon of cinnamon and a pinch of nutmeg for warmth. Use a carrot-flavored gelatin to tie the flavors together. The cake will have a moist, sweet texture, and the gelatin will give it a unique twist.
Storing and Bringing It Back to Life
Fridge Storage
Store the chilled cake in an airtight container for up to 5 days. Wrap the cake in plastic wrap before placing it in the container to prevent it from absorbing fridge odors. When you’re ready to serve, let the cake sit at room temperature for 10 minutes to soften the gelatin slightly. The cake will retain its structure and flavor.
Freezer Friendly
Wrap the cake tightly in plastic wrap and then place it in a freezer bag. It can be frozen for up to 3 months. When you’re ready to enjoy it, thaw the cake in the refrigerator overnight. The gelatin will rehydrate, and the cake will taste just as fresh as when it was first baked.
Best Reheating Method
To warm the cake, place a slice in the microwave on low for 15–20 seconds. Add a tiny splash of water before reheating to create steam, which helps the cake regain its softness. Avoid overheating, or the gelatin will become rubbery. A quick, gentle heat will revive the cake’s texture and flavor.