I was standing in my kitchen, half‑asleep, when the smoke alarm decided to audition for a Broadway musical. A bag of store‑bought garlic knots had gone rogue, and the whole apartment smelled like burnt cardboard. In that chaotic moment I swore I’d never trust a pre‑made carb again, and I dared my roommate to a bake‑off: if I could whip up something better than the “cheesy thing” we ordered last night, she’d have to host the next movie marathon. Spoiler alert – I won, and the victory tasted like melted mozzarella and fresh herbs dancing on a buttery cloud.
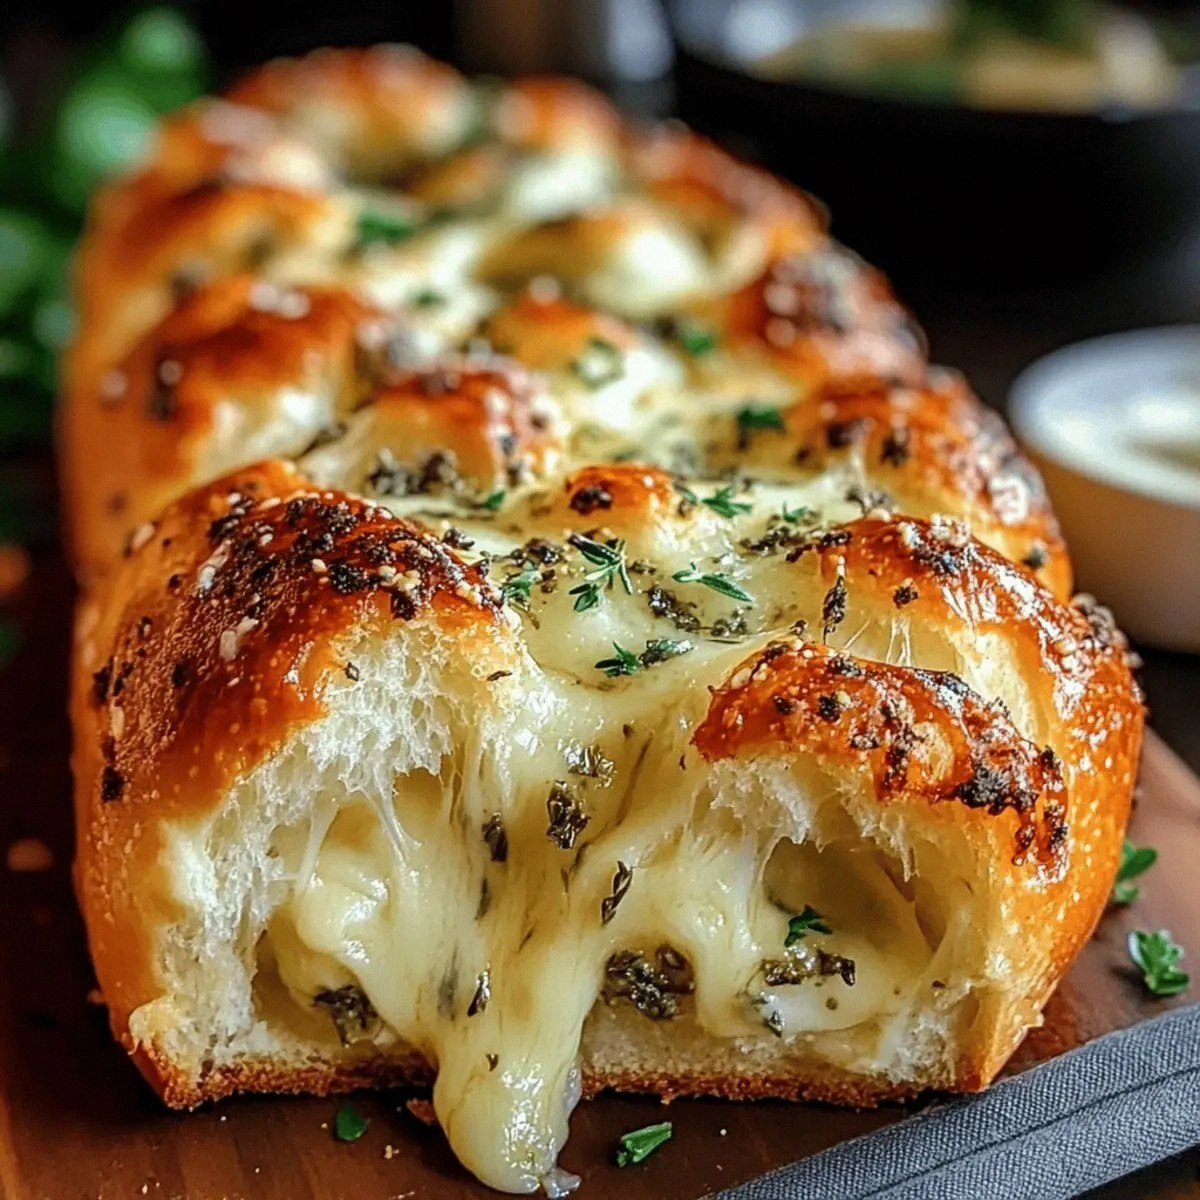
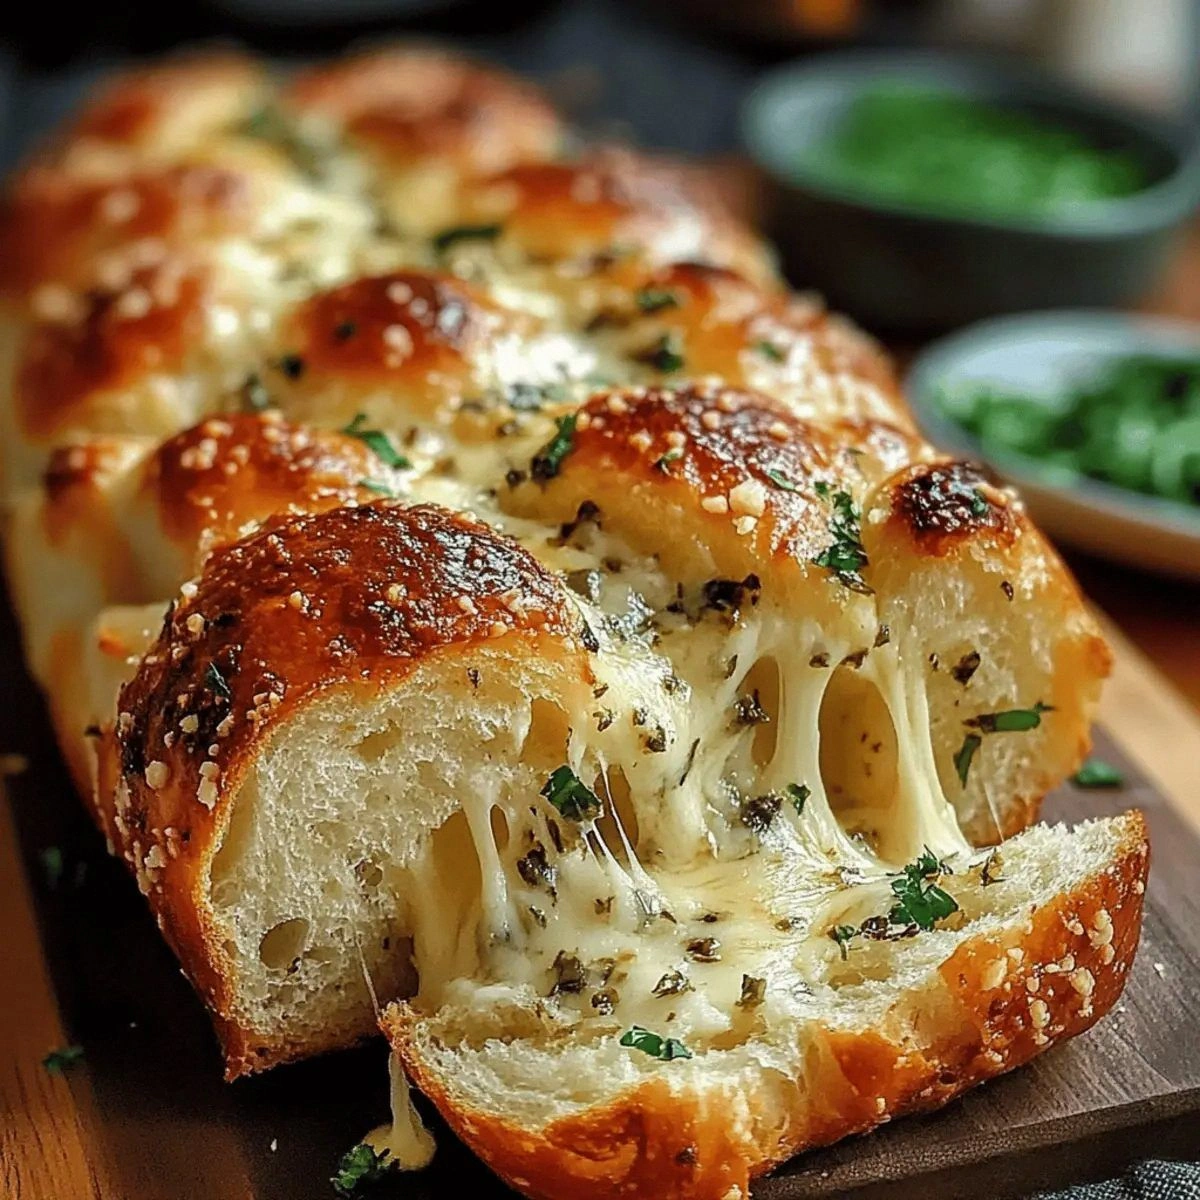
Picture this: the oven door swings open, a golden‑brown loaf emerges, steam curling like lazy ribbons, and the aroma of toasted garlic, piney oregano, and sweet butter floods the kitchen. The crust cracks just enough to reveal a soft, pillowy interior that stretches with each pull, strings of cheese pulling like silky tinsel. You hear the faint crackle of the crust, feel the warm heat radiating from the pan, and your mouth waters before the first bite even lands. This isn’t just bread; it’s a hug you can hold, a comfort that whispers “you’re home” in Italian.
Most recipes for herb cheese bread either skimp on the cheese or drown the dough in a soggy mess of herbs. I’ve tried the “quick” versions that promise a 20‑minute miracle, only to end up with a dense brick that would make a bricklayer weep. This version, however, is the culmination of countless trial runs, late‑night taste tests, and a few culinary sins (yes, I ate half the batch before anyone else got a chance). The secret? A two‑stage dough development that builds flavor layers, plus a surprise splash of cream cheese that turns the crumb into a velvety dream.
I’m about to spill the beans on every nuance, from the exact water temperature that coaxes the yeast into a frothy dance to the precise moment you fold in the herbs so they don’t wilt. I promise you’ll never settle for a bland, store‑bought loaf again. Let me walk you through every single step — by the end, you’ll wonder how you ever made it any other way.
What Makes This Version Stand Out
- Cheese Ratio: The blend of cream cheese, mozzarella, and Parmesan creates a melt that’s both stretchy and nutty, giving the crumb a luxurious mouthfeel you won’t find in plain sourdough.
- Herb Symphony: Fresh parsley, basil, and oregano are added at two different stages, ensuring a bright top note and a deep, aromatic backbone.
- Texture Contrast: A high‑hydration dough yields an open crumb, while a quick steam burst in the oven forms a crisp, crackly crust that shatters like thin ice.
- Simplicity Meets Sophistication: Only pantry staples plus a handful of fresh herbs, yet the technique feels like a bakery secret.
- Crowd Magnet: Even the pickiest eaters—kids, vegans (just skip the cheese), and that one friend who claims “bread is boring”—will be lining up for seconds.
- Make‑Ahead Magic: The dough can be refrigerated overnight, developing flavor while you sleep, and the loaf reheats beautifully.
- Versatile Base: Use it as a side for soups, a sandwich foundation, or a standalone snack; the possibilities are endless.
- Bold Claim: This is hands down the best version you’ll ever make at home; I dare you to taste this and not go back for seconds.
Inside the Ingredient List
The Flavor Base
All‑Purpose Flour is the canvas; its gluten‑forming proteins give structure while staying neutral enough to let the herbs shine. If you swapped it for whole‑wheat, you’d get a nuttier flavor but a denser crumb—great for a rustic twist, but not for that airy, melt‑in‑your‑mouth texture we’re after. Choose a brand that’s unbleached and fresh; old flour can taste stale and affect rise.
The Leavening Crew
Active Dry Yeast is the spark that turns this dough into a living thing. I always proof it in warm water with a pinch of sugar; if it doesn’t foam, you’ve got a dead yeast batch and the loaf will be as flat as a pancake. For a quicker rise, you can use instant yeast, but the flavor development will be slightly less complex.
The Texture Crew
Cream Cheese adds moisture and a subtle tang that balances the richness of mozzarella and Parmesan. It also creates that “cheese‑infused crumb” you’ll notice when you bite in. If you’re dairy‑free, swap it with a plant‑based cream cheese; the texture changes a bit but the meltiness remains.
The Unexpected Star
A handful of fresh herbs might sound modest, but they’re the secret fireworks. Parsley brings a peppery freshness, basil adds sweet, aromatic notes, and oregano supplies an earthy depth. If you can’t find fresh herbs, dried ones work in a pinch—use one‑third the amount, but add them earlier in the dough so they have time to hydrate.
The Final Flourish
Everything Bagel Seasoning and Red Pepper Flakes are the finishing touches that turn a good loaf into an unforgettable one. The sesame‑seed‑like crunch of the bagel mix adds texture, while the pepper flakes give a whisper of heat that awakens the palate. If you’re sensitive to spice, reduce the flakes; if you love heat, double them—just remember, a little goes a long way.
Everything's prepped? Good. Let’s get into the real action…
The Method — Step by Step
Start by warming your water to about 105°F (40°C). It should feel warm to the touch, like a summer shower, but not hot enough to scald your skin. Sprinkle the active dry yeast over the water, add the tablespoon of granulated sugar, and give it a gentle stir. Let it sit for 5‑7 minutes until it becomes foamy; that’s the yeast waking up and saying “let’s party!” If it doesn’t foam, you’ve got a dead yeast batch—don’t waste your time.
While the yeast is proofing, combine the flour, salt, and olive oil in a large mixing bowl. Create a well in the center and pour in the foamy yeast mixture. Using a wooden spoon, stir until a shaggy dough forms—don’t worry about smoothness yet. This is where the magic begins; the dough should look a bit like wet sand, clinging to the sides of the bowl.
After the autolyse, knead the dough on a lightly floured surface for about 8‑10 minutes. You’re looking for a smooth, elastic ball that passes the “windowpane test”—stretch a small piece; if it becomes translucent without tearing, you’re golden. If it tears, keep kneading a few more minutes; the gluten needs a little more love.
While you’re kneading, chop the fresh parsley, basil, and oregano finely. Set them aside in a small bowl, then add a pinch of garlic powder and red pepper flakes. This herb blend will be folded in twice: once into the dough and once on top, ensuring every bite bursts with flavor.
Now it’s time for the cheese. Soften the cream cheese at room temperature, then crumble it into the dough along with the shredded mozzarella and grated Parmesan. Sprinkle the herb mixture over the dough and fold it in gently, preserving the airy structure you just built. The dough will feel a bit sticky—that’s perfectly normal; the cheese adds moisture.
Shape the dough into a round loaf and place it in a greased 9‑inch cast‑iron skillet or a parchment‑lined baking sheet. Brush the top lightly with olive oil, then sprinkle the Everything Bagel Seasoning and a little extra grated Parmesan for that crunchy, golden crown. Cover the loaf loosely with a clean kitchen towel and let it rise for 45‑60 minutes, or until it has nearly doubled in size. The kitchen should smell like a bakery on a Sunday morning.
Preheat your oven to 425°F (220°C). Place a shallow pan of water on the lower rack to create steam—this is the secret to that crackly crust that shatters like thin ice when you bite into it. Slide the loaf onto the middle rack, and bake for 20 minutes. Then, reduce the temperature to 375°F (190°C) and continue baking for another 10‑12 minutes until the top is a deep golden‑brown and the internal temperature hits 190°F (88°C).
When the bread is done, remove it from the oven and let it cool on a wire rack for at least 15 minutes before slicing. This resting period lets the steam redistribute, ensuring the crumb stays moist and the cheese stays gooey. Slice with a serrated knife to keep the crust intact, and watch the cheese stretch like a warm, cheesy sunrise.
That’s it — you did it. But hold on, I’ve got a few more tricks that’ll take this to another level…
Insider Tricks for Flawless Results
The Temperature Rule Nobody Follows
Never let your dough sit in a cold kitchen for the final rise. A consistent room temperature of 75°F (24°C) speeds up fermentation and gives you that airy crumb. If your house is chilly, pop the dough in a turned‑off oven with the light on; the gentle warmth does wonders. I once tried a rapid rise at 90°F and ended up with a yeasty, over‑proofed loaf that tasted like beer—lesson learned.
Why Your Nose Knows Best
Your sense of smell is a far better indicator of dough readiness than a timer. When the dough has risen, it will give off a sweet, slightly alcoholic aroma, like fresh‑baked pizza dough. If you’re unsure, give it a gentle press; the indentation should spring back slowly. Trust that nose; it’ll save you from under‑ or over‑proofing.
The 5‑Minute Rest That Changes Everything
After shaping the loaf, let it rest uncovered for five minutes before the final proof. This short pause allows the gluten to relax, making the final shaping easier and the crumb more tender. Skipping this step often results in a tight crust that cracks unevenly. I once tried to rush it for a party, and the bread came out dense—don’t be that person.
Steam Is Your Secret Weapon
Creating steam in the first half of baking is what gives you that glossy, crackly crust. If you don’t have a pan for water, toss a few ice cubes onto a pre‑heated baking stone. The rapid vaporization does the trick. Just remember to keep the oven door closed for the first 15 minutes; opening it too early kills the steam.
Egg‑Milk Glaze for a Show‑Stopping Shine
A quick brush of beaten egg mixed with a splash of milk right before the final bake adds a beautiful amber sheen and a subtle crispness. It also helps the Everything Bagel Seasoning adhere better, ensuring every bite has that extra crunch. If you’re vegan, replace the egg with a mixture of aquafaba and a dash of maple syrup.
Creative Twists and Variations
This recipe is a playground. Here are some of my favorite ways to switch things up:
Sun‑Dried Tomato & Olive Explosion
Fold in a half‑cup of chopped sun‑dried tomatoes and a quarter‑cup of sliced Kalamata olives. The tangy tomatoes and briny olives add a Mediterranean punch that pairs beautifully with the herb cheese base. Perfect for a brunch buffet.
Spicy Jalapeño Cheddar
Swap the mozzarella for shredded sharp cheddar and add finely diced jalapeños to the herb mix. The cheddar brings a deeper, buttery flavor, while the jalapeños give a lively heat that will make your taste buds do a happy dance.
Sweet Cinnamon Raisin
For a breakfast twist, replace the herbs with 1 teaspoon ground cinnamon and add a half‑cup of raisins. Use a light cream cheese spread and drizzle honey after baking. The result is a sweet‑savory loaf that’s perfect with a cup of coffee.
Garlic‑Infused Olive Oil Drizzle
After the loaf cools, brush it with a mixture of olive oil, minced garlic, and a pinch of sea salt. This creates a fragrant, glossy finish that intensifies the garlic flavor without overwhelming the herbs.
Vegan Delight
Replace the dairy cheeses with plant‑based alternatives (vegan mozzarella and Parmesan) and use a flax‑egg (1 tablespoon ground flaxseed + 3 tablespoons water). The texture stays delightfully chewy, and the herbs still shine.
Storing and Bringing It Back to Life
Fridge Storage
Wrap the cooled loaf tightly in plastic wrap or store it in an airtight container. It will stay fresh for up to 4 days. The cheese may firm up a bit, but a quick reheating will revive the meltiness.
Freezer Friendly
Slice the bread, then place the pieces on a parchment sheet and flash‑freeze for 30 minutes. Transfer the frozen slices to a zip‑top bag; they’ll keep for up to 2 months. When you’re ready, pop them straight into the oven; no thawing needed.
Best Reheating Method
Preheat your oven to 350°F (175°C), lightly mist the loaf with water (just a splash), then cover loosely with foil and bake for 10‑12 minutes. The steam from the water revives the crumb, while the foil prevents the crust from over‑browning. The result? As if you just pulled it from the oven.