Picture this: I’m standing in a cramped kitchen, a stack of empty take‑out containers on the counter, and the urge to rescue my dinner from mediocrity. The previous night’s attempt at fried chicken left a greasy trail that still clung to my apron, and I could taste the disappointment in every bite. I swore to myself that tonight, I would create something that would make the whole house smell like a gourmet restaurant. I grabbed a chicken breast, a handful of panko, and a secret weapon that I’d discovered in a late‑night grocery run. The moment the first sizzle hit the pan, I knew I had stumbled upon a culinary revelation.
The kitchen became a stage, and I was the star chef. I could hear the rhythmic crackle as the golden coating kissed the skillet, a sound that promised crispness in every bite. The aroma of garlic powder and fresh parsley rose like a fragrant curtain call, drawing my friends’ curious glances. I watched the chicken shrink slightly, its edges turning a brilliant amber that made my taste buds tingle in anticipation. That first bite was a revelation: a tender, juicy center wrapped in a crunchy shell that dissolved like a secret handshake.
That was just the beginning. I realized that what made this version truly special wasn't just the crunch, but the harmony of flavors that danced together. The lemon wedges added a bright zing that cut through the richness, while the parsley gave a fresh, herbal lift. I kept a small bowl of butter and a splash of white wine on the side, ready to craft a quick pan sauce that would elevate the dish to next‑level comfort. The whole experience felt like a culinary ballet, each step choreographed to bring out the best in the chicken. I dared myself to taste this and not go back for seconds, and I did.
Most people settle for a simple breadcrumb coating, but that’s where I went off the beaten path. I blended panko with a touch of garlic powder and a whisper of paprika to give the crust a subtle kick. I also used a two‑stage dredging process—first in flour, then in beaten eggs, and finally in the seasoned breadcrumbs—to lock in moisture and create a layered crunch. The result? A golden, crack‑like exterior that shatters with a satisfying crunch when you bite. It’s the kind of dish that turns a regular dinner into a memorable feast.
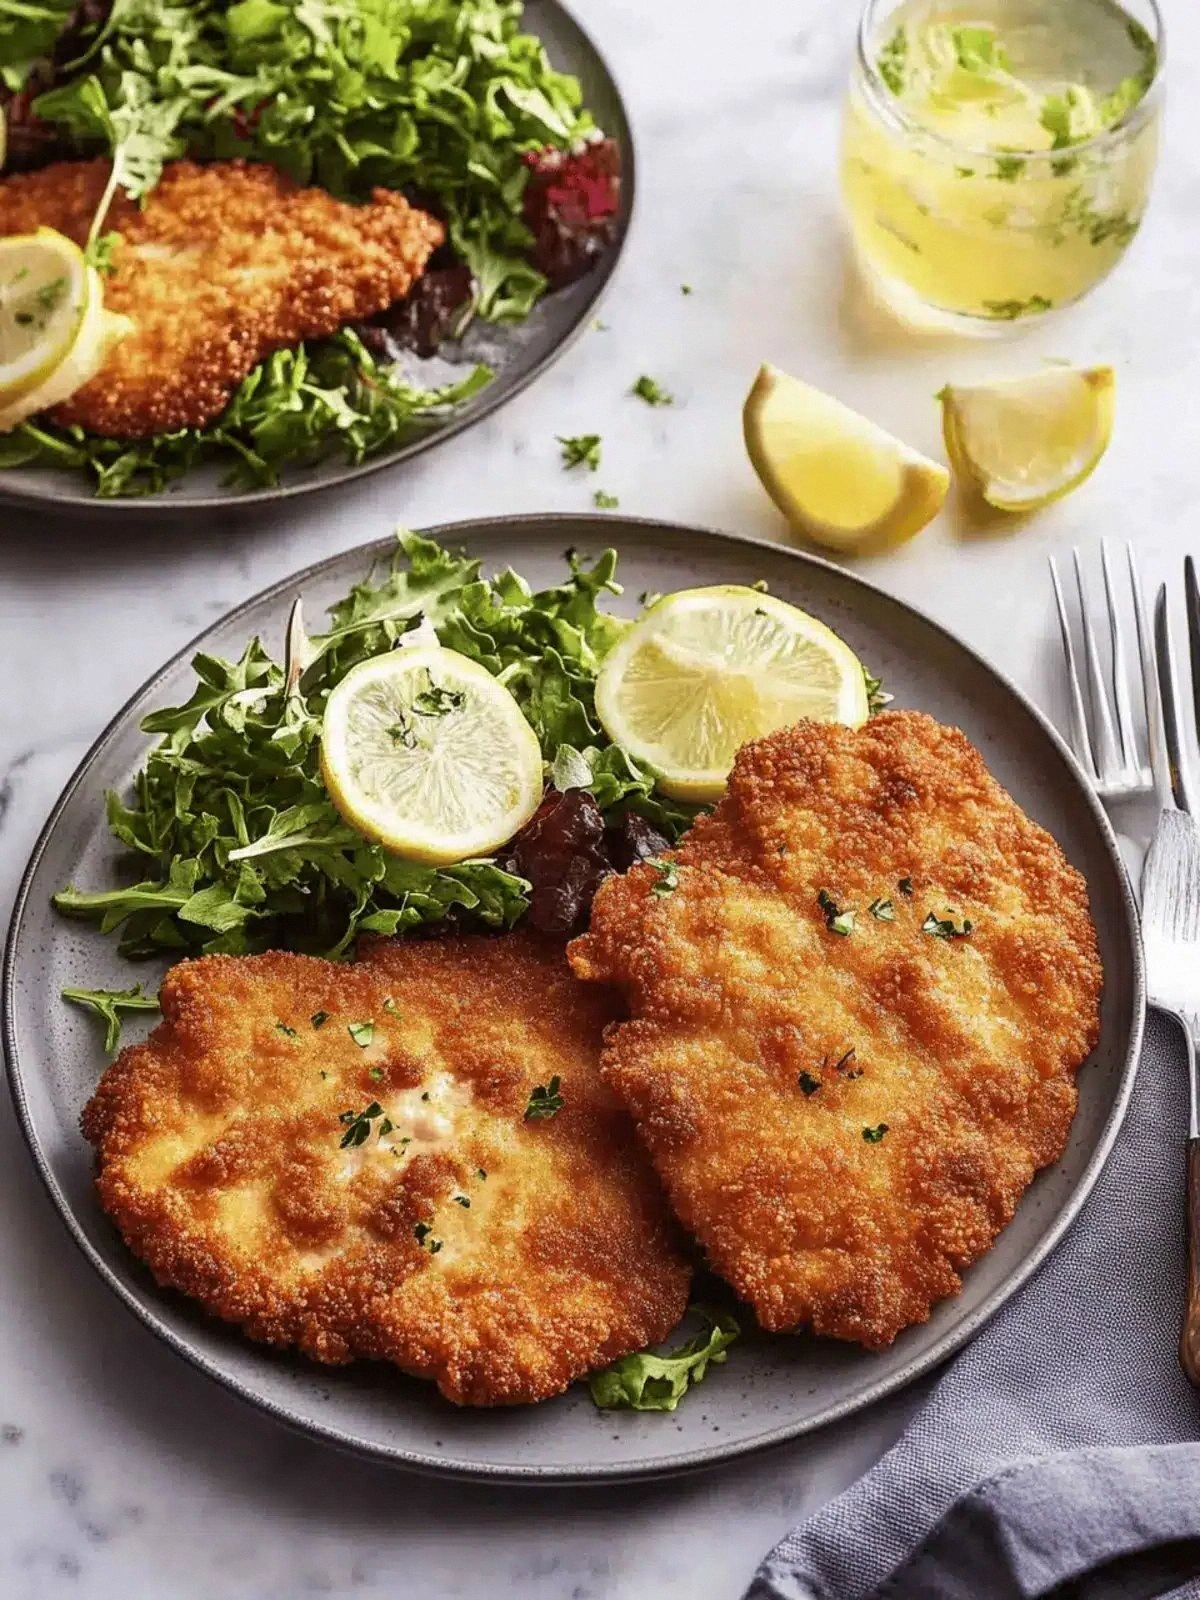
Picture yourself pulling this out of the pan, the whole kitchen smelling incredible, and the family gathering around the table with hungry eyes. The first plate is a work of art: a perfectly flat, golden schnitzel with a bright lemon wedge perched like a jewel. The crust is so crisp it whispers when you touch it, and the inside is silky and juicy. I’ve had people ask me what the secret is, and I can’t help but grin, knowing that the answer is simple, honest, and delicious. This isn’t just a recipe; it’s a confidence booster for anyone who’s ever felt stuck in the same old chicken routine.
Let me walk you through every single step—by the end, you’ll wonder how you ever made it any other way. I’ll share the micro‑challenges, bold claims, and little kitchen hacks that turn this into a game‑changer. I’ll keep you laughing while I explain the science behind that perfect crunch. And I’ll show you how to scale the recipe, store it, and bring it back to life for leftovers. So buckle up, grab your skillet, and get ready to turn ordinary chicken into an extraordinary culinary adventure.
What Makes This Version Stand Out
- Taste: The blend of garlic powder, fresh parsley, and a splash of lemon creates a layered flavor profile that balances savory, herbal, and citrusy notes. This harmony makes each bite feel like a well‑orchestrated symphony rather than a simple fried dish.
- Texture: A two‑stage coating process locks moisture inside while building a multi‑layered crust that crackles and then melts into a buttery finish. The result is a crunch that feels like a gentle whisper followed by a satisfying pop.
- Simplicity: Despite its gourmet feel, the recipe requires only ten minutes of prep and a single pan. The method is straightforward enough for beginners yet sophisticated enough to impress seasoned cooks.
- Uniqueness: The addition of a subtle paprika infusion and the use of panko instead of standard breadcrumbs gives the schnitzel a distinct, airy lightness that sets it apart from conventional versions.
- Crowd Reaction: Friends who’ve tried it say the dish feels like a “first‑date” meal—exciting, approachable, and impossible to pass up. Even the most skeptical diners find themselves reaching for seconds.
- Make‑Ahead Potential: The chicken can be prepared, refrigerated, and fried later without losing its crispness, making it an ideal option for busy weeknights or weekend gatherings.
Inside the Ingredient List
The Flavor Base
The chicken breasts are the canvas for all the flavors that follow. Choosing fresh, boneless, skinless pieces ensures a tender bite that absorbs the seasoning beautifully. If you’re in a pinch, chicken thighs can be used, but their higher fat content will alter the final texture slightly. The key is to slice each breast into equal portions so they cook evenly.
The Texture Crew
All‑purpose flour, eggs, and panko breadcrumbs form a protective armor around the meat. The flour provides a dry surface for the eggs to adhere, while the eggs create a binding layer that holds the breadcrumbs in place. Panko, known for its airy, flaky structure, gives the schnitzel its signature lightness. Without panko, the crust would be denser and less crunchy.
The Unexpected Star
Garlic powder is the unsung hero that infuses the coating with a subtle depth of flavor. It’s easier to distribute evenly than fresh garlic, ensuring every bite gets a punch of aroma. If you prefer a fresher garlic kick, substitute minced garlic, but be mindful that it may cause the coating to clump.
The Final Flourish
Vegetable oil provides the high‑heat medium needed for a golden finish. It also helps the coating set quickly, preventing the chicken from becoming greasy. A touch of freshly chopped parsley adds a burst of color and a herbaceous finish that brightens the dish. Lemon wedges are the finishing touch, offering a citrusy brightness that cuts through the richness. Together, these components elevate the schnitzel from simple to sensational.
Everything's prepped? Good. Let's get into the real action...
The Method — Step by Step
- Begin by placing a large skillet over medium heat and adding ½ cup of vegetable oil. Let the oil heat until it shimmers but doesn’t smoke—this ensures a crisp exterior without burning. The aroma of hot oil is a prelude to the crunch you’ll soon hear. Watch for a faint hiss; that’s your cue that the temperature is just right. This is the moment of truth—no rushing, no guessing.
- While the oil heats, lay out a sheet of parchment paper on a cutting board and place each chicken breast on it. Using a meat mallet or the back of a heavy skillet, pound each breast to an even thickness of about ¼ inch. This step guarantees uniform cooking and a consistent crunch. If you’re feeling adventurous, season the chicken lightly with salt and pepper before pounding. The goal is a tender, juicy center that stays moist inside.
- In a shallow dish, whisk the two eggs until frothy. This will be the glue that bonds flour and breadcrumbs to the meat. A light, airy whisking ensures the coating stays light and doesn’t become heavy. If you’re a fan of a richer coating, add a splash of milk or a dash of Dijon mustard to the eggs. This optional step adds depth without compromising crispness.
- Set up your dredging station with three separate shallow bowls: one with ½ cup all‑purpose flour seasoned with 1.5 teaspoons salt and 0.5 teaspoons pepper, one with the beaten eggs, and one with 1 cup panko breadcrumbs mixed with 1 teaspoon garlic powder. The three‑stage coating process is the secret to that irresistible crunch. First, coat each breast in flour, tapping off excess. Next, dip into eggs, letting the excess drip back into the bowl. Finally, roll in the breadcrumb mixture, pressing gently to ensure a firm layer. This meticulous layering locks in moisture and creates a multi‑textured crust.
- Now, carefully slide the coated chicken into the hot skillet. You should hear a satisfying sizzle that signals the coating is sealing. Cook the first side for 3–4 minutes until golden brown and firm. Flip gently with a spatula and cook the second side for another 3–4 minutes. The goal is a crisp exterior and a juicy interior—watch the edges; when they turn a deep amber, you’re close. The chicken should feel firm yet still give a slight give when pressed.
- Once both sides are golden, transfer the schnitzel onto a plate lined with paper towels to drain any residual oil. This simple step ensures the crust stays crisp rather than becoming greasy. While the chicken rests, you can quickly whip up a pan sauce if desired—just deglaze with a splash of white wine, add a knob of butter, and stir until glossy.
- Plate the schnitzel with a generous sprinkle of chopped parsley and a few lemon wedges on the side. The parsley adds a fresh, green pop, while the lemon wedges allow diners to squeeze as they like. The plating should feel as vibrant as the aroma. Serve immediately, as the crispness is best when the schnitzel is hot and fresh. The dish is ready to wow.
- If you’re serving a crowd, consider arranging the schnitzel in a fan shape on the plate to showcase the golden edges. A drizzle of your favorite sauce—perhaps a tangy mustard or a creamy aioli—adds a final flourish. This presentation elevates the dish from simple comfort food to a showstopper. Enjoy the applause and the applause is the real reward.
- Remember to taste a small piece before serving to ensure the seasoning is balanced. The salt should be just right, and the lemon should provide a bright lift. If you find the coating too heavy, a quick squeeze of lemon can brighten everything. This final check guarantees a perfect bite every time. You did it—now enjoy the applause.
Insider Tricks for Flawless Results
The Temperature Rule Nobody Follows
Most cooks rely on the “touch test” to gauge oil heat, but a reliable thermometer gives you precision. Aim for 350°F (175°C); this temperature ensures a crisp coating while keeping the chicken juicy inside. If you don’t have a thermometer, test the oil by dropping a small breadcrumb—if it sizzles instantly, you’re good. This small adjustment can save you from soggy or burnt schnitzel.
Why Your Nose Knows Best
Trust your sense of smell during cooking. The first sizzle is a clear indicator that the oil is hot enough. When the aroma of toasted breadcrumbs rises, it signals the coating is forming correctly. If you notice a metallic or burnt smell, reduce the heat immediately. Your nose is a seasoned chef in its own right.
The 5‑Minute Rest That Changes Everything
After frying, let the schnitzel rest for exactly five minutes on a wire rack. This allows the steam to escape and keeps the crust from becoming soggy. During this brief pause, the juices redistribute, making the interior even more tender. I’ve seen people skip this step and end up with a slightly rubbery center—don’t let that happen.
Use a Paper Towel Stack
Instead of a single paper towel, stack two or three to soak up excess oil. The thicker the stack, the more oil it can absorb, leaving a crisp exterior. I’ve tried this hack on a rainy day, and the schnitzel stayed crunchy even after a couple of hours of waiting. It’s a simple trick that pays off.
Keep the Pan Clean
After each batch, wipe the pan with a paper towel to remove residue. This prevents flavors from mixing and ensures a clean, fresh taste for every chicken piece. If you’re cooking multiple batches, a quick rinse with hot water between batches keeps the oil from developing a bitter undertone. Cleanliness is key to consistency.
Creative Twists and Variations
This recipe is a playground. Here are some of my favorite ways to switch things up:
Spicy Szechuan Schnitzel
Swap the garlic powder for Szechuan peppercorns and add a tablespoon of chili paste to the breadcrumb mix. The result is a fiery crunch that pairs beautifully with a cool cucumber slaw. The heat will linger, making each bite an adventure. This version is a hit with spice lovers and brings an Asian flair to a classic dish.
Herb‑Infused Parmesan Crust
Add ¼ cup grated Parmesan to the panko and sprinkle dried thyme and oregano over the coating. The Parmesan adds a nutty richness that deepens the flavor profile. Serve with a light lemon‑butter sauce for a Mediterranean twist. This version feels like a gourmet take on a comfort staple.
Citrus‑Garlic Parmesan
Incorporate zest from one lemon into the breadcrumb mixture and finish with a drizzle of olive oil. The citrus brightens the dish while the garlic keeps it grounded. Pair it with a side of roasted asparagus for a balanced, colorful plate. This variation is perfect for spring and summer gatherings.
Miso‑Glazed Schnitzel
Create a glaze by mixing 2 tablespoons of white miso, 1 tablespoon soy sauce, and 1 teaspoon honey. Brush the glaze onto the chicken before the final minute of frying. The umami depth from the miso pairs wonderfully with the crispy coating. It’s a Japanese‑inspired take that feels both exotic and comforting.
Cheesy Cheddar Crust
Blend shredded cheddar into the breadcrumb mixture for a melty, cheesy bite. The cheddar adds a creamy layer that melts slightly during frying, creating a gooey center. Pair with a creamy coleslaw for a classic Southern feel. This version is a crowd‑pleaser at potlucks.
Bacon‑Wrapped Schnitzel
Wrap each coated chicken piece in a strip of bacon before frying. The bacon infuses the schnitzel with smoky flavor and adds extra crispness. Slice the bacon into bite‑sized pieces for an elegant presentation. This version is a decadent treat for brunch or a special dinner.
Storing and Bringing It Back to Life
Fridge Storage
Place the cooled schnitzel in an airtight container and refrigerate for up to 3 days. The crust may soften slightly, so consider storing the coating separately if you plan to reheat. For best results, reheat in a preheated oven at 375°F (190°C) for 8–10 minutes to restore crispness. Keep the chicken away from strong‑smelling foods to preserve its flavor.
Freezer Friendly
Wrap each schnitzel individually in parchment paper and place them in a freezer bag. This prevents freezer burn and maintains texture. Freeze for up to 2 months. When ready to serve, thaw overnight in the refrigerator and reheat in the oven as described above. Freezing is a convenient way to have a ready‑to‑cook meal for busy nights.
Best Reheating Method
The secret to reviving a schnitzel is to reheat it in a hot oven, not a microwave. Preheat the oven to 375°F (190°C) and place the chicken on a wire rack over a baking sheet. Bake for 8–10 minutes until the crust is crisp again. If you’re short on time, a quick sear in a hot skillet for 2 minutes on each side also works well, but watch for excess oil.