When the last batch of gluten‑free pizza crusts I tried fell flat and tasted like cardboard, I was ready to give up on the whole gluten‑free thing. I stared at the scorched, soggy dough, my confidence evaporating faster than the steam rising from my skillet. That night, I swore I’d find a way to turn cassava into a crust that could stand beside the classics without flinching. The next morning, I discovered the humble tuber’s secret potential and the rest is history.
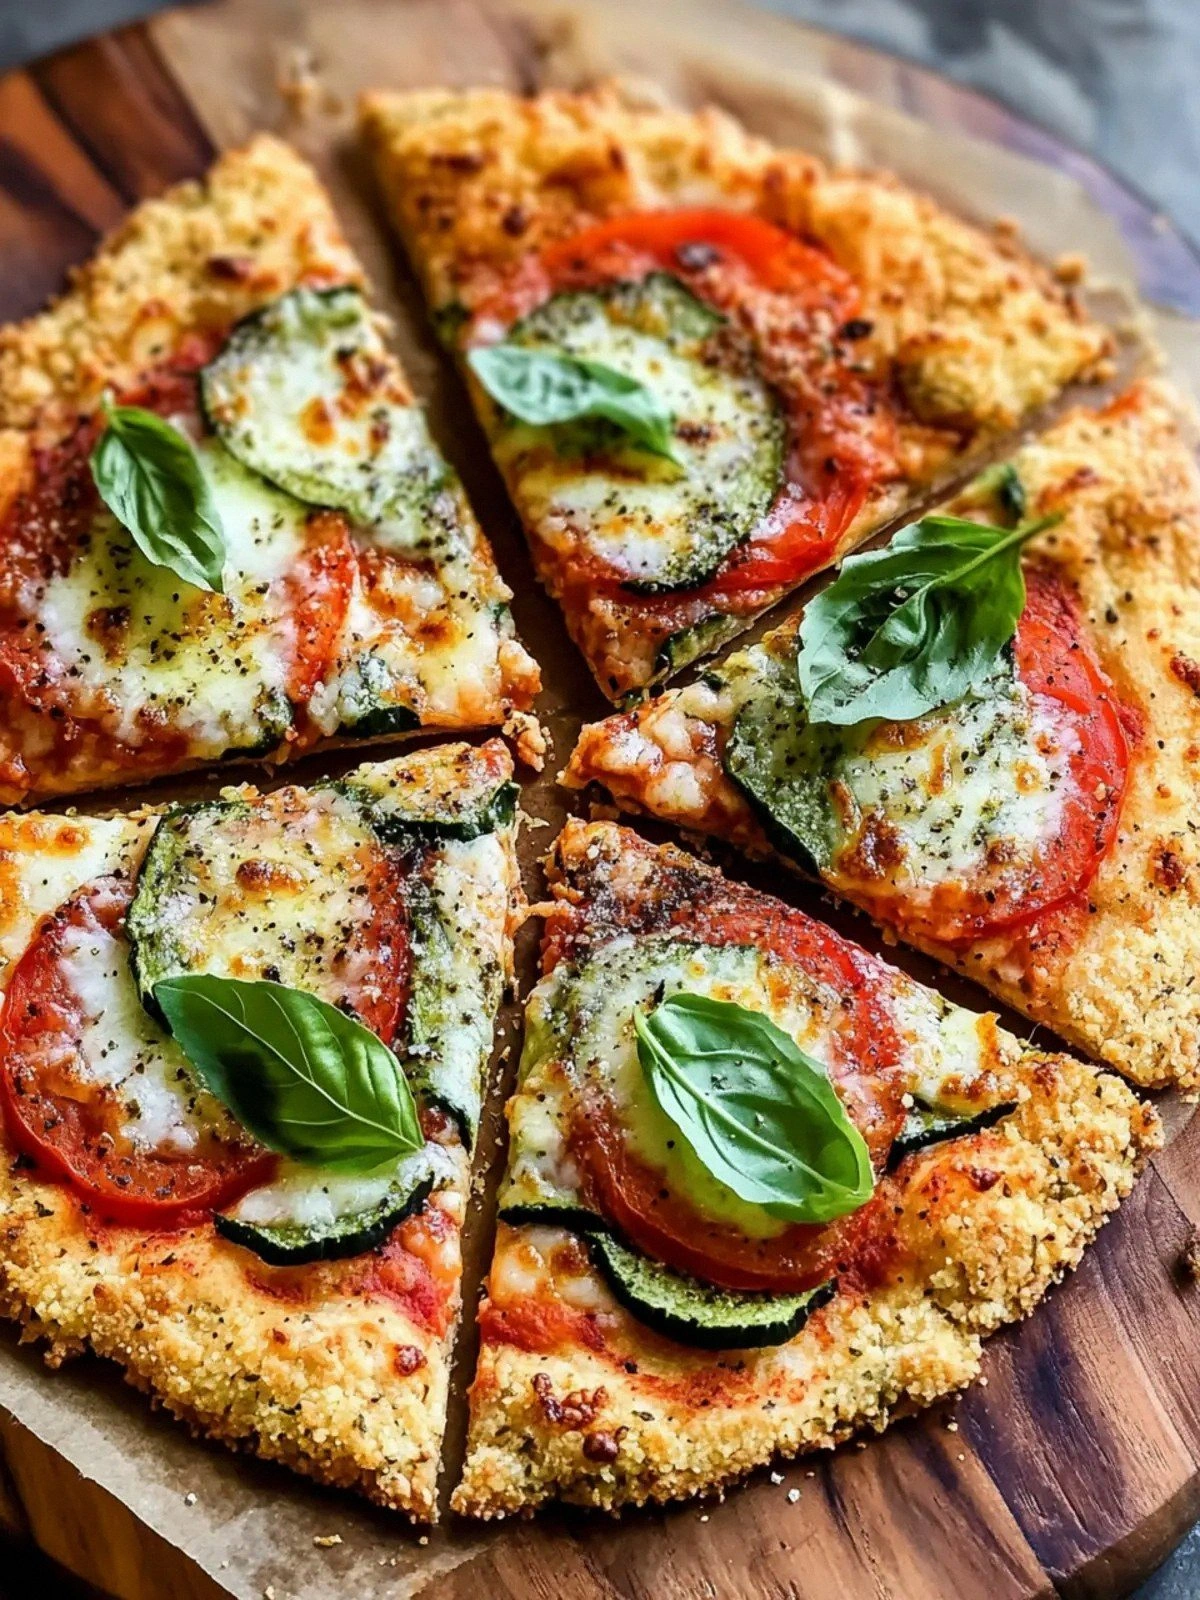
Picture the kitchen: the scent of caramelized palm shortening mingles with the earthy aroma of freshly grated cassava, a subtle perfume that promises depth. My eyes catch the golden crust forming on the baking sheet, its edges crisping into a delicate, almost buttery crunch. The sound of the dough sliding into the oven is a quiet triumph, a low hum that tells me something good is about to happen. As the timer ticks, I can almost taste the first bite—light, airy, yet rich enough to carry any topping you dream of.
What sets this version apart is not just the absence of wheat, but the marriage of tropical flavors with classic Italian herbs. The cassava gives a naturally sweet, nutty undertone that balances the sharpness of basil and oregano, creating a flavor profile that feels both exotic and comforting. The palm shortening adds a velvety texture, preventing the crust from becoming dry or rubbery, a common pitfall in many gluten‑free recipes. And the blend of coconut and almond flours introduces a subtle nuttiness that elevates the overall mouthfeel.
I dare you to taste this and not go back for seconds. I’ll be honest—once I made the first batch, I ate half of it before anyone else even had a chance. If you’ve ever struggled with a flaky, gluten‑free crust that feels like a disappointment, you’re not alone. This recipe is hands down the best version you’ll ever make at home, and the technique I’ll share will change how you view cassava forever. Let me walk you through every single step—by the end, you’ll wonder how you ever made it any other way.
What Makes This Version Stand Out
- Flavor: The cassava base delivers a natural sweetness that complements the savory herbs, creating a balanced taste that feels like a Mediterranean sunrise.
- Texture: Palm shortening’s buttery finish keeps the crust moist inside while crisping the edges into a satisfying snap.
- Ease: No need for blind baking or pre‑cooking the dough; the entire process takes less than 45 minutes from start to finish.
- Uniqueness: Coconut and almond flours provide a subtle nutty undertone, setting this crust apart from the standard gluten‑free options.
- Crowd‑pleaser: Guests rave about the airy, almost airy interior that feels like a light cloud of flavor.
- Ingredient Quality: Using fresh, high‑quality cassava root ensures the dough stays tender and free from off‑flavors.
- Cooking Method: A single‑pan bake that eliminates the mess of multiple pans and pans.
- Make‑Ahead Potential: The dough can be pre‑baked and stored, making it a perfect solution for last‑minute gatherings.
Inside the Ingredient List
The Flavor Base
Cassava Root is the star of the show. It offers a mild sweetness that acts as a natural counterbalance to the robust Italian herbs. When grated, it releases a subtle earthy aroma that permeates the dough, giving the crust a depth that’s hard to achieve with wheat flour alone. Skipping cassava would mean losing that unique flavor profile; the crust would become flat and uninspired.
The Texture Crew
Palm Shortening is the secret weapon that keeps the crust moist and tender. Its high melting point prevents the dough from drying out during the bake, while its buttery undertone adds a silky finish. If you don’t have palm shortening, a 1:1 substitution of coconut oil can work, but expect a slightly different mouthfeel. The combination of coconut and almond flours adds a subtle nuttiness that elevates the overall texture, making each bite feel like a small, crunchy surprise.
The Unexpected Star
Almond Flour brings a delicate, sweet nuttiness that isn’t overpowering but adds an extra layer of complexity. Its fine texture helps bind the dough together, preventing it from becoming crumbly. If you’re allergic or simply don’t have almond flour on hand, ground flaxseed meal can be a decent substitute, though it will add a slightly earthy flavor.
The Final Flourish
Herbs and seasonings—basil, oregano, garlic powder, and Italian seasoning—create a fragrant, savory base that sings with every bite. Salt is the essential enhancer, pulling out the flavors from every ingredient. A pinch of sea salt can be added at the end of the baking process for a final burst of flavor. If you want a slightly spicy kick, a dash of crushed red pepper flakes will complement the herbs beautifully.
Everything’s prepped? Good. Let’s get into the real action...
The Method — Step by Step
- Step 1: Prepare the cassava. Peel and grate one cup of fresh cassava root using a box grater or a food processor with a shredding blade. Squeeze the grated cassava through a clean towel or cheesecloth to remove excess moisture; this step is crucial to prevent a gummy crust. While you’re doing this, let the grated cassava sit in a bowl so the fibers can settle and release any remaining liquid. The goal is a dry, fluffy texture that will absorb the flour without becoming soggy.
- Step 2: Mix the dry ingredients. In a large mixing bowl, combine 1/4 cup palm shortening, 1/4 cup coconut flour, 1/4 cup almond flour, 1 tsp salt, 1 tsp basil, 1 tsp oregano, 1/2 tsp garlic powder, and 1 tsp Italian seasoning. Whisk until the mixture is uniform, ensuring the herbs are evenly distributed. This dry blend will form the backbone of your crust, providing structure and flavor. If you notice any clumps, sift the mixture through a fine mesh sieve to smooth it out.
- Step 3: Combine wet and dry. Add the grated cassava to the dry mixture and stir until the dough comes together. The dough should feel slightly tacky but not sticky; if it’s too dry, add a tablespoon of warm coconut milk or a splash of water. Knead the dough gently with your hands for about 2 minutes, watching for the cassava fibers to incorporate fully. The dough should hold its shape without crumbling.
- Step 4: Shape the crust. Place the dough on a parchment‑lined baking sheet. Using a rolling pin or your palms, flatten the dough into a 12‑inch circle, aiming for a thickness of about 1/4 inch. The edges should be slightly raised to create a rim that will crisp up beautifully. If the dough sticks to the surface, dust a small amount of coconut flour to prevent sticking without altering the flavor profile.
- Step 5: Pre‑bake the crust. Preheat your oven to 425°F (220°C). Place the crust in the oven and bake for 12–15 minutes, or until the edges begin to turn golden and a faint toasty aroma emerges. This step ensures the crust has a firm base that won’t collapse when you add toppings. Keep an eye on the color; you want a light golden hue, not a deep brown.
- Step 6: Add toppings. Remove the pre‑baked crust from the oven and spread your favorite sauce—marinara, pesto, or a simple olive oil and garlic blend. Sprinkle shredded mozzarella, sliced veggies, or your chosen protein. The key is to keep the toppings light; too much moisture can make the crust soggy. A light drizzle of olive oil over the toppings will help them brown evenly.
- Step 7: Finish baking. Return the pizza to the oven and bake for an additional 10–12 minutes, until the cheese is melted and bubbly, and the crust edges are crisp. Watch for the cheese to develop a subtle golden crust; that’s your sign of perfection. The final bake also seals the crust’s moisture, giving it that coveted airy interior.
- Step 8: Cool and serve. Let the pizza rest for 3–4 minutes on a cooling rack to allow the cheese to set, preventing it from sliding off. Slice with a pizza cutter or a sharp knife, and serve immediately while the crust is still warm and the cheese is delightfully gooey. If you’re preparing ahead, wrap the cooled pizza in parchment and store in an airtight container; it will stay fresh for up to 48 hours.
That's it — you did it. But hold on, I've got a few more tricks that'll take this to another level...
Insider Tricks for Flawless Results
The Temperature Rule Nobody Follows
Many people bake at 400°F, but this recipe thrives at 425°F. The higher temperature ensures the edges crisp up while keeping the center airy. If your oven runs hot, lower the temperature by 10–15°F to avoid burning the crust. I once tried baking at 450°F, and the crust was so crisp that the toppings blistered; that was a lesson in the importance of temperature control.
Why Your Nose Knows Best
Before you lift the pizza out of the oven, give it a sniff. A faint, sweet, toasted aroma indicates the cassava has caramelized just right. If you detect a raw, starchy smell, give it a couple more minutes. Your nose is a reliable judge of doneness, often more accurate than the timer.
The 5‑Minute Rest That Changes Everything
After baking, let the pizza rest on a rack for exactly five minutes. This pause allows the cheese to set, preventing it from sliding off when you cut. It also lets the steam redistribute, keeping the crust from becoming soggy on the inside. A quick 5‑minute rest is the secret to a pizza that looks as good as it tastes.
Keep It Moist, Not Wet
When adding toppings, avoid placing too much moisture on the crust. Use a light drizzle of olive oil or a thin layer of sauce to keep the crust from absorbing excess liquid. If you’re adding tomatoes or mushrooms, pat them dry before placing them on the pizza. A dry surface ensures the crust remains crisp.
Pre‑Bake, Don’t Skip It
Some people skip the pre‑bake step to save time, but this can lead to a soggy base. The pre‑bake creates a sturdy foundation that holds the toppings and prevents the crust from becoming soggy. Even if you’re in a hurry, give the crust 12 minutes before adding toppings; the time saved later is worth the initial effort.
Creative Twists and Variations
This recipe is a playground. Here are some of my favorite ways to switch things up:
Spicy Jalapeño Pepper
Add thinly sliced jalapeños to the topping list for a fiery kick. The heat pairs wonderfully with the mild cassava base, creating a contrast that excites the palate. This variation is perfect for a summer gathering where everyone needs a little spice.
Marinara & Mozzarella Classic
Use a classic marinara sauce and a generous layer of shredded mozzarella. The tomato acidity cuts through the nuttiness of the cassava, while the cheese adds a gooey, indulgent layer. This is the go‑to version for families who love traditional pizza flavors.
Roasted Veggie Delight
Top the crust with roasted bell peppers, zucchini, and eggplant. The roasting process brings out natural sweetness that complements the cassava. Sprinkle with fresh basil after baking for an aromatic finish.
Greek Yogurt & Herb Sauce
Swap marinara for a creamy Greek yogurt sauce flavored with dill and lemon zest. The tangy yogurt balances the earthy cassava, while the herbs add a fresh burst. This version is light yet satisfying, ideal for a brunch spread.
BBQ Chicken & Pineapple
Spread a smoky BBQ sauce base, top with shredded chicken and pineapple chunks. The sweet pineapple and smoky sauce create a tropical vibe that pairs beautifully with the cassava’s natural sweetness. This variation is a crowd‑pleaser at parties.
Cheesecake‑Inspired Dessert Pizza
Swap savory toppings for sweet ones: spread a thin layer of mascarpone, top with fresh berries, drizzle honey, and finish with a dusting of cocoa powder. The cassava crust becomes a dessert canvas, offering a unique twist on traditional cheesecake.
Storing and Bringing It Back to Life
Fridge Storage
Store the cooled pizza in an airtight container in the refrigerator for up to 48 hours. Wrap each slice loosely in parchment paper to prevent sticking. When ready to eat, reheat in a pre‑heated oven at 350°F for 10 minutes or until the cheese is melted again.
Freezer Friendly
For longer storage, freeze individual slices in a freezer‑safe bag. Label with the date and freeze for up to 3 months. Thaw overnight in the refrigerator, then reheat in the oven at 375°F for 15 minutes, or until the crust is crisp.
Best Reheating Method
Reheat on a baking sheet at 375°F for 8–10 minutes, or until the crust is hot and the cheese is bubbling. Adding a tiny splash of water to the bottom of the baking sheet creates steam, which helps the crust stay moist and prevents it from drying out. Finish with a quick broil for a few seconds if you want a golden top.