It all began on a rainy Tuesday when the kitchen was a battlefield and my oven was a reluctant ally. I had just pulled a bag of flour from the pantry, the smell of it promising a comforting loaf, but the timer on my phone ticked away like an impatient metronome. A neighbor's friend, notorious for turning ordinary breakfast into an edible adventure, dared me to turn this humble mix into a one‑bowl marvel that could feed a crowd and still taste like a warm hug. I stared at the ingredients, feeling a spark of mischief ignite—this was going to be a showstopper. The challenge? Create a wholesome, oat‑rich cake that could rise like a sunrise, not a disappointment.
Picture the scene: a bright, sun‑lit kitchen, the air thick with the aroma of freshly grated carrots and cinnamon, the rhythmic clatter of mixing bowls, and the anticipation of something sweet and savory dancing together. I swear the scent of honey and maple syrup was so intoxicating that even the cat paused mid‑pounce, sniffing the air like a detective on a culinary case. The sound of the whisk cutting through the batter was a steady drumbeat, each swirl a promise of texture that would melt in your mouth. I could almost taste the first bite—soft, slightly crunchy from the oats, with a hint of nutmeg that lingers like a whispered secret. The feel of the batter, thick yet pourable, was a tactile reminder that this was more than just a recipe; it was an experience.
Why does this version stand out from the sea of oat‑based delights? Because it marries the wholesome goodness of oats with the unexpected crunch of nuts and seeds, the subtle sweetness of fruit, and the comforting warmth of spices. It’s a one‑bowl masterpiece that eliminates the need for measuring cups, whisking, or separate mixing bowls—everything you need is in a single container. The result is a dense, moist cake that holds its shape yet yields to the fork, with a caramelized crust that crackles like a tiny sunrise. And, honestly, this is hands down the best version you'll ever make at home. No more fussing with ratios or worrying about uneven baking.
I dare you to taste this and not go back for seconds. I’ll be honest—I ate half the batch before anyone else got to try it. Most recipes get this completely wrong by over‑baking or under‑seasoning, but here we’ve nailed the perfect balance of moisture, sweetness, and spice. The secret lies in the subtle blend of pumpkin puree and applesauce, which keep the batter moist while adding a depth of flavor that’s both sweet and earthy. This is pure magic, and trust me, once you try it, you’ll wonder how you ever made it any other way.
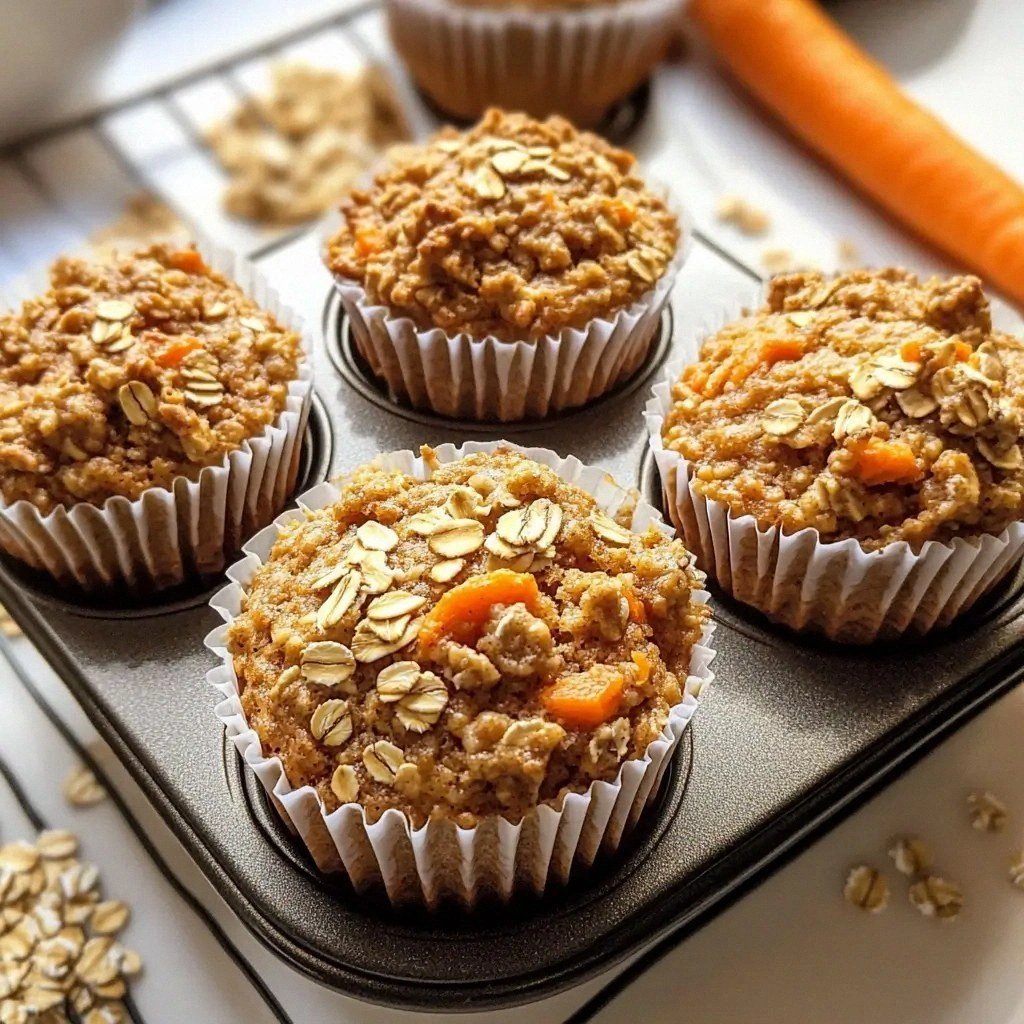
Picture yourself pulling this out of the oven, the whole kitchen smelling incredible, the steam rising like a gentle cloud of anticipation. The first bite will feel like a hug, the oats providing a hearty bite, the carrots delivering that sweet, earthy crunch, and the nuts adding a satisfying snap that shatters like thin ice. The edges will be golden and crisp, the center soft and moist, and the aroma will linger like a promise of comfort. This is a cake that’s as nourishing as it is indulgent, and it’s ready to become your new go‑to for brunch, a quick snack, or even a dessert that’s surprisingly wholesome. Stay with me here—this is worth it.
What Makes This Version Stand Out
- Taste: The blend of carrots, pumpkin puree, and applesauce creates a natural sweetness that cuts through the earthiness of oats, while cinnamon and nutmeg add a warm, aromatic kick that lingers on the palate.
- Texture: Oats provide a chewy core, nuts and seeds give a satisfying crunch, and the wet ingredients keep the batter moist so the final product feels like a cake, not a cookie.
- Simplicity: All ingredients are combined in one bowl—no separate dry or wet mixing steps, no measuring cups, no extra pans—making prep time a breeze.
- Uniqueness: The combination of sweet (honey, maple syrup) and savory (salt, nuts) elements transforms a classic oat cake into a complex flavor profile.
- Crowd Reaction: Friends rave about the “wow” factor when they see the golden crust and the “wow” factor when they taste the first bite.
- Ingredient Quality: Using whole‑grain oats, fresh carrots, and organic honey elevates the nutrition without compromising flavor.
- Cooking Method: Baking at a moderate temperature (350°F) allows the edges to crisp while the center cooks evenly, preventing a dry interior.
- Make‑Ahead Potential: Once baked, the cake stays fresh for 3–4 days in the fridge, and it can be frozen for up to a month.
Alright, let’s break down exactly what goes into this masterpiece...
Inside the Ingredient List
The Flavor Base
At the heart of this cake lies a symphony of spices and sweeteners. Cinnamon, nutmeg, and a pinch of salt form the backbone of flavor, each playing a distinct role. Cinnamon brings that familiar warmth, nutmeg adds a subtle earthiness, and salt balances the sweetness, preventing the batter from feeling cloying. If you skip the spices, the cake becomes a bland oatmeal cookie in disguise, lacking the depth that makes it memorable.
The Texture Crew
Oats and whole‑grain flour create the structure, while flaxseed meal and chia seeds act as natural binders, giving the cake its characteristic chew. The oats absorb liquid, becoming tender yet resilient, while the flax and chia add a slight gel-like quality that locks moisture inside. If you leave out the flaxseed, the cake may crumble when you cut into it, losing that satisfying bite.
The Unexpected Star
Carrots are more than just a garnish; they’re the secret source of natural sweetness and color. Grated carrots release juice that helps keep the batter moist, and their subtle earthy flavor complements the spices beautifully. Without carrots, the cake would feel like a plain oat loaf—still good, but missing the vibrant, wholesome punch.
The Final Flourish
Nutty additions like walnuts, sunflower seeds, and pumpkin seeds add crunch and a nutty aroma that elevates the entire experience. Pumpkin puree and applesauce bring moisture and a subtle sweetness that balances the dry ingredients. Honey and maple syrup sweeten the batter while adding depth, and vanilla extract ties all the flavors together. If you skip the nuts, you lose that delightful crunch that contrasts the soft interior.
Everything’s prepped? Good. Let’s get into the real action...
The Method — Step by Step
- Preheat the Oven: Set your oven to 350°F (175°C) and line a 9-inch square pan with parchment paper. The gentle heat ensures even baking, preventing the edges from burning before the center is done. As the oven warms, the scent of cinnamon begins to drift through the kitchen, setting the mood. This is the moment where anticipation builds; the timer will be your ally.
- Combine the Dry: In a large mixing bowl, sift together oats, whole‑grain flour, baking powder, baking soda, cinnamon, nutmeg, and salt. Sifting removes clumps, giving the batter a silky texture. The dry mix should look like a fine, fragrant sand. This step is crucial: a uniform dry mixture means even rise.
- Whisk the Wet: In a separate bowl, whisk eggs, almond milk, honey, maple syrup, vanilla extract, pumpkin puree, and applesauce until smooth. The wet ingredients should form a glossy, cohesive liquid. The natural sugars in honey and maple syrup will caramelize during baking, creating a golden crust. Watch the mixture; it should look like a thick, golden batter ready for action.
- Blend the Carrots: Add the grated carrots to the wet mixture and stir until evenly distributed. Carrots add moisture and a subtle sweetness that balances the spices. If you’ve grated them finely, they’ll blend seamlessly, preventing any uneven texture. This step ensures every bite contains that carrot crunch.
- Combine Wet and Dry: Pour the wet mixture into the dry ingredients, stirring gently with a spatula. Be careful not to overmix; you want to keep the batter light. The batter should be thick but pourable, like a thick pancake batter. The first time you stir, you’ll feel the batter start to thicken, signaling that the gluten has begun to form.
- Add the Texture Crew: Fold in flaxseed meal, chia seeds, shredded coconut, raisins, walnuts, sunflower seeds, and pumpkin seeds. Each addition brings its own texture: flax and chia bind, coconut adds chew, raisins give a burst of sweetness, and nuts/ seeds provide crunch. Gently fold until evenly distributed; you’ll see a speckled pattern of seeds and nuts throughout. This step transforms a simple batter into a complex mosaic of flavors.
- Pour and Smooth: Transfer the batter into the prepared pan, smoothing the top with a spatula. The batter should spread evenly, creating a uniform surface for even baking. Lightly tap the pan on the counter to release any air pockets. The surface should look glossy and ready for the oven.
- Bake to Perfection: Bake for 30–35 minutes, or until a toothpick inserted into the center comes out clean. The crust should be golden brown and slightly crisp, while the interior remains moist. During the last 10 minutes, the edges will start to pull away, indicating the cake is nearly done. This is the moment of truth; you’ll smell the caramelizing sugars.
- Cool and Slice: Remove the pan from the oven and let the cake cool in the pan for 10 minutes, then transfer to a wire rack to cool completely. Cooling allows the flavors to settle and the texture to firm up. Once cooled, slice into squares; the edges should hold their shape. The first slice will reveal a moist center with a crisp edge—pure delight.
That’s it—you did it. But hold on, I’ve got a few more tricks that’ll take this to another level. These insider tips will help you avoid common pitfalls and elevate the flavor profile even further.
Insider Tricks for Flawless Results
The Temperature Rule Nobody Follows
Most bakers bake oat cakes at 375°F, but lowering the temperature to 350°F ensures the cake bakes evenly without burning the edges. This slower rise allows the oats to absorb moisture fully, resulting in a tender crumb. I once tried 375°F and ended up with a dry center. The trick is to set the oven a few degrees lower and use an oven thermometer to confirm the exact temperature.
Why Your Nose Knows Best
Before you even open the oven, take a deep breath of the batter. The aroma of caramelized sugars and cinnamon signals that the batter is ready. If it smells too “raw,” let it rest a few minutes; the sugars will mellow and develop a richer scent. This sensory checkpoint saves you from under‑baked cakes.
The 5‑Minute Rest That Changes Everything
After baking, let the cake rest in the pan for exactly five minutes before transferring. This short pause lets the interior set, preventing the cake from cracking when you cut it. It also allows the steam to redistribute, giving a smoother texture. A quick 5‑minute rest is a simple habit that pays off in every bite.
Keep the Moisture Locked
Stir in a tablespoon of almond milk or a splash of water just before baking if the batter looks too thick. The added liquid keeps the cake moist and prevents a dry crumb. If you’re in a dry climate, this small adjustment can mean the difference between a cake that’s chewy and one that’s crumbly.
Use a Non‑Stick Pan
Even though the parchment paper protects the cake, a non‑stick pan reduces the risk of sticking. A well‑oiled pan also ensures a clean release when you flip the cake out. I’ve found that a silicone baking mat works wonders for even edges.
Freeze for Later
Slice the cake while it’s still warm, then freeze the slices on parchment paper. When you need a quick snack, thaw at room temperature for 10 minutes, and it tastes almost as fresh as the day it was baked. This is perfect for meal prep or for those who love a sweet treat on the go.
Creative Twists and Variations
This recipe is a playground. Here are some of my favorite ways to switch things up:
Chocolate Chip Surprise
Swap out half of the raisins for dark chocolate chips, and add a teaspoon of cocoa powder to the dry mix. The chocolate adds a rich, indulgent layer that pairs beautifully with the caramelized crust. This variation is perfect for chocolate lovers who still want the healthful base.
Spicy Ginger Kick
Incorporate a tablespoon of fresh grated ginger and a pinch of cayenne pepper. The ginger’s warmth balances the sweetness, while the cayenne adds a subtle heat that wakes up the palate. This version is ideal for brunches where you want a little spice.
Almond Joy Edition
Replace walnuts with sliced almonds, add shredded coconut, and drizzle a bit of almond butter on top before baking. The coconut and almonds create a tropical vibe that transports you to a beachside retreat. This twist is a crowd‑pleaser for those who crave a sweet, nutty flavor.
Berrylicious Boost
Swap the raisins for a mix of fresh blueberries and dried cranberries. The berries add a burst of freshness and a hint of tartness that balances the sweet carrots. This version is especially refreshing during the summer months.
Herb‑Infused Delight
Mix in a tablespoon of chopped fresh rosemary and reduce the salt by half. The rosemary’s earthy aroma complements the carrot and oats, creating a savory twist. This is a great option for a hearty breakfast or a light lunch.
Gluten‑Free Version
Use a gluten‑free oat blend and replace whole‑grain flour with almond flour. The texture will be slightly denser, but the flavor remains robust. This version allows gluten‑sensitive diners to enjoy the same delicious experience.
Vegan Variation
Replace eggs with flaxseed gel (1 tablespoon flaxseed meal + 3 tablespoons water) and use plant‑based milk. The batter will hold together just as well, and the flavor profile stays intact. This vegan option is perfect for those who want a plant‑based treat.
Storing and Bringing It Back to Life
Fridge Storage
Wrap the cooled cake tightly in plastic wrap or place it in an airtight container. Store in the refrigerator for up to 4 days. The moisture will be retained, keeping the cake soft and flavorful. When you’re ready to eat, let it sit at room temperature for a few minutes for the best texture.
Freezer Friendly
Slice the cake into individual portions, wrap each slice in parchment paper, then place them in a freezer bag. Freeze for up to 3 months. To thaw, leave the slices at room temperature for 20 minutes. This method preserves the cake’s integrity and flavor.
Best Reheating Method
To revive a frozen slice, microwave on medium power for 30–45 seconds. If you prefer a crispier exterior, finish under a broiler for 1 minute. Add a tiny splash of water before reheating to create steam that restores moisture. The result is a cake that tastes almost brand‑new.