I still remember the night I nearly set my kitchen on fire while chasing a dream of a perfect chili. The oven door was ajar, the timer was on 10 minutes, and I had just added a splash of red wine to a pot of simmering lamb. The smell that burst out was a smoky, earthy aroma that made my neighbors wonder if a barbecue was happening in my apartment. The realization hit me hard: my chili was a masterpiece in the making, but I needed a definitive recipe that would keep the flavor locked in and the texture just right. This is the moment that sparked the creation of the Lamb Chili Recipe that you’re about to discover.
If you’ve ever tried a lamb chili that tasted like a bland stew, you’re not alone. Most people use generic spice blends that mask the distinct flavor of lamb, leaving the dish feeling flat and forgettable. I was tired of that mediocrity, so I set out to craft a version that celebrates the richness of lamb while balancing heat, acidity, and sweetness. The result is a chili that’s robust, complex, and utterly addictive—every bite feels like a warm hug from a distant, smoky campfire. I dare you to taste this and not go back for seconds.
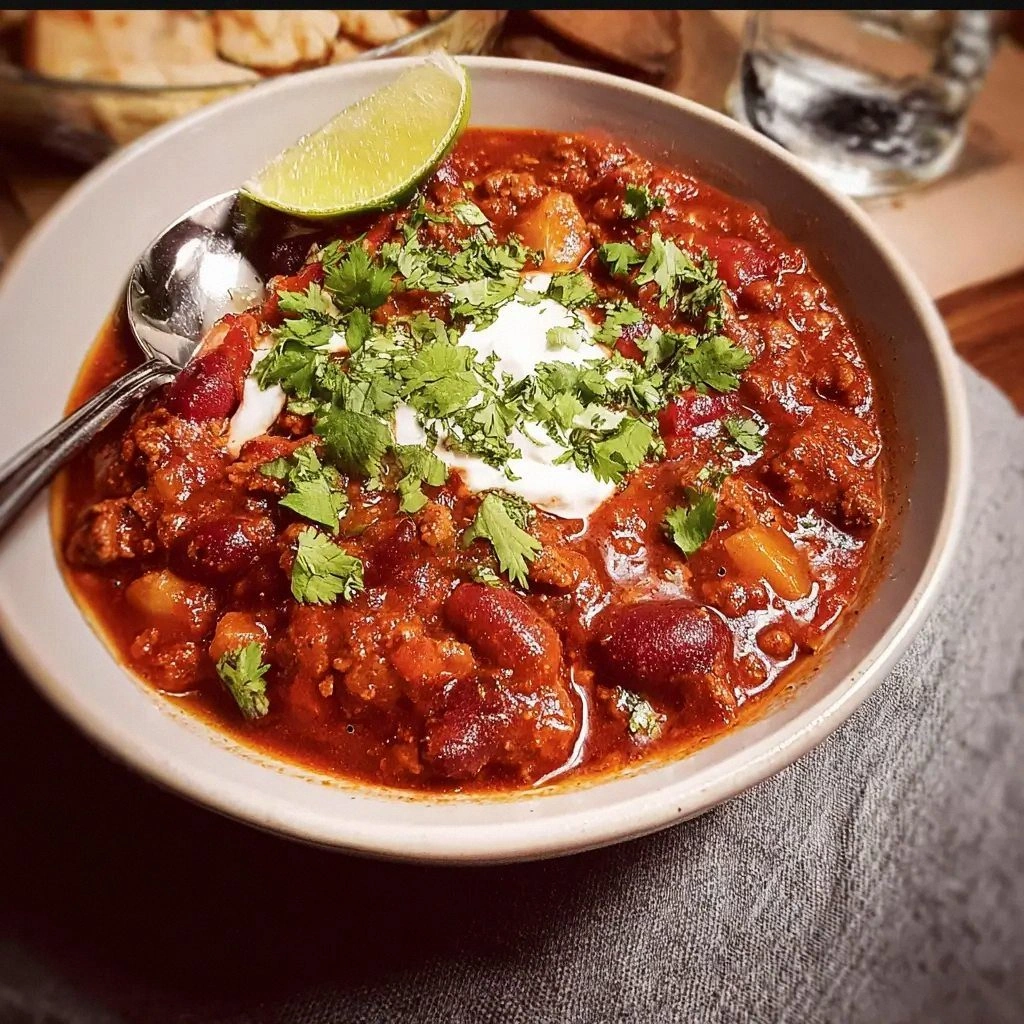
Picture yourself pulling this out of the oven, the whole kitchen smelling incredible, and your guests reaching for a second helping without hesitation. The sauce clings to the meat like velvet, and the chili’s color is a deep, inviting mahogany that promises comfort and warmth. The first spoonful delivers a burst of savory lamb, a kick of chili heat, and a subtle sweetness from caramelized onions that lingers on your palate. The finish is a gentle peppery note that lingers, making you crave more. This is hands down the best version you’ll ever make at home.
But what truly sets this chili apart isn’t just the flavor profile—it’s the technique that locks in moisture, the precise timing that brings out the best in each ingredient, and the thoughtful balance of spices that make it both bold and approachable. I’ve experimented with dozens of chili variations, and most of them fall short because they either overcook the meat or under-season the broth. I’ve learned that the secret lies in searing the lamb properly, building a layered base of aromatics, and letting the chili simmer gently for the right amount of time. The end result is a dish that is both comforting and sophisticated, with a depth that will keep you coming back for more.
There’s a particular technique I’ll reveal in this recipe that you won’t find in most chili guides: the “double sear” method. By first searing the lamb until it develops a caramelized crust and then searing it again after adding the onions, you lock in flavor and create a complex, smoky undertone that is simply irresistible. This subtle step transforms a simple pot of chili into a gourmet experience. And don’t worry—the process is straightforward, and I’ll walk you through each moment.
I’ve also discovered that the right blend of spices can turn a humble pot of lamb into a culinary adventure. By combining smoked paprika, cumin, oregano, and a touch of cinnamon, you create a warm, aromatic base that elevates the dish. This blend brings out the natural sweetness of the lamb while providing a gentle heat that doesn’t overpower the other flavors. The result is a chili that is both comforting and exciting, a true crowd-pleaser that will impress even the most discerning palates.
Now, let’s dive into the details. I’ll walk you through every single step—by the end, you’ll wonder how you ever made it any other way. From the initial searing to the final garnish, each moment is designed to bring out the best in the ingredients. I’ll share my personal hacks, the exact timing you need, and the little tricks that make this chili stand out from the rest. Ready? Let’s get cooking.
What Makes This Version Stand Out
- Flavor Depth: The double sear technique and layered spices create a rich, complex taste that feels both hearty and refined. Each bite reveals subtle notes of smokiness, earthiness, and a hint of sweet caramel.
- Texture Perfection: The lamb is seared until caramelized, then simmered to melt into tender, melt-in-your-mouth pieces that cling to the chili. The beans remain plump and firm, adding a satisfying bite.
- Simplicity: Despite its depth, the recipe requires only a handful of ingredients and a single pot, making it accessible for busy weeknights.
- Make-Ahead Friendly: The chili actually improves after resting; the flavors meld further, making it ideal for meal prep or a potluck.
- Ingredient Quality: Using fresh, high-quality lamb and ripe tomatoes ensures a vibrant, authentic taste that can't be replicated with frozen or processed ingredients.
- Heat Control: The chili offers a customizable heat level thanks to the adjustable cayenne and fresh chili peppers, allowing you to dial in the exact spice intensity.
- Visual Appeal: The deep mahogany hue of the sauce is both appetizing and Instagram-worthy, making it perfect for hosting or sharing.
- Versatility: The recipe works wonderfully with variations—add corn for crunch, swap beans for lentils, or top with avocado for creaminess.
Inside the Ingredient List
The Flavor Base
Ground lamb is the star of this chili, and choosing the right cut is essential. I recommend using a mix of 70% lean and 30% fat to maintain juiciness while preventing the dish from becoming greasy. The fat renders during searing, creating a natural sauce that carries the spices beautifully. If you’re in a hurry, a quick pat-down with paper towels before cooking will help remove excess moisture, ensuring a crisp sear.
The Texture Crew
Kidney beans and pinto beans provide body and a subtle earthiness that balances the lamb’s richness. Soaking the beans overnight reduces cooking time and improves digestibility. If you’re short on time, canned beans are fine—just rinse them well to cut down on sodium. The beans’ creamy texture contrasts with the tender lamb, creating a satisfying mouthfeel.
The Unexpected Star
A splash of red wine adds a depth of flavor that is often missing in traditional chili recipes. The acidity cuts through the lamb’s richness, while the tannins provide a subtle bitterness that elevates the overall taste. If wine is off the table, a small amount of balsamic vinegar or a splash of Worcestershire sauce can serve as a suitable substitute.
The Final Flourish
Fresh cilantro, a squeeze of lime, and a dollop of sour cream finish the dish with bright, refreshing notes. The cilantro adds herbal brightness, lime provides acidity, and sour cream offers a creamy contrast that balances the heat. If dairy is a concern, Greek yogurt or a non-dairy alternative works just as well.
Everything's prepped? Good. Let's get into the real action.
The Method — Step by Step
- Heat the Skillet: Place a heavy-bottomed cast-iron skillet over medium-high heat and add a splash of olive oil. Watch the oil shimmer—when it begins to lightly smoke, it’s ready. This step ensures a perfect sear and prevents sticking. I’ve found that a high smoke point oil like avocado or grapeseed works best for lamb.
- First Sear of Lamb: Add the ground lamb in a single layer, pressing it down with a spatula to maximize contact with the pan. Let it cook undisturbed for 3-4 minutes until a golden crust forms. Flip once and sear the other side. This caramelization builds a deep, savory base for the chili.
- Remove Excess Fat: Drain the rendered fat into a measuring cup, reserving it for later. The fat should be about 2 tablespoons; if it’s more, let the pan cool and then pour out the excess. This keeps the chili from becoming too greasy while still retaining flavor. The reserved fat is essential for the next step.
- Second Sear and Aromatics: Return the skillet to medium heat, add the reserved fat, and then toss in diced onions, bell pepper, and minced garlic. Sauté for 5 minutes until the vegetables soften and the onions become translucent. This second sear deepens the flavor profile and infuses the oil with aromatic compounds.
- Add Spices: Sprinkle in smoked paprika, ground cumin, dried oregano, cayenne pepper, and a pinch of cinnamon. Stir constantly for 1 minute until the spices become fragrant. The aroma that fills the kitchen is a clear sign that the chili is on the right track.
- Deglaze with Wine: Pour in the red wine, scraping up any browned bits from the bottom of the pan. Let the wine reduce by half—this should take about 3 minutes. The deglazing step pulls all the flavor into the liquid, creating a richer base.
- Introduce Liquids and Beans: Add canned tomatoes, tomato paste, and beef broth, stirring to combine. Then fold in the soaked beans and a handful of corn kernels for extra texture. Bring the mixture to a gentle simmer, reduce the heat to low, and cover partially. Let it simmer for 30 minutes, stirring occasionally.
- Season and Finish: Taste the chili and adjust salt, pepper, and additional spices as needed. Stir in chopped cilantro, a squeeze of lime juice, and a dollop of sour cream or Greek yogurt. The final garnish adds brightness and a creamy contrast that balances the heat.
- Serve: Ladle the chili into bowls and top with extra cilantro, lime wedges, and shredded cheese if desired. Pair with cornbread or a side of rice for a complete meal. The chili is best enjoyed hot, but it also holds up wonderfully for leftovers.
That’s it — you did it. But hold on, I’ve got a few more tricks that’ll take this to another level.
Insider Tricks for Flawless Results
The Temperature Rule Nobody Follows
Many chili recipes call for a high simmer, but that can cause the beans to break apart and the sauce to become watery. I’ve found that keeping the chili at a gentle low simmer (around 200°F) for the entire cooking time preserves the beans’ structure and concentrates the flavors. Use a thermometer if you’re unsure; the ideal range is 190-210°F.
Why Your Nose Knows Best
Smell is your best ally in determining doneness. When the chili emits a sweet, caramelized aroma and the spices are fully integrated, it’s ready to taste. Trust your nose over the clock—cooking is an art, not a science.
The 5-Minute Rest That Changes Everything
After the chili finishes simmering, let it rest for 5 minutes off the heat. This resting period allows the flavors to meld and the liquid to thicken slightly. The result is a more cohesive, flavorful dish.
The Secret to Creamy Texture
If you prefer a creamier chili, add a splash of heavy cream or a spoonful of Greek yogurt at the end. Stir until fully incorporated. The creaminess balances the heat and adds a silky mouthfeel.
Avoiding the Common Pitfall
Many people skip the double sear, leading to bland meat. I’ve seen friends who forgot to deglaze and ended up with a dry, flavorless broth. Don’t make the same mistake—follow the steps exactly, and you’ll have a chili that stands out.
The Final Touch of Freshness
A squeeze of fresh lime juice right before serving brightens the dish and cuts through the richness. Add a pinch of fresh chili flakes for a subtle heat boost. The citrus notes bring everything together and leave a lingering, pleasant aftertaste.
Creative Twists and Variations
This recipe is a playground. Here are some of my favorite ways to switch things up:
Smoky Chipotle Chili
Replace regular chili powder with chipotle powder and add a diced chipotle pepper for an extra smoky heat. The result is a chili that feels like a desert sunset—bold and unforgettable.
Mediterranean Lamb Chili
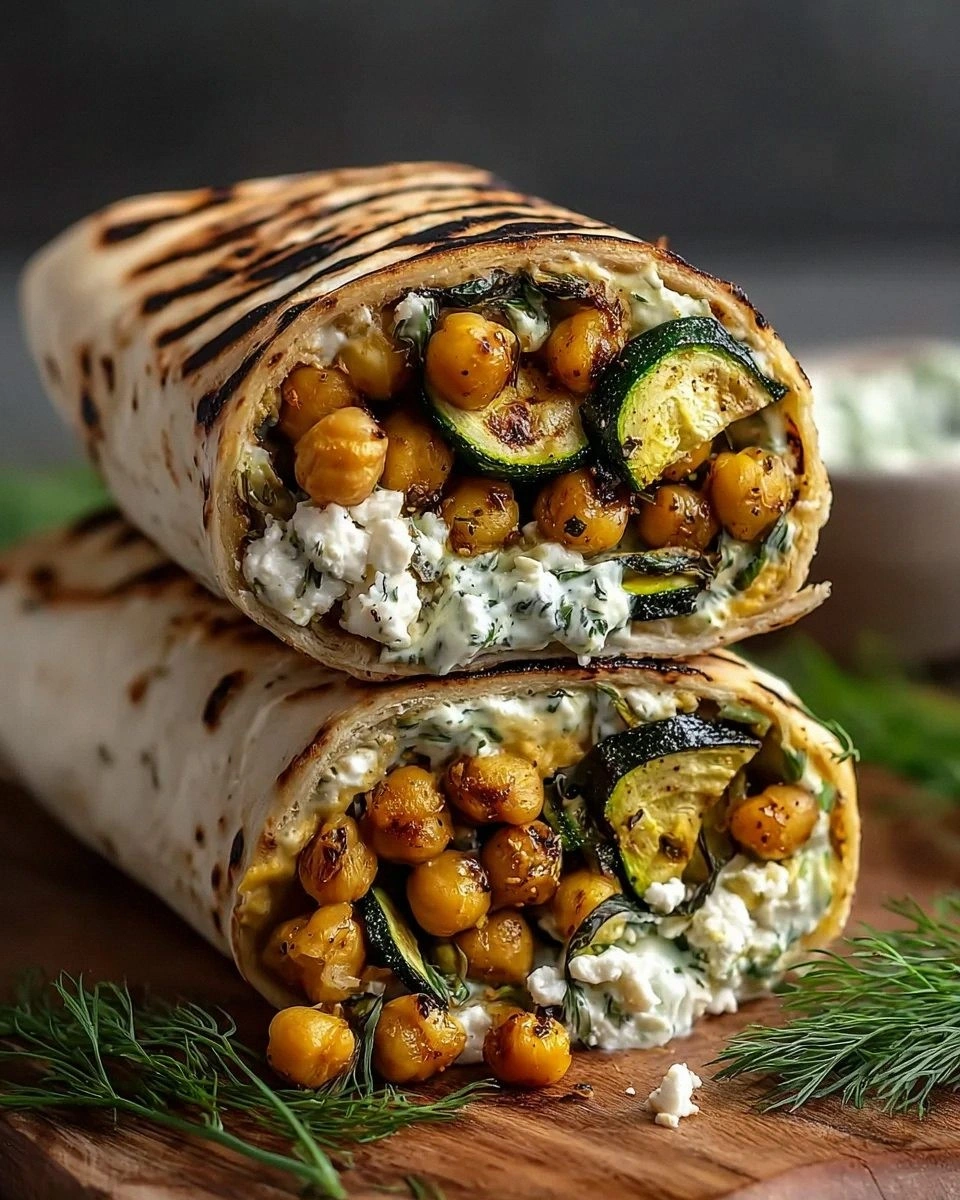
Swap the beans for chickpeas and add diced eggplant and zucchini. Finish with a drizzle of olive oil and a sprinkle of feta cheese. This version offers a Mediterranean twist that’s both hearty and light.
Vegetarian Lamb Substitute
Use finely chopped mushrooms or lentils as a meat substitute. They absorb the spices beautifully and provide a meaty texture without the animal product. It’s a great option for flexitarian diners.
Spicy Sweet Chili
Add a splash of maple syrup or honey to balance the heat with sweetness. The caramelized onions also contribute a natural sweetness that pairs perfectly with the maple note.
Low-Carb Lamb Chili
Omit the beans and corn, and increase the amount of tomatoes and vegetables. Serve over cauliflower rice or a bed of sautéed spinach for a low-carb option that still delivers on flavor.
Breakfast Chili
Add a few scrambled eggs into the pot during the last 5 minutes of cooking. Serve with a side of toasted sourdough for a hearty breakfast that feels like a late-night comfort meal.
Storing and Bringing It Back to Life
Fridge Storage
Cool the chili to room temperature, then transfer it to an airtight container. Store in the refrigerator for up to 4 days. The flavors will continue to deepen, making it even more delicious for leftovers.
Freezer Friendly
For longer storage, portion the chili into freezer-safe containers and freeze for up to 3 months. Thaw overnight in the refrigerator before reheating.
Best Reheating Method
Reheat the chili on the stove over medium-low heat, adding a splash of water or broth to maintain moisture. Stir frequently until it reaches the desired temperature. A tiny splash of water before reheating steams back to perfection and keeps the chili from drying out.