Why you'll love this recipe
- Kid-approved orange‑cocoa bites that vanish fast
- Make-ahead party-friendly, set and refrigerate
- No‑bake, quick assembly in under two hours
- Crowd‑pleaser with nostalgic Cadbury flavor
- Easy pantry staples, no fancy equipment needed
I still remember the summer rain drumming on my kitchen window as I whisked butter and corn syrup together, the sweet scent mingling with the faint chocolate aroma from the pot on the stove. My niece’s eyes widened the second I piped the orange‑tinted creme, and she declared them the best Easter surprise she’d ever tasted. Since that rainy afternoon, these Cadbury Creme Bites have become my go‑to for every holiday gathering, because they’re as easy to make as they are unforgettable to eat.
The story
The moment the melted milk chocolate hits the mini muffin cups, a glossy sheen spreads, and the kitchen fills with a buttery cocoa perfume that makes your mouth water before the first bite.
I first discovered these bites while helping my niece hide Easter eggs in the backyard; she begged for a chocolate surprise that could fit in her tiny palm, and the idea of a bite‑size Cadbury creme took root.
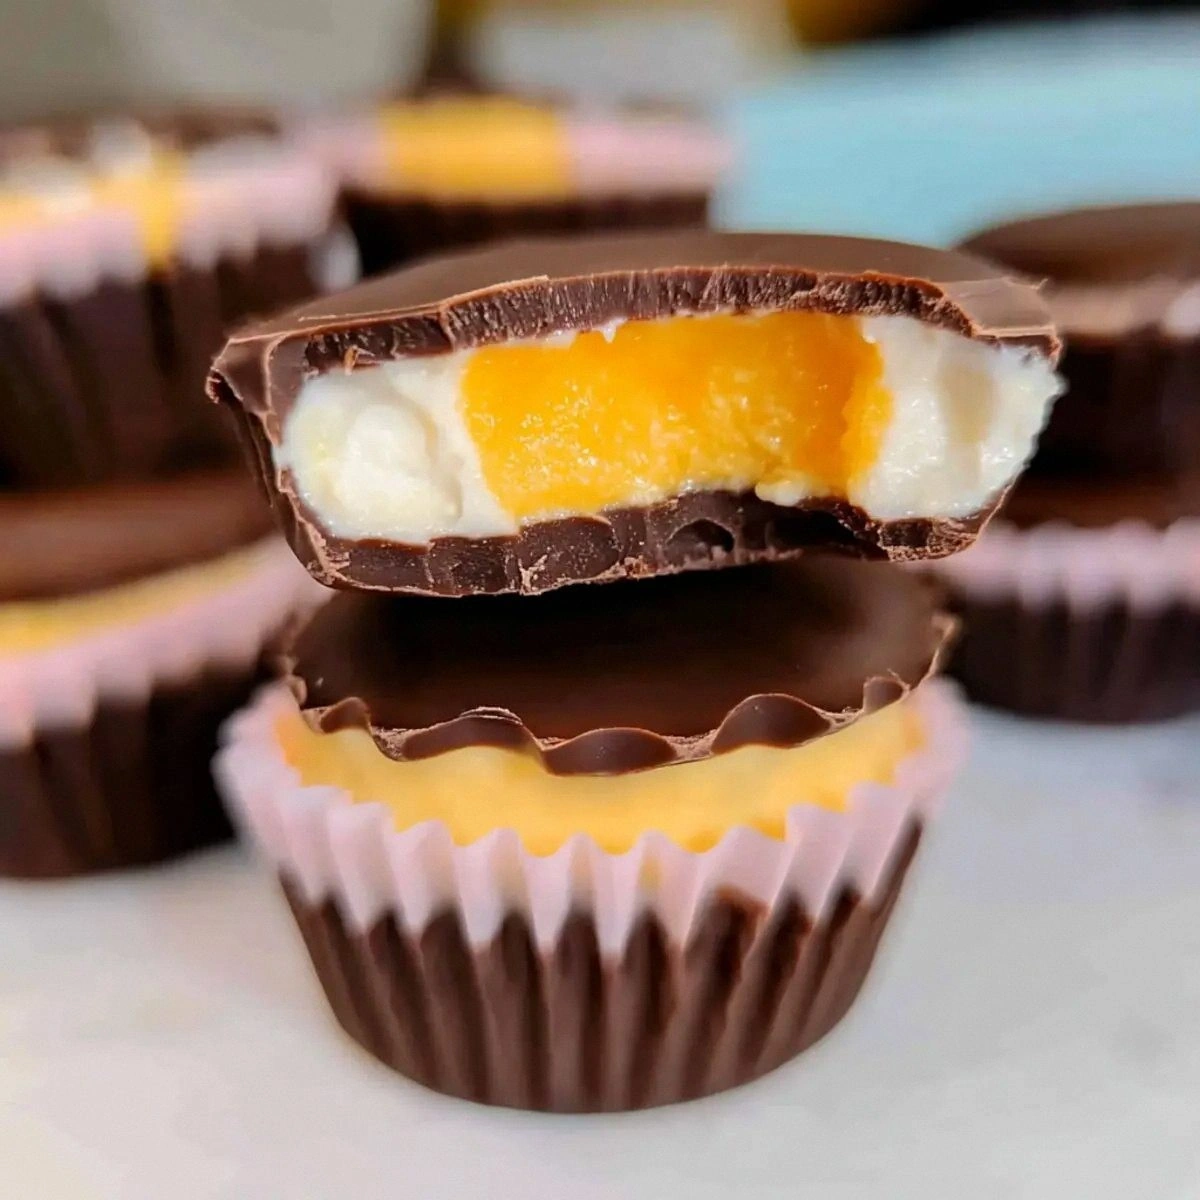
What sets this version apart is the dual‑colored orange and yellow creme layers sandwiched between two chocolate shells, a technique that gives a pop of spring color and a velvety texture you won’t find in store‑bought versions.
Each bite delivers a crisp chocolate snap, followed by a silky, buttery filling that balances sweet corn‑syrup gloss with a subtle salty edge, while the orange hue adds a citrus‑bright note that lifts the richness.
Serve them on a pastel platter alongside fresh berries for a brunch spread, or tuck them into a holiday dessert tray where they become instant conversation starters.
Don’t let the multiple steps intimidate you—melting chocolate in the microwave and piping the layers are foolproof once you have your tools ready, and the whole batch comes together in under two hours.
After testing four different color ratios and watching my family devour three rounds in a row, I can promise these bites hold their shape, flavor, and charm every time.
Why This Recipe Works
- Layered chocolate shell gives structural support for the soft filling.
- Corn syrup prevents sugar crystallization, keeping the creme silky.
- Separating and coloring the filling preserves bright, unmixed hues.
Ingredient notes & substitutions
Milk Chocolate
Provides the rich chocolate shell and structural base for each bite.
Light Corn Syrup
Keeps the filling glossy and prevents sugar crystallization for a silky texture.
Butter, softened
Adds richness and creaminess to the filling, helping it set smoothly.
Powdered Sugar
Sweetens the filling while keeping it smooth and lump‑free.
Equipment you'll need
Ingredients
- 32 oz Milk Chocolate (Provides essential chocolatey flavor and structure.)
- 1 cup Light Corn Syrup (Keeps the filling moist.)
- 0.5 cup Butter, softened (Adds creaminess and richness.)
- 2 tsp Vanilla Extract (Elevates the flavor profile.)
- 6 cups Powdered Sugar (Provides sweetness and perfect texture.)
- 0.5 tsp Salt (Balances the sweetness.)
- 2 Tbsp Milk (Helps achieve desired consistency.)
- 2 drops Orange Gel Food Coloring (Adds a vibrant hue.)
- 1 drop Yellow Gel Food Coloring (Complements the orange color.)
Before You Start
- Soften butter at room temperature 30 minutes
- Line mini muffin cups with parchment liners
- Measure chocolate and set up microwave‑safe bowl
- Gather both gel food colorings
Instructions
- 1Step 1
Begin by lining 48 mini muffin cups with parchment paper liners to ensure easy removal later.
- 2Step 2
In a microwave-safe bowl, melt 16 oz of milk chocolate. Heat on HIGH for 30 seconds, stir, and continue in 20-second intervals until smooth.
- 3Step 3
Transfer melted chocolate into a piping bag and pipe into each lined muffin cup, filling halfway.
- 4Step 4
In a stand mixer, combine softened butter and light corn syrup. Beat until well blended, then mix in vanilla extract, salt, and milk. Gradually add powdered sugar until creamy.
- 5Step 5
Divide filling into two bowls. Mix orange gel food coloring in one bowl and yellow in the other.
- 6Step 6
Pipe a layer of the white filling into the chocolate-coated cups, followed by a dollop of orange filling.
- 7Step 7
Melt remaining milk chocolate and pipe over filled muffin cups, smoothing the top before refrigerating until set.
Pro tips
Melt chocolate in short bursts
Heat in 30‑second intervals, stirring each time to avoid scorching.
Soften butter completely
Leave butter at room temperature for at least 30 minutes for a smooth blend.
Pipe chocolate evenly
Use a wide tip and work quickly before the chocolate sets.
Divide filling before coloring
Split the cream mixture into two bowls, then add gel colors to keep hues vibrant.
Tap the tray to release bubbles
After the final chocolate coat, gently tap the pan on the counter to pop air pockets.
Chill before removing
Refrigerate the bites at least 20 minutes; they snap cleanly when fully set.
Store in airtight container
Keep the bites sealed to maintain the chocolate’s crispness and prevent moisture.
Variations to try
White Chocolate Version
Swap the milk chocolate for white chocolate and use pink gel coloring for a pastel spring look.
Dairy‑Free Alternative
Use dairy‑free chocolate and replace butter with softened coconut oil for a vegan-friendly bite.
Holiday Peppermint Twist
Add a drop of peppermint extract to the filling and a pinch of red food coloring for a festive flavor.
Spicy Chili Chocolate
Stir a pinch of cayenne into the melted chocolate for an adult‑only heat that balances the sweetness.
Serving Suggestions
Troubleshooting
Chocolate hardens too fast
Melt in shorter intervals and keep the bowl warm; work quickly.
Filling separates
Add a splash of milk and beat briskly to re‑emulsify.
Colors turn muddy
Add gel colors after dividing the filling; use only a few drops.
Bites stick to liner
Allow chocolate to set fully, then gently tap the tray to release.
Bites are crumbly
Ensure butter is fully softened and incorporate sugar slowly for a cohesive texture.
Storage & make-ahead
Refrigerator
Store in a sealed airtight container in the fridge for up to 5 days.
Freezer
Freeze individually wrapped bites for up to 1 month; thaw in the refrigerator before serving.
Best way to reheat
No reheating needed, but a 10‑second microwave burst restores softness if chilled.
Make-ahead
Assemble and chill up to 2 days ahead; keep the final chocolate coating separate until just before serving to avoid sogginess.
Ingredients
- 32 oz Milk Chocolate (Provides essential chocolatey flavor and structure.)
- 1 cup Light Corn Syrup (Keeps the filling moist.)
- 0.5 cup Butter, softened (Adds creaminess and richness.)
- 2 tsp Vanilla Extract (Elevates the flavor profile.)
- 6 cups Powdered Sugar (Provides sweetness and perfect texture.)
- 0.5 tsp Salt (Balances the sweetness.)
- 2 Tbsp Milk (Helps achieve desired consistency.)
- 2 drops Orange Gel Food Coloring (Adds a vibrant hue.)
- 1 drop Yellow Gel Food Coloring (Complements the orange color.)
Instructions
- 1Begin by lining 48 mini muffin cups with parchment paper liners to ensure easy removal later.
- 2In a microwave-safe bowl, melt 16 oz of milk chocolate. Heat on HIGH for 30 seconds, stir, and continue in 20-second intervals until smooth.
- 3Transfer melted chocolate into a piping bag and pipe into each lined muffin cup, filling halfway.
- 4In a stand mixer, combine softened butter and light corn syrup. Beat until well blended, then mix in vanilla extract, salt, and milk. Gradually add powdered sugar until creamy.
- 5Divide filling into two bowls. Mix orange gel food coloring in one bowl and yellow in the other.
- 6Pipe a layer of the white filling into the chocolate-coated cups, followed by a dollop of orange filling.
- 7Melt remaining milk chocolate and pipe over filled muffin cups, smoothing the top before refrigerating until set.