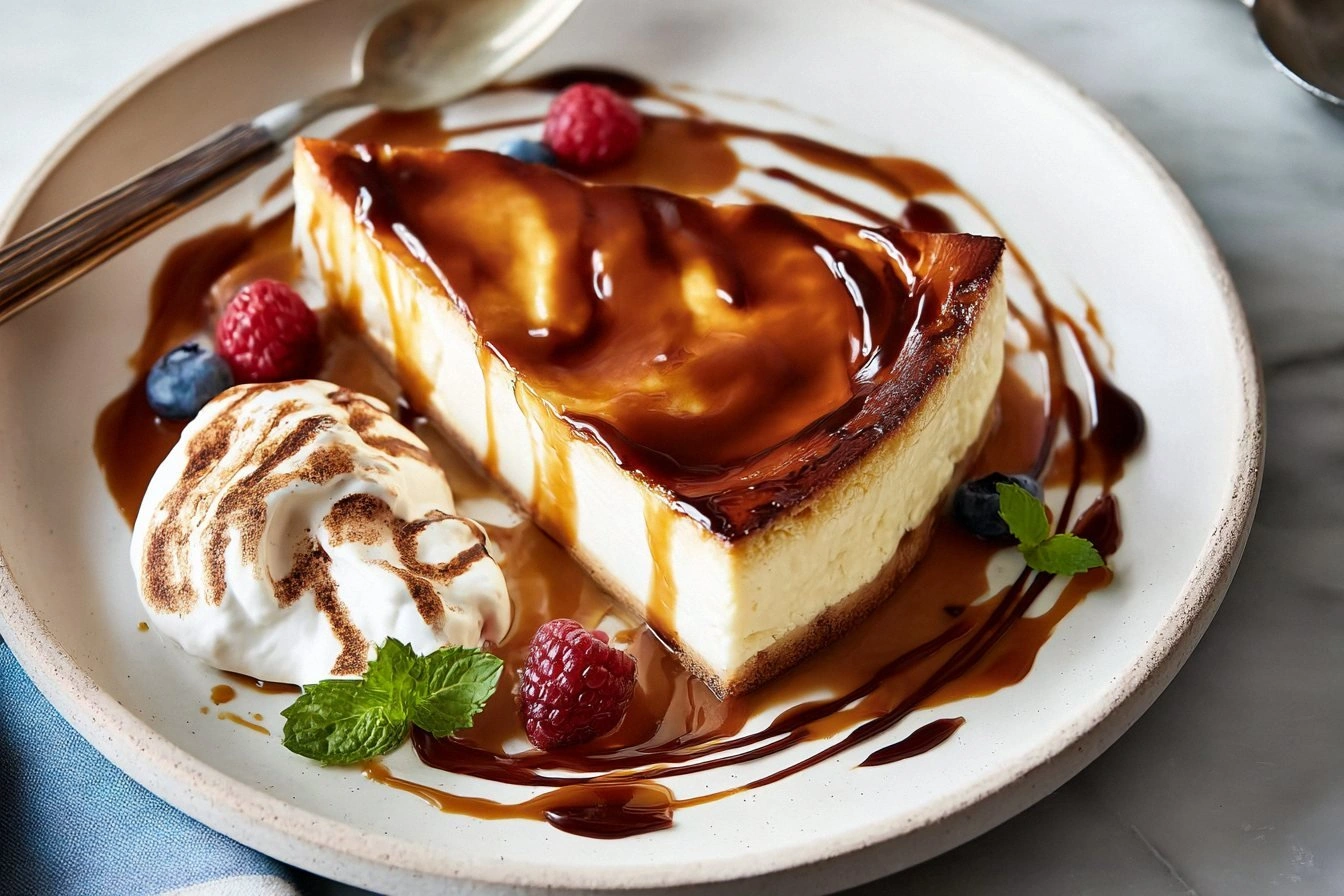
I was in the middle of a frantic Thursday night, the kind where the pantry looks like a war zone and my cravings were screaming louder than a toddler at bedtime. I had a half‑finished batch of caramel sauce, three different milks staring at me from the fridge, and a sudden, unstoppable urge to bake something that would make my grandma weep with pride. I tossed a dare into the air: “Who can resist a cake that smells like a caramel‑laden dream?” The answer? My kitchen, my taste buds, and eventually, anyone who dared to take a bite. The result was a cake so rich it practically glistened with its own ambition.
Picture this: the oven door swings open, a golden‑brown dome rises like a sunrise, and the air is instantly saturated with a buttery, caramel perfume that makes your nose do a happy dance. The crust cracks just enough to reveal a tender, almost melt‑in‑your‑mouth crumb that’s been pampered by not one, not two, but three milks. The first sip of milk gives you that familiar comfort, the heavy cream adds a silk‑like weight, and the sweetened condensed milk brings a caramel‑kissed depth that’s nothing short of decadent. When you drizzle the caramel sauce over the top, it pools like liquid amber, promising a sweet climax that you can’t help but chase.
Most caramel cakes out there are either too dry, overly sweet, or simply forget the power of a balanced milk trio. I’ve tried the “quick fix” versions that rely on a single milk and a splash of vanilla—pleasant, but they lack that layered richness that makes you close your eyes and sigh. This version, however, layers flavors like a symphony, each milk playing its own instrument while the caramel conducts the whole orchestra. The secret? A technique that gently folds the milks together after they’ve been tempered with the batter, ensuring a uniform, velvety texture that never collapses.
And here’s the kicker: the caramel sauce isn’t just a topping; it’s an integral part of the cake’s structure, seeping into the crumb as it bakes, creating pockets of gooey bliss that explode with every forkful. I dare you to taste this and not go back for seconds. Let me walk you through every single step — by the end, you’ll wonder how you ever made it any other way.
What Makes This Version Stand Out
- Flavor Depth: The trio of milks creates a layered sweetness that single‑milk cakes can’t match, while the caramel sauce adds a buttery, toffee‑like finish.
- Texture Harmony: A tender crumb meets a slightly crisp edge, giving you that satisfying contrast between soft and slightly crunchy.
- Simplicity Meets Luxury: Despite its gourmet vibe, the ingredient list is pantry‑friendly and the technique is straightforward.
- Unique Ingredient Balance: Sweetened condensed milk provides both sweetness and moisture, eliminating the need for extra butter.
- Crowd‑Pleaser Factor: Even the pickiest eaters can’t resist the caramel drizzle that glistens like a promise.
- Ingredient Quality: Using real vanilla extract and high‑quality caramel sauce elevates the whole experience.
- Cooking Method: The gentle fold‑in of milks prevents over‑mixing, keeping the cake light despite its richness.
- Make‑Ahead Potential: The cake stays moist for days, and the caramel can be reheated for a fresh glaze anytime.
Inside the Ingredient List
The Flavor Base
All‑Purpose Flour is the backbone of any cake, providing structure while still allowing the batter to rise into that airy cloud we all crave. If you substitute with cake flour, you’ll get an even softer crumb, but you’ll also need to adjust the liquid ratios. The Granulated Sugar does more than sweeten; it helps create a tender crumb by breaking down gluten strands during creaming. Baking Powder is the silent hero that lifts the cake, ensuring those soft peaks that make each slice look like a pillow. Finally, Salt isn’t just a seasoning—it amplifies the caramel’s buttery notes and balances the sweetness of the condensed milk.
The Texture Crew
Eggs are the emulsifiers that bind the fats and liquids together, giving the cake its luxurious mouthfeel. Milk, the first of the three milks, adds moisture and a subtle dairy flavor that sets the stage. Heavy Cream, with its higher fat content, contributes a velvety richness that makes the crumb feel like silk against your tongue. Sweetened Condensed Milk is the secret weapon: it injects extra sweetness, creaminess, and a hint of caramelized sugar without the need for additional butter.
The Unexpected Star
Caramel Sauce is more than a garnish; it’s an active participant that seeps into the batter as it bakes, creating pockets of molten caramel that burst with each bite. A good quality caramel will have a deep amber hue and a buttery, slightly salty finish that prevents the cake from becoming cloyingly sweet. Vanilla Extract rounds out the flavor profile, adding aromatic depth that ties the milk trio and caramel together in perfect harmony.
The Final Flourish
When selecting your ingredients, go for a high‑quality vanilla extract—real vanilla beans will give you those specks of flavor that pure imitation can’t mimic. For the caramel sauce, look for one that lists butter and cream as primary ingredients; this ensures a richer, smoother texture. If you can’t find sweetened condensed milk, a quick DIY version is to simmer regular milk with sugar until it thickens, though it won’t have the exact same caramel notes. Everything’s prepped? Good. Let’s get into the real action...

The Method — Step by Step
Preheat your oven to 350°F (175°C) and grease a 9‑inch round cake pan with butter, then line the bottom with parchment paper. The butter not only prevents sticking but also adds a subtle nutty aroma that will mingle with the caramel later. When you place the pan in the oven, you’ll hear a faint whisper of heat—a comforting prelude to what’s about to happen. Let the pan sit while you prepare the batter; this little waiting period is the perfect time to double‑check your ingredient measurements.
In a large mixing bowl, whisk together the flour, baking powder, and salt. This dry blend ensures the leavening agent is evenly distributed, preventing any pockets of flatness. As you stir, imagine the flour clouds forming a soft blanket that will later cradle the milky goodness. Once combined, set the bowl aside and give yourself a quick high‑five—your base is ready.
In a separate bowl, cream the granulated sugar with the eggs until the mixture turns a pale, almost creamy yellow and the volume doubles. This step is where the magic begins: the sugar crystals dissolve, and the air you incorporate will become the lift that makes the cake airy. Listen for the faint sound of the whisk against the bowl; it’s the sound of anticipation building.
Now, gently fold in the three milks one at a time: start with the regular milk, followed by the heavy cream, and finish with the sweetened condensed milk. As each milk meets the batter, you’ll notice a subtle change in texture—first silky, then richer, finally almost luxurious. Watch Out: If you over‑mix at this stage, the gluten in the flour can develop, leading to a dense cake. Keep the motion light and slow, just enough to combine.
Combine the wet and dry mixtures, adding the vanilla extract and a pinch of extra salt if you love that sweet‑salty balance. Stir just until you see no dry flour streaks; over‑mixing is the enemy of fluffiness. At this point, the batter should have a glossy sheen, a sign that the fats and liquids are perfectly emulsified.
Pour the batter into the prepared pan, smoothing the top with a spatula. Drizzle half of the caramel sauce over the surface, using the back of a spoon to create swirls that will bake into the cake. This technique creates caramel ribbons that, once baked, become pockets of gooey delight.
Kitchen Hack: For perfect caramel ribbons, warm the sauce slightly before drizzling; it spreads more evenly without sinking.Slide the pan into the oven and bake for 30‑35 minutes, or until a toothpick inserted in the center comes out clean and the edges start pulling away from the pan. Around the 20‑minute mark, the kitchen will fill with that intoxicating caramel‑butter aroma that makes you want to peek inside. Resist the urge to open the oven too often; each opening drops temperature and can affect the rise.
While the cake bakes, gently warm the remaining caramel sauce in a small saucepan over low heat, just until it’s pourable. This extra step ensures the final drizzle will glide over the cake like liquid gold, rather than setting into a crust. Keep an eye on it—caramel can scorch quickly, turning bitter in seconds.
When the timer dings, remove the cake and let it cool in the pan for 10 minutes, then turn it out onto a wire rack. While it’s still warm, generously pour the warmed caramel over the top, allowing it to cascade down the sides. The caramel will seep into the crumb, creating those coveted pockets of molten bliss. Let the cake cool completely before slicing; this lets the flavors meld and the caramel set to a glossy finish.
Finally, slice, serve, and watch as your guests’ eyes widen in anticipation. The first bite should deliver a soft, buttery crumb followed by a rush of caramel that lingers like a sweet memory. And now the fun part—pair it with a scoop of vanilla ice cream or a dollop of whipped cream for an extra layer of decadence. That’s it — you did it. But hold on, I’ve got a few more tricks that’ll take this to another level...
Insider Tricks for Flawless Results
The Temperature Rule Nobody Follows
Never bake a cake straight from the fridge. Let the batter sit at room temperature for 10‑15 minutes before it hits the oven; this small pause ensures an even rise and prevents a “sunken middle.” I once tried skipping this step, and the center turned out dense enough to double as a doorstop. Trust me, a few minutes of patience make all the difference.
Why Your Nose Knows Best
The moment you smell that caramel‑butter perfume, you’re close to the perfect bake. If the aroma feels faint, give the cake an extra minute; if it’s overpowering, your oven might be running hot. Use your senses as a guide—your nose is a more reliable timer than any gadget.
The 5‑Minute Rest That Changes Everything
After you’ve poured the final caramel glaze, let the cake rest for exactly five minutes before cutting. This short pause lets the caramel set just enough to stay glossy while still being fluid enough to seep into the crumb. Skipping this rest can result in a glaze that slides off the plate, leaving you with a dry slice.
The Butter‑Brush Secret
Before adding the final caramel drizzle, lightly brush the cake’s surface with melted butter. This creates a shiny, slightly crisp crust that contrasts beautifully with the soft interior. One of my friends tried this and swore the cake tasted “like a bakery’s secret.”
The Cool‑Down Flip
If you’re in a hurry, invert the cake onto a cooling rack while it’s still warm. The inverted position prevents the bottom from becoming soggy from steam, keeping the whole cake uniformly moist. Just be gentle—this cake is delicate, and a sudden jolt can cause cracks.
Creative Twists and Variations
This recipe is a playground. Here are some of my favorite ways to switch things up:
Salted Caramel Pretzel Crunch
Fold crushed pretzel pieces into the batter before baking, then sprinkle flaky sea salt on the caramel glaze. The salty crunch adds a surprising textural contrast that’s perfect for snack‑lovers.
Espresso‑Infused Dream
Dissolve a tablespoon of instant espresso in the milk mixture; the coffee notes deepen the caramel’s richness, creating a dessert that feels like a coffeehouse treat.
Berry‑Burst Surprise
Swirl in a handful of fresh raspberries or blueberries just before baking. The fruit releases juices that mingle with the caramel, offering bursts of tartness that cut through the sweetness.
Nutty Delight
Add toasted almond slivers to the batter and garnish the top with a caramel‑glazed almond slice. The nutty aroma elevates the cake to a sophisticated level.
Coconut Coconut
Replace half of the regular milk with coconut milk and sprinkle toasted coconut flakes on the glaze. The tropical twist adds a subtle, fragrant layer that pairs beautifully with caramel.
Storing and Bringing It Back to Life
Fridge Storage
Wrap the cooled cake tightly in plastic wrap, then store it in an airtight container. It will stay fresh for up to five days, and the caramel glaze actually becomes more set, giving a pleasant chew.
Freezer Friendly
Slice the cake into individual portions, wrap each slice in parchment, then place them in a freezer‑safe bag. Freeze for up to three months. When ready to serve, let the slice thaw at room temperature for 30 minutes, then re‑warm gently in a 300°F oven for 5‑7 minutes.
Best Reheating Method
Add a tiny splash of milk or water to the slice before microwaving for 20‑30 seconds; the added moisture creates steam that revives the crumb and restores that melt‑in‑your‑mouth texture.